Embed Size (px)
Citation preview

Debian维护者指南
青木修
March 26, 2019
Debian维护者指南by 青木修
版权 © 2014-2017 Osamu Aoki版权 © 2017-2019杨博远版权 © 2018 Fonzie Huang
Permission is hereby granted, free of charge, to any person obtaining a copy of this software and associateddocumentation files (the ”Software”), to deal in the Software without restriction, including without limitation therights to use, copy, modify, merge, publish, distribute, sublicense, and/or sell copies of the Software, and to permitpersons to whom the Software is furnished to do so, subject to the following conditions:
The above copyright notice and this permission notice shall be included in all copies or substantial portions of theSoftware.
THE SOFTWARE IS PROVIDED ”AS IS”, WITHOUT WARRANTY OF ANY KIND, EXPRESS OR IM-PLIED, INCLUDING BUT NOT LIMITED TO THE WARRANTIES OF MERCHANTABILITY, FITNESSFOR A PARTICULAR PURPOSE AND NONINFRINGEMENT. IN NO EVENT SHALL THE AUTHORS ORCOPYRIGHT HOLDERS BE LIABLE FOR ANY CLAIM, DAMAGES OR OTHER LIABILITY, WHETHERIN AN ACTION OF CONTRACT, TORT OR OTHERWISE, ARISING FROM, OUT OF OR IN CONNECTIONWITH THE SOFTWARE OR THE USE OR OTHER DEALINGS IN THE SOFTWARE.
本指南在撰写过程中参考了以下几篇文档:
•“Making a Debian Package (AKA the Debmake Manual)”,版权所有 © 1997 Jaldhar Vyas.
•“The New-Maintainer’s Debian Packaging Howto”,版权所有 © 1997 Will Lowe.
•“Debian New Maintainers’Guide”,版权所有 © 1998-2002 Josip Rodin, 2005-2017 Osamu Aoki, 2010Craig Small以及 2010 Raphaël Hertzog。
本指南的最新版本应当可以在下列位置找到:
• 在 debmake-doc软件包中,以及
• 位于 Debian文档网站。
i
Contents
1 概览 1
2 预备知识 32.1 Debian社区的工作者 . . . . . . . . . . . . . . . . . . . . . . . . . . . . . . . . . . . . . . . . 32.2 如何做出贡献 . . . . . . . . . . . . . . . . . . . . . . . . . . . . . . . . . . . . . . . . . . . . 32.3 Debian的社会驱动力 . . . . . . . . . . . . . . . . . . . . . . . . . . . . . . . . . . . . . . . . 42.4 技术提醒 . . . . . . . . . . . . . . . . . . . . . . . . . . . . . . . . . . . . . . . . . . . . . . . 42.5 Debian文档 . . . . . . . . . . . . . . . . . . . . . . . . . . . . . . . . . . . . . . . . . . . . . . 52.6 帮助资源 . . . . . . . . . . . . . . . . . . . . . . . . . . . . . . . . . . . . . . . . . . . . . . . 52.7 仓库状况 . . . . . . . . . . . . . . . . . . . . . . . . . . . . . . . . . . . . . . . . . . . . . . . 62.8 贡献流程 . . . . . . . . . . . . . . . . . . . . . . . . . . . . . . . . . . . . . . . . . . . . . . . 62.9 新手贡献者和维护者 . . . . . . . . . . . . . . . . . . . . . . . . . . . . . . . . . . . . . . . . 8
3 工具的配置 93.1 电子邮件地址 . . . . . . . . . . . . . . . . . . . . . . . . . . . . . . . . . . . . . . . . . . . . 93.2 mc . . . . . . . . . . . . . . . . . . . . . . . . . . . . . . . . . . . . . . . . . . . . . . . . . . . 93.3 git . . . . . . . . . . . . . . . . . . . . . . . . . . . . . . . . . . . . . . . . . . . . . . . . . . . 103.4 quilt . . . . . . . . . . . . . . . . . . . . . . . . . . . . . . . . . . . . . . . . . . . . . . . . . . 103.5 devscripts . . . . . . . . . . . . . . . . . . . . . . . . . . . . . . . . . . . . . . . . . . . . . . . 113.6 pbuilder . . . . . . . . . . . . . . . . . . . . . . . . . . . . . . . . . . . . . . . . . . . . . . . . 113.7 git-buildpackage . . . . . . . . . . . . . . . . . . . . . . . . . . . . . . . . . . . . . . . . . . . 133.8 HTTP代理 . . . . . . . . . . . . . . . . . . . . . . . . . . . . . . . . . . . . . . . . . . . . . . 133.9 私有 Debian仓库 . . . . . . . . . . . . . . . . . . . . . . . . . . . . . . . . . . . . . . . . . . . 14
4 简单例子 154.1 大致流程 . . . . . . . . . . . . . . . . . . . . . . . . . . . . . . . . . . . . . . . . . . . . . . . 154.2 什么是 debmake? . . . . . . . . . . . . . . . . . . . . . . . . . . . . . . . . . . . . . . . . . . 164.3 什么是 debuild? . . . . . . . . . . . . . . . . . . . . . . . . . . . . . . . . . . . . . . . . . . . 164.4 第一步:获取上游源代码 . . . . . . . . . . . . . . . . . . . . . . . . . . . . . . . . . . . . . . 174.5 第二步:使用 debmake产生模板文件 . . . . . . . . . . . . . . . . . . . . . . . . . . . . . . . 184.6 第三步:编辑模板文件 . . . . . . . . . . . . . . . . . . . . . . . . . . . . . . . . . . . . . . . 224.7 第四步:使用 debuild构建软件包 . . . . . . . . . . . . . . . . . . . . . . . . . . . . . . . . . 244.8 第三步(备选):修改上游源代码 . . . . . . . . . . . . . . . . . . . . . . . . . . . . . . . . . 26
4.8.1 使用 diff -u处理补丁 . . . . . . . . . . . . . . . . . . . . . . . . . . . . . . . . . . . . 274.8.2 使用 dquilt处理补丁 . . . . . . . . . . . . . . . . . . . . . . . . . . . . . . . . . . . . 284.8.3 使用 dpkg-source --commit处理补丁 . . . . . . . . . . . . . . . . . . . . . . . . . . . . 29
5 基本内容 315.1 打包工作流 . . . . . . . . . . . . . . . . . . . . . . . . . . . . . . . . . . . . . . . . . . . . . . 31
5.1.1 debhelper软件包 . . . . . . . . . . . . . . . . . . . . . . . . . . . . . . . . . . . . . . 335.2 软件包名称和版本 . . . . . . . . . . . . . . . . . . . . . . . . . . . . . . . . . . . . . . . . . . 335.3 本土 Debian软件包 . . . . . . . . . . . . . . . . . . . . . . . . . . . . . . . . . . . . . . . . . 345.4 debian/rules . . . . . . . . . . . . . . . . . . . . . . . . . . . . . . . . . . . . . . . . . . . . . . 35
5.4.1 dh . . . . . . . . . . . . . . . . . . . . . . . . . . . . . . . . . . . . . . . . . . . . . . . 355.4.2 简单的 debian/rules . . . . . . . . . . . . . . . . . . . . . . . . . . . . . . . . . . . . . 365.4.3 自定义 debian/rules . . . . . . . . . . . . . . . . . . . . . . . . . . . . . . . . . . . . . 365.4.4 debian/rules中的变量 . . . . . . . . . . . . . . . . . . . . . . . . . . . . . . . . . . . . 375.4.5 可重现的构建 . . . . . . . . . . . . . . . . . . . . . . . . . . . . . . . . . . . . . . . . 37
5.5 debian/control . . . . . . . . . . . . . . . . . . . . . . . . . . . . . . . . . . . . . . . . . . . . . 385.5.1 Debian二进制软件包的拆分 . . . . . . . . . . . . . . . . . . . . . . . . . . . . . . . . 38
5.5.1.1 debmake -b . . . . . . . . . . . . . . . . . . . . . . . . . . . . . . . . . . . . 385.5.1.2 拆包的场景和例子 . . . . . . . . . . . . . . . . . . . . . . . . . . . . . . . . 395.5.1.3 库软件包名称 . . . . . . . . . . . . . . . . . . . . . . . . . . . . . . . . . . . 39
5.5.2 Substvar . . . . . . . . . . . . . . . . . . . . . . . . . . . . . . . . . . . . . . . . . . . 40
ii
CONTENTS
5.5.3 binNMU安全 . . . . . . . . . . . . . . . . . . . . . . . . . . . . . . . . . . . . . . . . 415.6 debian/changelog . . . . . . . . . . . . . . . . . . . . . . . . . . . . . . . . . . . . . . . . . . . 415.7 debian/copyright . . . . . . . . . . . . . . . . . . . . . . . . . . . . . . . . . . . . . . . . . . . 425.8 debian/patches/* . . . . . . . . . . . . . . . . . . . . . . . . . . . . . . . . . . . . . . . . . . . 43
5.8.1 dpkg-source -x . . . . . . . . . . . . . . . . . . . . . . . . . . . . . . . . . . . . . . . . 445.8.2 dquilt和 dpkg-source . . . . . . . . . . . . . . . . . . . . . . . . . . . . . . . . . . . . 44
5.9 debian/upstream/signing-key.asc . . . . . . . . . . . . . . . . . . . . . . . . . . . . . . . . . . . 445.10 debian/watch和 DFSG . . . . . . . . . . . . . . . . . . . . . . . . . . . . . . . . . . . . . . . . 455.11 其它 debian/*文件 . . . . . . . . . . . . . . . . . . . . . . . . . . . . . . . . . . . . . . . . . . 455.12 Debian打包的定制化 . . . . . . . . . . . . . . . . . . . . . . . . . . . . . . . . . . . . . . . . 495.13 在版本控制系统中进行记录(标准) . . . . . . . . . . . . . . . . . . . . . . . . . . . . . . . 505.14 在版本控制系统中进行记录(备选方案) . . . . . . . . . . . . . . . . . . . . . . . . . . . . 505.15 构建软件包时排除不必要的内容 . . . . . . . . . . . . . . . . . . . . . . . . . . . . . . . . . . 51
5.15.1 使用 debian/rules clean进行修复 . . . . . . . . . . . . . . . . . . . . . . . . . . . . . . 515.15.2 使用版本控制系统修复 . . . . . . . . . . . . . . . . . . . . . . . . . . . . . . . . . . . 525.15.3 使用 extend-diff-ignore修复 . . . . . . . . . . . . . . . . . . . . . . . . . . . . . . . . 525.15.4 使用 tar-ignore修复 . . . . . . . . . . . . . . . . . . . . . . . . . . . . . . . . . . . . . 52
5.16 上游构建系统 . . . . . . . . . . . . . . . . . . . . . . . . . . . . . . . . . . . . . . . . . . . . 535.16.1 Autotools . . . . . . . . . . . . . . . . . . . . . . . . . . . . . . . . . . . . . . . . . . . 535.16.2 CMake . . . . . . . . . . . . . . . . . . . . . . . . . . . . . . . . . . . . . . . . . . . . 535.16.3 Python distutils . . . . . . . . . . . . . . . . . . . . . . . . . . . . . . . . . . . . . . . . 54
5.17 调试信息 . . . . . . . . . . . . . . . . . . . . . . . . . . . . . . . . . . . . . . . . . . . . . . . 545.17.1 新的 -dbgsym软件包(Stretch 9.0或更新) . . . . . . . . . . . . . . . . . . . . . . . 55
5.18 库软件包 . . . . . . . . . . . . . . . . . . . . . . . . . . . . . . . . . . . . . . . . . . . . . . . 555.18.1 库符号 . . . . . . . . . . . . . . . . . . . . . . . . . . . . . . . . . . . . . . . . . . . . 565.18.2 库变迁 . . . . . . . . . . . . . . . . . . . . . . . . . . . . . . . . . . . . . . . . . . . . 57
5.19 debconf . . . . . . . . . . . . . . . . . . . . . . . . . . . . . . . . . . . . . . . . . . . . . . . . 575.20 多体系结构 . . . . . . . . . . . . . . . . . . . . . . . . . . . . . . . . . . . . . . . . . . . . . . 57
5.20.1 多架构库路径 . . . . . . . . . . . . . . . . . . . . . . . . . . . . . . . . . . . . . . . . 585.20.2 多架构头文件路径 . . . . . . . . . . . . . . . . . . . . . . . . . . . . . . . . . . . . . 595.20.3 多架构支持下的 *.pc文件路径 . . . . . . . . . . . . . . . . . . . . . . . . . . . . . . 59
5.21 编译加固 . . . . . . . . . . . . . . . . . . . . . . . . . . . . . . . . . . . . . . . . . . . . . . . 595.22 持续集成 . . . . . . . . . . . . . . . . . . . . . . . . . . . . . . . . . . . . . . . . . . . . . . . 595.23 自举 . . . . . . . . . . . . . . . . . . . . . . . . . . . . . . . . . . . . . . . . . . . . . . . . . . 605.24 错误报告 . . . . . . . . . . . . . . . . . . . . . . . . . . . . . . . . . . . . . . . . . . . . . . . 60
6 debmake选项 616.1 快捷选项(-a,-i) . . . . . . . . . . . . . . . . . . . . . . . . . . . . . . . . . . . . . . . . . 61
6.1.1 Python模块 . . . . . . . . . . . . . . . . . . . . . . . . . . . . . . . . . . . . . . . . . 616.2 上游快照(-d,-t) . . . . . . . . . . . . . . . . . . . . . . . . . . . . . . . . . . . . . . . . . 626.3 debmake -cc . . . . . . . . . . . . . . . . . . . . . . . . . . . . . . . . . . . . . . . . . . . . . . 626.4 debmake -k . . . . . . . . . . . . . . . . . . . . . . . . . . . . . . . . . . . . . . . . . . . . . . 626.5 debmake -j . . . . . . . . . . . . . . . . . . . . . . . . . . . . . . . . . . . . . . . . . . . . . . 636.6 debmake -x . . . . . . . . . . . . . . . . . . . . . . . . . . . . . . . . . . . . . . . . . . . . . . 646.7 debmake -P . . . . . . . . . . . . . . . . . . . . . . . . . . . . . . . . . . . . . . . . . . . . . . 646.8 debmake -T . . . . . . . . . . . . . . . . . . . . . . . . . . . . . . . . . . . . . . . . . . . . . . 64
7 提示 657.1 debdiff . . . . . . . . . . . . . . . . . . . . . . . . . . . . . . . . . . . . . . . . . . . . . . . . . 657.2 dget . . . . . . . . . . . . . . . . . . . . . . . . . . . . . . . . . . . . . . . . . . . . . . . . . . 657.3 debc . . . . . . . . . . . . . . . . . . . . . . . . . . . . . . . . . . . . . . . . . . . . . . . . . . 657.4 piuparts . . . . . . . . . . . . . . . . . . . . . . . . . . . . . . . . . . . . . . . . . . . . . . . . 657.5 debsign . . . . . . . . . . . . . . . . . . . . . . . . . . . . . . . . . . . . . . . . . . . . . . . . 667.6 dput . . . . . . . . . . . . . . . . . . . . . . . . . . . . . . . . . . . . . . . . . . . . . . . . . . 667.7 bts . . . . . . . . . . . . . . . . . . . . . . . . . . . . . . . . . . . . . . . . . . . . . . . . . . . 667.8 git-buildpackage . . . . . . . . . . . . . . . . . . . . . . . . . . . . . . . . . . . . . . . . . . . 66
7.8.1 gbp import-dscs --debsnap . . . . . . . . . . . . . . . . . . . . . . . . . . . . . . . . . . 677.9 上游 git仓库 . . . . . . . . . . . . . . . . . . . . . . . . . . . . . . . . . . . . . . . . . . . . . 677.10 chroot . . . . . . . . . . . . . . . . . . . . . . . . . . . . . . . . . . . . . . . . . . . . . . . . . 68
iii
CONTENTS
7.11 新的 Debian版本 . . . . . . . . . . . . . . . . . . . . . . . . . . . . . . . . . . . . . . . . . . . 697.12 新上游版本 . . . . . . . . . . . . . . . . . . . . . . . . . . . . . . . . . . . . . . . . . . . . . . 70
7.12.1 uupdate + tarball . . . . . . . . . . . . . . . . . . . . . . . . . . . . . . . . . . . . . . . 707.12.2 uscan . . . . . . . . . . . . . . . . . . . . . . . . . . . . . . . . . . . . . . . . . . . . . 717.12.3 gbp . . . . . . . . . . . . . . . . . . . . . . . . . . . . . . . . . . . . . . . . . . . . . . 717.12.4 gbp + uscan . . . . . . . . . . . . . . . . . . . . . . . . . . . . . . . . . . . . . . . . . . 71
7.13 3.0源代码格式 . . . . . . . . . . . . . . . . . . . . . . . . . . . . . . . . . . . . . . . . . . . . 727.14 CDBS . . . . . . . . . . . . . . . . . . . . . . . . . . . . . . . . . . . . . . . . . . . . . . . . . 727.15 在 UTF-8环境下构建 . . . . . . . . . . . . . . . . . . . . . . . . . . . . . . . . . . . . . . . . 737.16 UTF-8转换 . . . . . . . . . . . . . . . . . . . . . . . . . . . . . . . . . . . . . . . . . . . . . . 737.17 上传 orig.tar.gz . . . . . . . . . . . . . . . . . . . . . . . . . . . . . . . . . . . . . . . . . . . . 737.18 跳过的上传 . . . . . . . . . . . . . . . . . . . . . . . . . . . . . . . . . . . . . . . . . . . . . . 747.19 高级打包 . . . . . . . . . . . . . . . . . . . . . . . . . . . . . . . . . . . . . . . . . . . . . . . 747.20 其他发行版 . . . . . . . . . . . . . . . . . . . . . . . . . . . . . . . . . . . . . . . . . . . . . . 757.21 除错 . . . . . . . . . . . . . . . . . . . . . . . . . . . . . . . . . . . . . . . . . . . . . . . . . . 75
8 更多示例 778.1 挑选最好的模板 . . . . . . . . . . . . . . . . . . . . . . . . . . . . . . . . . . . . . . . . . . . 778.2 无Makefile(shell,命令行界面) . . . . . . . . . . . . . . . . . . . . . . . . . . . . . . . . . 798.3 Makefile(shell,命令行界面) . . . . . . . . . . . . . . . . . . . . . . . . . . . . . . . . . . 848.4 setup.py(Python3,命令行界面) . . . . . . . . . . . . . . . . . . . . . . . . . . . . . . . . . 868.5 Makefile(shell,图形界面) . . . . . . . . . . . . . . . . . . . . . . . . . . . . . . . . . . . . 908.6 setup.py(Python3,图形界面) . . . . . . . . . . . . . . . . . . . . . . . . . . . . . . . . . . 938.7 Makefile(单个二进制软件包) . . . . . . . . . . . . . . . . . . . . . . . . . . . . . . . . . . 968.8 Makefile.in + configure(单个二进制软件包) . . . . . . . . . . . . . . . . . . . . . . . . . . 988.9 Autotools(单个二进制文件) . . . . . . . . . . . . . . . . . . . . . . . . . . . . . . . . . . . 1018.10 CMake(单个二进制软件包) . . . . . . . . . . . . . . . . . . . . . . . . . . . . . . . . . . . 1048.11 Autotools(多个二进制软件包) . . . . . . . . . . . . . . . . . . . . . . . . . . . . . . . . . . 1088.12 CMake(多个二进制软件包) . . . . . . . . . . . . . . . . . . . . . . . . . . . . . . . . . . . 1138.13 国际化 . . . . . . . . . . . . . . . . . . . . . . . . . . . . . . . . . . . . . . . . . . . . . . . . 1188.14 细节 . . . . . . . . . . . . . . . . . . . . . . . . . . . . . . . . . . . . . . . . . . . . . . . . . . 123
A debmake(1)手册页 125A.1 名称 . . . . . . . . . . . . . . . . . . . . . . . . . . . . . . . . . . . . . . . . . . . . . . . . . . 125A.2 概述 . . . . . . . . . . . . . . . . . . . . . . . . . . . . . . . . . . . . . . . . . . . . . . . . . . 125A.3 描述 . . . . . . . . . . . . . . . . . . . . . . . . . . . . . . . . . . . . . . . . . . . . . . . . . . 125
A.3.1 可选参数: . . . . . . . . . . . . . . . . . . . . . . . . . . . . . . . . . . . . . . . . . 125A.4 示例 . . . . . . . . . . . . . . . . . . . . . . . . . . . . . . . . . . . . . . . . . . . . . . . . . . 128A.5 帮助软件包 . . . . . . . . . . . . . . . . . . . . . . . . . . . . . . . . . . . . . . . . . . . . . . 128A.6 注意事项 . . . . . . . . . . . . . . . . . . . . . . . . . . . . . . . . . . . . . . . . . . . . . . . 128A.7 除错 . . . . . . . . . . . . . . . . . . . . . . . . . . . . . . . . . . . . . . . . . . . . . . . . . . 129A.8 作者 . . . . . . . . . . . . . . . . . . . . . . . . . . . . . . . . . . . . . . . . . . . . . . . . . . 129A.9 许可证 . . . . . . . . . . . . . . . . . . . . . . . . . . . . . . . . . . . . . . . . . . . . . . . . 129A.10 参见 . . . . . . . . . . . . . . . . . . . . . . . . . . . . . . . . . . . . . . . . . . . . . . . . . . 129
iv
Abstract本篇《Debian维护者指南》(2019-03-26)教程文档面向普通 Debian用户和未来的开发者,描述了使
用 debmake命令构建 Debian软件包的方法。本指南注重描述现代的打包风格,同时提供了许多简单的示例。
• POSIX shell脚本打包
• Python3脚本打包
• C和Makefile/Autotools/CMake
• 含有共享库的多个二进制软件包的打包,等等。
本篇《Debian维护者指南》可看作《Debian新维护者手册》的继承文档。

前言
如果您在某些方面算得上是有经验的 Debian用户 1 的话,您可能遇上过这样的情况:
• 您想要安装某一个软件包,但是该软件在 Debian仓库中尚不存在。
• 您想要将一个 Debian软件包更新为上游的新版本。
• 您想要添加某些补丁来修复某个 Debian软件包中的缺陷。
如果您想要创建一个 Debian软件包来满足您的需求,并将您的工作与社区分享,您便是本篇指南的目标读者,即未来的 Debian维护者。2 欢迎来到 Debian社区。
Debian是一个大型的、历史悠久的志愿者组织。因此,它具有许多需要遵守的社会上和技术上的规则和惯例。Debian也开发出了一长串的打包工具和仓库维护工具,用来构建一套能够解决各种技术目标的二进制软件包:
• 跨多个架构构建的软件包(第 5.4.4 节)
• 可重现的构建(第 5.4.5 节)
• 在明确指定软件包依赖和补丁情况下干净地构建(第 5.5 节,第 5.8 节,第 7.10 节)
• 拆分多个二进制软件包的最佳实践(第 5.5.1 节)
• 平滑的程序库迁移(第 5.18.2 节)
• 交互式安装定制(第 5.19 节)
• 多架构(multiarch)支持(第 5.20 节)
• 使用特定的编译选项进行安全增强(第 5.21 节)
• 持续集成(第 5.22 节)
• 自举(第 5.23 节)
• ……
这些目标也许会让很多新近参与进 Debian工作中的潜在 Debian维护者感到迷茫而不知所措。本篇指南尝试为这些目标提供一个着手点,方便读者开展工作。它具体描述了以下内容:
• 作为未来潜在的维护者,您在参与 Debian工作之前应该了解的东西。
• 制作一个简单的 Debian软件包大概流程如何。
• 制作 Debian软件包时有哪些规则。
• 制作 Debian软件包的小窍门。
• 在某些典型场景下制作 Debian软件包的示例。1您的确需要对 Unix编程有所了解,但显然没必要是这方面的天才。在 Debian参考手册中,您可以了解到使用 Debian系统的
一些基本方法和关于 Unix编程的一些指引。2如果您对分享 Debian软件包不感兴趣,您当然可以在本地环境中将上游的源码包进行编译并安装至 /usr/local来解决问题。
vi
前言
作者在更新原有的使用 dh-make软件包的“新维护者手册”时感受到了文档的局限性。因此,作者决定创建一个替代工具并编写其对应的文档以解决某些现代的需求。其成果便是 debmake(当前版本:4.3.1))软件包,以及这篇更新的“Debian维护者指南”,可从 debmake-doc(当前版本:1.14-1)软件包获取。许多杂项事务和小提示都集成进了 debmake命令,以使本指南内容简单易懂。本指南同时提供了许
多打包示例。
小心
合适地创建并维护 Debian 软件包需要占用许多时间。Debian 维护者在接受这项挑战时一定要确保 既能精通技术又能勤勉投入精力。
某些重要的主题会详细进行说明。其中某些可能看起来和您没什么关系。请保持耐心。某些边角案例会被跳过。某些主题仅使用外部链接提及。这些都是有意的行文安排,目标是让这份指南保持简单而可维护。
vii
Chapter 1
概览
对 package-1.0.tar.gz,一个包含了简单的、符合 GNU编码标准和 FHS(文件系统层级规范)的 C语言源代码的程序来说,它在 Debian下打包工作可以按照下列流程,使用 debmake命令进行。
$ tar -xvzf package-1.0.tar.gz$ cd package-1.0$ debmake... Make manual adjustments of generated configuration files
$ debuild
如果跳过了对生成的配置文件的手工调整流程,则最终生成的二进制软件包将缺少有意义的软件包描述信息,但是仍然能为 dpkg命令所使用,在本地部署环境下正常工作。
小心
这里的 debmake 命令只提供一些不错的模板文件。如果生成的软件包需要发布出去供公众使用的话,这些模板文件必须手工调整至最佳状态以遵从 Debian 仓库的严格质量标准。
如果您在 Debian打包方面还是个新手的话,此时不要过多在意细节问题,请先确立一个大致流程的印象。如果您曾经接触过 Debian打包工作,您会注意到这和 dh_make命令很像。这是因为 debmake命令设
计时便旨在替代历史上由 dh_make命令所提供的功能。1
debmake命令设计提供如下特性与功能:
• 现代的打包风格
– debian/copyright:符合 DEP-5– debian/control:substvar支持、multiarch支持、多个二进制软件包、……– debian/rules:dh语法、编译器加固选项、……
• 灵活性
– 许多选项(第 5.5.1.1 节、第 6 章、附录 A)
• 合理的默认行为
– 执行过程不中断,输出干净的结果– 生成多架构支持(multiarch)的软件包,除非明确指定了 -m选项。– 生成非本土 Debian软件包,使用“3.0 (quilt)”格式,除非明确指定了 -n选项。
• 额外的功能1历史上还存在过 deb-make命令,它在 dh_make之前曾经流行过。当前的 debmake软件包的版本从 4.0起始,其目的便是避
免和废弃的 debmake软件包的版本产生重叠。旧有的对应软件包提供了 deb-make命令。
1
CHAPTER 1. 概览
– 根据当前源代码对 debian/copyright文件进行验证(第 6.4 节)
debmake命令将大多数重量级工作分派给了其后端软件包:debhelper、dpkg-dev、devscripts、pbuilder,等等。
提示
请确保将 -b、-f、-l 和 -w 选项的参数使用引号合适地保护起来,以避免 shell 环境的干扰。
提示
非本土软件包是标准的 Debian 软件包。
提示
本文档中所有软件包构建示例的详细日志可以由第 8.14 节一段给出的操作来获取。
注意
所产生的 debian/copyright 文件,以及 -c(第 6.3 节)和 -k(第 6.4 节)选项的输出都涉及了对版权和授权信息的启发式操作。它们具有局限性,可能会输出某些错误的结果。
2
Chapter 2
预备知识
这里给出您在投入 Debian相关工作之前应当理解掌握的一些必备的预备知识。
2.1 Debian社区的工作者在 Debian社区中有这几类常见的角色:
• 上游作者(upstream author):程序的原始作者。
• 上游维护者(upstream maintainer):目前在上游维护程序代码的人。
• 软件包维护者(maintainer):制作并维护该程序 Debian软件包的人。
• 赞助者(sponsor):帮助维护者上传软件包到 Debian官方仓库的人(在通过内容检查之后)。
• 导师(mentor):帮助新手维护者熟悉和深入打包的人。
• Debian开发者(DD, Debian Developer):Debian社区的官方成员。DD拥有向 Debian官方仓库上传的全部权限。
• Debian维护者(Debian Maintainer, DM):拥有对 Debian官方仓库部分上传权限的人。
注意,您不可能在一夜之间成为 Debian开发者(DD),因为成为 DD所需要的远不只是技术技巧。不过别因此而气馁,如果您的软件包对其他人有用,您可以当这个软件的软件包维护者,然后通过一位赞助者来上传这份软件,或者您可以申请成为 Debian维护者。还有,要成为 Debian开发者不一定要创建新软件包。对已有软件做出贡献也是成为 Debian开发者的
理想途径。眼下正有很多软件包等着好的维护者来接手(参见第 2.8 节)。
2.2 如何做出贡献
请参考下列文档来了解应当如何为 Debian作出贡献:
• 您如何协助 Debian?(官方)
• The Debian GNU/Linux FAQ,第 12章 -“为 Debian项目捐赠”(半官方)
• Debian Wiki, HelpDebian(补充内容)
• Debian新成员站点(官方)
• Debian Mentors FAQ(补充内容)
3
CHAPTER 2. 预备知识 2.3. DEBIAN的社会驱动力
2.3 Debian的社会驱动力为做好准备和 Debian进行交互,请理解 Debian的社会动力学:
• 我们都是志愿者。
– 任何人都不能把事情强加给他人。– 您应该主动地做自己想做的事情。
• 友好的合作是我们前行的动力。
– 您的贡献不应致使他人增加负担。– 只有当别人欣赏和感激您的贡献时,它才有真正的价值。
• Debian并不是一所学校,在这里没有所谓的老师会自动地注意到您。
– 您需要有自学大量知识和技能的能力。– 其他志愿者的关注是非常稀缺的资源。
• Debian一直在不断进步。
– Debian期望您制作出高质量的软件包。– 您应该随时调整自己来适应变化。
在这篇指南之后的部分中,我们只关注打包的技术方面。因此,请参考下面的文档来理解 Debian的社会动力学:
• Debian: 17年的自由软件、“实干主义”、和民主(前任 DPL制作的介绍性幻灯片)
2.4 技术提醒
这里给出一些技术上的建议,参考行事可以让您与其他维护者共同维护软件包时变得更加轻松有效,从而让 Debian项目的输出成果最大化。
• 让您的软件包容易除错(debug)。
– 保持您的软件包简单易懂。– 不要对软件包过度设计。
• 让您的软件包拥有良好的文档记录。
– 使用可读的代码风格。– 在代码中写注释。– 格式化代码使其风格一致。– 维护软件包的 git仓库 1。
注意
对软件进行除错(debug)通常会比编写初始可用的软件花费更多的时间。
1绝大多数 Debian维护者使用 git而非其它版本控制系统,如 hg、bzr等等。
4

CHAPTER 2. 预备知识 2.5. DEBIAN文档
2.5 Debian文档请在阅读本指南的同时按需阅览下面这些 Debian官方文档中的相关部分;这些文档提供的信息有助于创建质量优良的 Debian软件包:
•《Debian政策手册》
–“必须遵循”的规则(https://www.debian.org/doc/devel-manuals#policy)
•“Debian开发者参考”
–“最佳实践”文档(https://www.debian.org/doc/devel-manuals#devref)
如果本指南文档的内容与官方的 Debian文档有所冲突,那么官方的那些总是对的。请使用 reportbug工具向 debmake-doc软件包报告问题。这里有一些替代性的教程文档,您可以与本指南一起阅读进行参考:
•“Debian新维护者手册”(较旧)
– https://www.debian.org/doc/devel-manuals#maint-guide– https://packages.qa.debian.org/m/maint-guide.html
•“Debian打包教程”
– https://www.debian.org/doc/devel-manuals#packaging-tutorial– https://packages.qa.debian.org/p/packaging-tutorial.html
•“Ubuntu打包指南”(Ubuntu基于 Debian。)
– http://packaging.ubuntu.com/html/
提示
阅读这些教程时,您应当考虑使用 debmake 命令替代 dh_make 命令以获得更好的模板文件。
2.6 帮助资源
在您决定在某些公共场合问出您的问题之前,请先做好自己能做到的事情,例如,阅读能找到的文档:
• 软件包的信息可以使用 aptitude、apt-cache以及 dpkg命令进行查看。
• 所有相关软件包在 /usr/share/doc/软件包名目录下的文件。
• 所有相关命令在 man命令下输出的内容。
• 所有相关命令在 info命令下输出的内容。
• [email protected]邮件列表存档的内容。
• [email protected]邮件列表存档的内容。
要获取您所需要的信息,一种有效的方法是在网页搜索引擎中构建类似“关键字 site:lists.debian.org”这样具有限制条件的搜索字符串来限定搜索的域名。制作一个小型测试用软件包也是了解打包细节的一个好办法。对当前已有的维护良好的软件包进行检
查则是了解其他人如何制作软件包的最好方法。如果您对打包仍然存在疑问,您可以使用以下方式与他人进行沟通:
• [email protected]邮件列表。(这个邮件列表为专为新手答疑解惑。)
5
CHAPTER 2. 预备知识 2.7. 仓库状况
• [email protected]邮件列表。(这个邮件列表针对熟练用户和高级开发者。)
• IRC(互联网中继聊天)例如 #debian-mentors。
• 专注某个特定软件包集合的团队。(完整列表请见 https://wiki.debian.org/Teams)
• 特定语言的邮件列表。
– debian-devel-{french,italian,portuguese,spanish}@lists.debian.org– [email protected](该邮件列表用于一般的(简体)中文讨论。)– [email protected]
如果您在做好功课后能在这些场合中合适地提出您的疑问的话,那些更有经验的 Debian开发者会很愿意帮助您。
小心
Debian 的开发是一个不断变动的目标。您在网上找到的某些信息可能是过时的、不正确的或者不适用的,使用时请留意。
2.7 仓库状况
请了解 Debian仓库的当前状况。
• Debian已经包含了绝大多数种类程序的软件包。
• Debian仓库内软件包的数量是活跃维护者的数十倍。
• 遗憾的是,某些软件包缺乏维护者的足够关注。
因此,对已经存在于仓库内的软件包做出贡献是十分欢迎的(这也更有可能得到其他维护者的支持和协助上传)。
提示
来自 devscripts 软件包的 wnpp-alert 命令可以检查已安装软件中需要接手或已被丢弃的软件包。
2.8 贡献流程
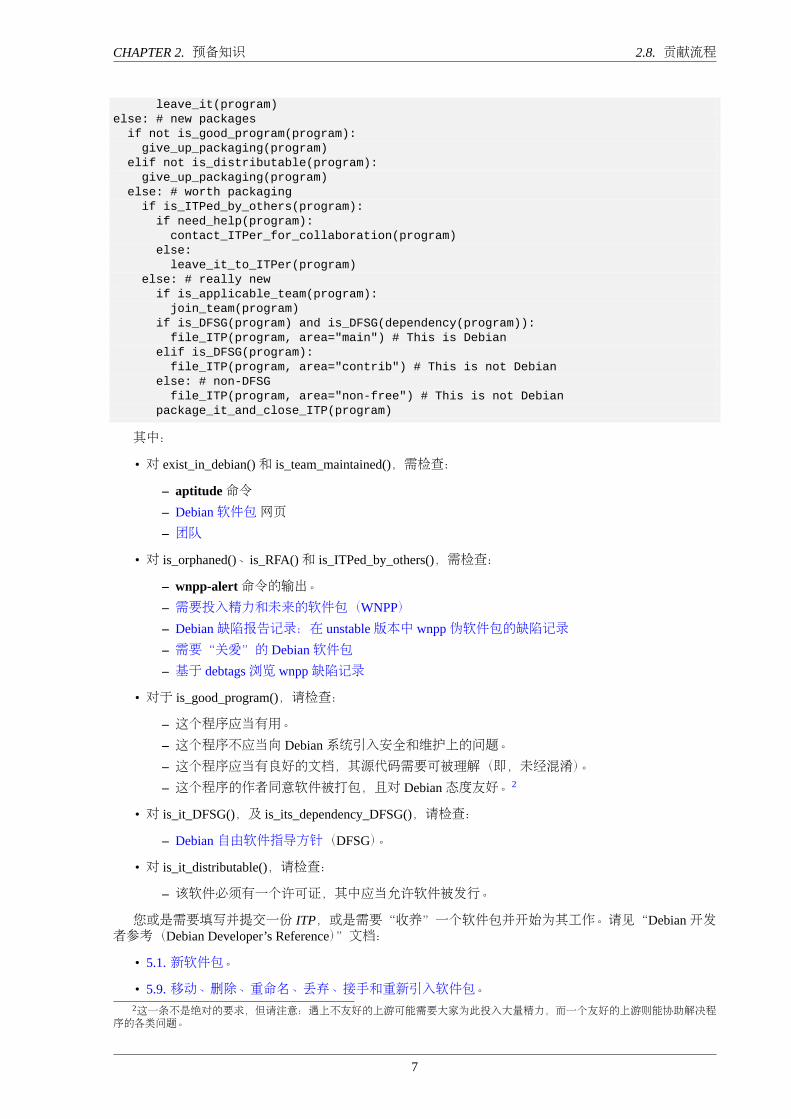
这里使用类 Python伪代码,给出了向 Debian贡献名为 program的软件所走的贡献流程:
if exist_in_debian(program):if is_team_maintained(program):join_team(program)
if is_orphaned(program) # maintainer: Debian QA Groupadopt_it(program)
elif is_RFA(program) # Request for Adoptionadopt_it(program)
else:if need_help(program):
contact_maintainer(program)triaging_bugs(program)preparing_QA_or_NMU_uploads(program)
else:
6
CHAPTER 2. 预备知识 2.8. 贡献流程
leave_it(program)else: # new packagesif not is_good_program(program):give_up_packaging(program)
elif not is_distributable(program):give_up_packaging(program)
else: # worth packagingif is_ITPed_by_others(program):
if need_help(program):contact_ITPer_for_collaboration(program)
else:leave_it_to_ITPer(program)
else: # really newif is_applicable_team(program):
join_team(program)if is_DFSG(program) and is_DFSG(dependency(program)):
file_ITP(program, area="main") # This is Debianelif is_DFSG(program):
file_ITP(program, area="contrib") # This is not Debianelse: # non-DFSG
file_ITP(program, area="non-free") # This is not Debianpackage_it_and_close_ITP(program)
其中:
• 对 exist_in_debian()和 is_team_maintained(),需检查:
– aptitude命令– Debian软件包网页– 团队
• 对 is_orphaned()、is_RFA()和 is_ITPed_by_others(),需检查:
– wnpp-alert命令的输出。– 需要投入精力和未来的软件包(WNPP)– Debian缺陷报告记录:在 unstable版本中 wnpp伪软件包的缺陷记录– 需要“关爱”的 Debian软件包– 基于 debtags浏览 wnpp缺陷记录
• 对于 is_good_program(),请检查:
– 这个程序应当有用。– 这个程序不应当向 Debian系统引入安全和维护上的问题。– 这个程序应当有良好的文档,其源代码需要可被理解(即,未经混淆)。– 这个程序的作者同意软件被打包,且对 Debian态度友好。2
• 对 is_it_DFSG(),及 is_its_dependency_DFSG(),请检查:
– Debian自由软件指导方针(DFSG)。
• 对 is_it_distributable(),请检查:
– 该软件必须有一个许可证,其中应当允许软件被发行。
您或是需要填写并提交一份 ITP,或是需要“收养”一个软件包并开始为其工作。请见“Debian开发者参考(Debian Developer’s Reference)”文档:
• 5.1. 新软件包。
• 5.9. 移动、删除、重命名、丢弃、接手和重新引入软件包。2这一条不是绝对的要求,但请注意:遇上不友好的上游可能需要大家为此投入大量精力,而一个友好的上游则能协助解决程
序的各类问题。
7
CHAPTER 2. 预备知识 2.9. 新手贡献者和维护者
2.9 新手贡献者和维护者
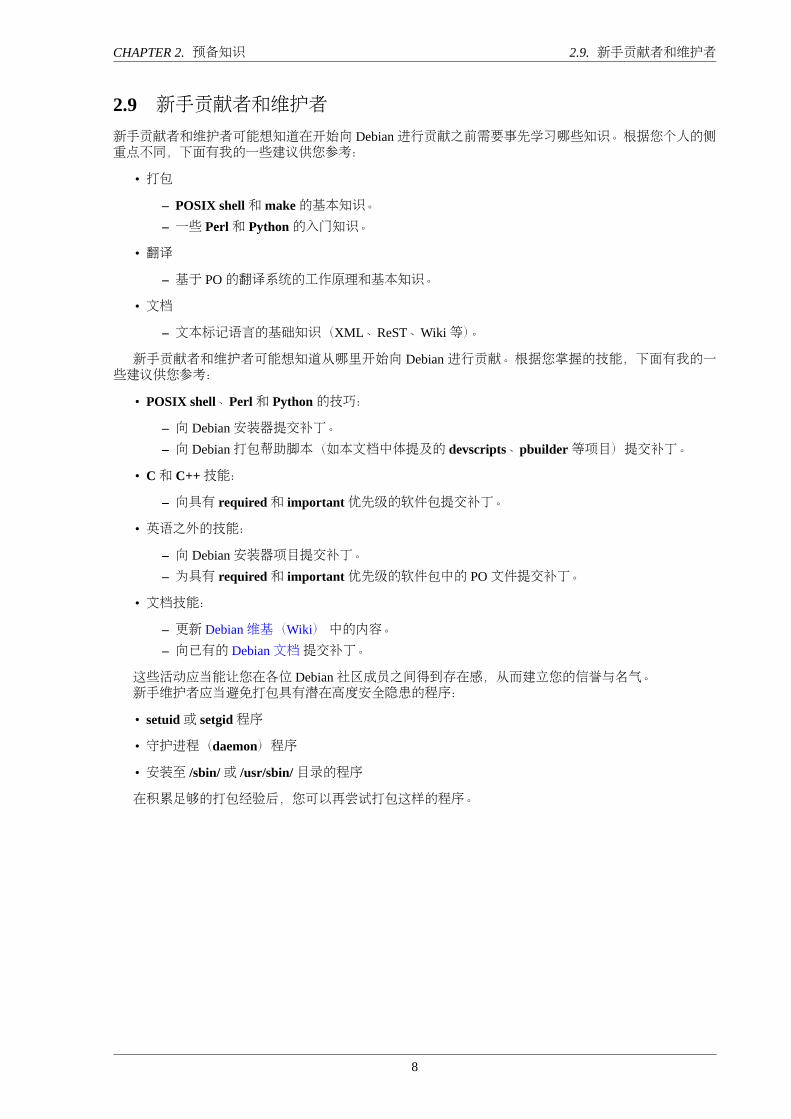
新手贡献者和维护者可能想知道在开始向 Debian进行贡献之前需要事先学习哪些知识。根据您个人的侧重点不同,下面有我的一些建议供您参考:
• 打包
– POSIX shell和 make的基本知识。– 一些 Perl和 Python的入门知识。
• 翻译
– 基于 PO的翻译系统的工作原理和基本知识。
• 文档
– 文本标记语言的基础知识(XML、ReST、Wiki等)。
新手贡献者和维护者可能想知道从哪里开始向 Debian进行贡献。根据您掌握的技能,下面有我的一些建议供您参考:
• POSIX shell、Perl和 Python的技巧:
– 向 Debian安装器提交补丁。– 向 Debian打包帮助脚本(如本文档中体提及的 devscripts、pbuilder等项目)提交补丁。
• C和 C++技能:
– 向具有 required和 important优先级的软件包提交补丁。
• 英语之外的技能:
– 向 Debian安装器项目提交补丁。– 为具有 required和 important优先级的软件包中的 PO文件提交补丁。
• 文档技能:
– 更新 Debian维基(Wiki)中的内容。– 向已有的 Debian文档提交补丁。
这些活动应当能让您在各位 Debian社区成员之间得到存在感,从而建立您的信誉与名气。新手维护者应当避免打包具有潜在高度安全隐患的程序:
• setuid或 setgid程序
• 守护进程(daemon)程序
• 安装至 /sbin/或 /usr/sbin/目录的程序
在积累足够的打包经验后,您可以再尝试打包这样的程序。
8
Chapter 3
工具的配置
build-essential软件包必须在构建环境内预先安装。devscripts软件包应当安装在维护者的工作环境中。尽管这个不是绝对的要求,但是在维护者的工作环境内装上并配置好本章节提到的各个常用的软件包
会有助于维护者高效投入工作。这些软件可以构成我们共同确立的一个基准工作环境。如有需要,请同样按需安装在“Debian开发者参考”文中 Debian维护者工具概览一节提到的各个工
具。
小心
这里展示的工具配置方式仅作为示例提供,可能与系统上最新的软件包相比有所落后。Debian 的开发具有一个移动的目标。请确保阅读合适的文档并按照需要更新配置内容。
3.1 电子邮件地址
许多 Debian维护工具识别并使用 shell环境变量 $DEBEMAIL和 $DEBFULLNAME作为作为您的电子邮件地址和名称。我们可以通过将下面几行加入 ~/.bashrc1 的方式对这些软件进行配置。添加至 ~/.bashrc文件
DEBEMAIL="[email protected]"DEBFULLNAME="Firstname Lastname"export DEBEMAIL DEBFULLNAME
3.2 mcmc命令提供了管理文件的简单途径。它可以打开二进制 deb文件,并仅需对二进制 deb文件按下回车键便能检查其内容。它调用了 dpkg-deb命令作为其后端。我们可以按照下列方式对其配置,以支持简易chdir操作。添加至 ~/.bashrc文件
# mc relatedexport HISTCONTROL=ignoreboth. /usr/lib/mc/mc.sh
1这里假设您正在使用 Bash并以此作为登录默认 shell。如果您设置了其它登录 shell,例如 Z shell,请使用它们对应的配置文件替换 ~/.bashrc文件。
9
CHAPTER 3. 工具的配置 3.3. GIT
3.3 git如今 git命令已成为管理带历史的源码树的必要工具。
git命令的用户级全局配置,如您的名字和电子邮件地址,保存在 ~/.gitconfig文件中,且可以使用如下方式配置。
$ git config --global user.name "Name Surname"$ git config --global user.email [email protected]
如果您仍然只习惯 CVS或者 Subversion的命令风格,您可以使用如下方式设置几个命令别名。
$ git config --global alias.ci "commit -a"$ git config --global alias.co checkout
您可以使用如下命令检查全局配置。
$ git config --global --list
提示
有必要使用某些图形界面 git 工具,例如 gitk 或 gitg 命令来有效地处理 git 仓库的历史。
3.4 quiltquilt 命令提供了记录修改的一个基本方式。对 Debian 打包来说,该工具需要进行自定义,从而在debian/patches/目录内记录修改内容,而非使用默认的 patches/目录。为了避免改变 quilt命令自身的行为,我们在这里创建一个用于 Debian打包工作的命令别名:dquilt。
之后,我们将对应内容写入 ~/.bashrc文件。下面给出的第二行为 dquilt命令提供与 quilt命令相同的命令行补全功能。添加至 ~/.bashrc文件
alias dquilt="quilt --quiltrc=${HOME}/.quiltrc-dpkg"complete -F _quilt_completion $_quilt_complete_opt dquilt
然后我们来创建具有如下内容的 ~/.quiltrc-dpkg文件。
d=.while [ ! -d $d/debian -a `readlink -e $d` != / ];
do d=$d/..; doneif [ -d $d/debian ] && [ -z $QUILT_PATCHES ]; then
# if in Debian packaging tree with unset $QUILT_PATCHESQUILT_PATCHES="debian/patches"QUILT_PATCH_OPTS="--reject-format=unified"QUILT_DIFF_ARGS="-p ab --no-timestamps --no-index --color=auto"QUILT_REFRESH_ARGS="-p ab --no-timestamps --no-index"QUILT_COLORS="diff_hdr=1;32:diff_add=1;34:" + \
"diff_rem=1;31:diff_hunk=1;33:diff_ctx=35:diff_cctx=33"if ! [ -d $d/debian/patches ]; then mkdir $d/debian/patches; fi
fi
请参考 quilt(1)和处理大量补丁的方法暨对 Quilt的介绍以了解如何使用 quilt命令。要获取使用示例,请查看第 4.8 节。
10
CHAPTER 3. 工具的配置 3.5. DEVSCRIPTS
3.5 devscriptsdebsign命令由 devscripts软件包提供,它可以使用用户的 GPG私钥对 Debian软件包进行签名。
debuild命令同样由 devscripts软件包提供,它可以构建二进制软件包并使用 lintian命令对其进行检查。lintian命令的详细输出通常都很实用。您可以将下列内容写入 ~/.devscripts文件来进行配置。
DEBUILD_DPKG_BUILDPACKAGE_OPTS="-i -I -us -uc"DEBUILD_LINTIAN_OPTS="-i -I --show-overrides"DEBSIGN_KEYID="Your_GPG_keyID"
用于 dpkg-source命令的 DEBUILD_DPKG_BUILDPACKAGE_OPTS中可以额外使用 -i和 -I选项以帮助构建源码中具有外来无关内容的软件包(参见第 5.15 节)。当前情况下,使用 4096位的 RSA密钥是较好的做法。另见创建一个新 GPG密钥。
3.6 pbuilderpbuilder软件包提供了净室(干净的)(chroot)构建环境。2
我们可以搭配使用另外几个辅助软件包对其自定义。
• cowbuilder软件包能加速 chroot创建过程。
• lintian软件包能找到所构建软件包中的缺陷。
• bash、mc和 vim软件包在构建失败时用来查找问题。
• ccache软件包可以加速 gcc。(可选)
• libeatmydata1软件包可以加速 dpkg。(可选)
• 并行运行 make以提高构建速度。(可选)
警告
可选的自定义项可能造成负面影响。如果有疑问,请禁用它们。
我们使用如下给出的内容来创建 ~/.pbuilderrc文件(所有可选功能均已禁用)。
AUTO_DEBSIGN="${AUTO_DEBSIGN:-no}"PDEBUILD_PBUILDER=cowbuilderHOOKDIR="/var/cache/pbuilder/hooks"MIRRORSITE="http://deb.debian.org/debian/"#APTCACHE=/var/cache/pbuilder/aptcacheAPTCACHE=/var/cache/apt/archives#BUILDRESULT=/var/cache/pbuilder/result/BUILDRESULT=../EXTRAPACKAGES="ccache lintian libeatmydata1"
# enable to use libeatmydata1 for pbuilder#export LD_PRELOAD=${LD_PRELOAD+$LD_PRELOAD:}libeatmydata.so
# enable ccache for pbuilder#export PATH="/usr/lib/ccache${PATH+:$PATH}"#export CCACHE_DIR="/var/cache/pbuilder/ccache"#BINDMOUNTS="${CCACHE_DIR}"
2sbuild软件包提供了另一套 chroot平台。
11

CHAPTER 3. 工具的配置 3.6. PBUILDER
# parallel make#DEBBUILDOPTS=-j8
注意
可以考虑创建从 /root/.pbuilderrc 到 /home/<user>/.pbuilderrc 的符号链接以获得一致的体验。
注意
由于 缺陷 #606542,您可能需要手动将 EXTRAPACKAGES 列出的软件包安装进入 chroot。请见第 7.10 节。
注意
应当在 chroot 环境内外同时安装上 libeatmydata1 (>=82-2),否则即为禁用libeatmydata1。该软件包在某些构建系统中可能导致竞争情况(race condition)发生。
注意
并行的 make 可能在某些已有软件包上运行失败,它同样会使得构建日志难以阅读。
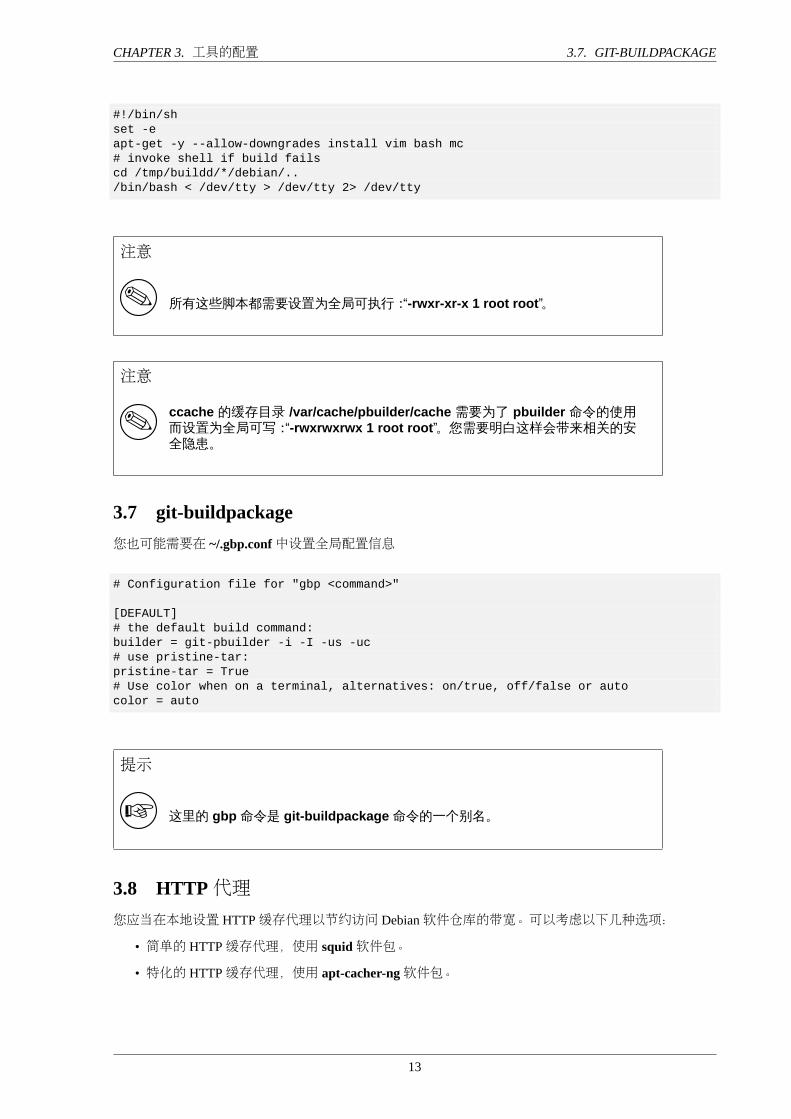
我们可以按如下方式创建钩子脚本。/var/cache/pbuilder/hooks/A10ccache
#!/bin/shset -e# increase the ccache caching sizeccache -M 4G# output the current statisticsccache -s
/var/cache/pbuilder/hooks/B90lintian
#!/bin/shset -eapt-get -y --allow-downgrades install lintianecho "+++ lintian output +++"su -c "lintian -i -I --show-overrides /tmp/buildd/*.changes; :" -l pbuilderecho "+++ end of lintian output +++"
/var/cache/pbuilder/hooks/C10shell
12
CHAPTER 3. 工具的配置 3.7. GIT-BUILDPACKAGE
#!/bin/shset -eapt-get -y --allow-downgrades install vim bash mc# invoke shell if build failscd /tmp/buildd/*/debian/../bin/bash < /dev/tty > /dev/tty 2> /dev/tty
注意
所有这些脚本都需要设置为全局可执行:“-rwxr-xr-x 1 root root”。
注意
ccache 的缓存目录 /var/cache/pbuilder/cache 需要为了 pbuilder 命令的使用而设置为全局可写:“-rwxrwxrwx 1 root root”。您需要明白这样会带来相关的安全隐患。
3.7 git-buildpackage您也可能需要在 ~/.gbp.conf中设置全局配置信息
# Configuration file for "gbp <command>"
[DEFAULT]# the default build command:builder = git-pbuilder -i -I -us -uc# use pristine-tar:pristine-tar = True# Use color when on a terminal, alternatives: on/true, off/false or autocolor = auto
提示
这里的 gbp 命令是 git-buildpackage 命令的一个别名。
3.8 HTTP代理您应当在本地设置 HTTP缓存代理以节约访问 Debian软件仓库的带宽。可以考虑以下几种选项:
• 简单的 HTTP缓存代理,使用 squid软件包。
• 特化的 HTTP缓存代理,使用 apt-cacher-ng软件包。
13
CHAPTER 3. 工具的配置 3.9. 私有 DEBIAN仓库
3.9 私有 Debian仓库您可以使用 reprepro软件包搭建私有 Debian仓库。
14
Chapter 4
简单例子
有一句古罗马谚语说得好:“Longum iter est per praecepta, breve et efficax per exempla”(“一例胜千言!”)。这里给出了从简单的 C语言源代码创建简单的 Debian软件包的例子,并假设上游使用了Makefile作
为构建系统。我们假设上游源码压缩包(tarball)名称为 debhello-0.0.tar.gz。这一类源代码设计可以用这样的方式安装成为非系统文件:
$ tar -xzmf debhello-0.0.tar.gz$ cd debhello-0.0$ make$ make install
Debian的打包需要对“make install”流程进行改变,从而将文件安装至目标系统镜像所在位置,而非通常使用的 /usr/local下的位置。
注意
在其它更加复杂的构建系统下构建 Debian 软件包的例子可以在第 8 章找到。
4.1 大致流程
从上游源码压缩包 debhello-0.0.tar.gz构建单个非本土 Debian软件包的大致流程可以总结如下:
• 维护者获取上游源码压缩包 debhello-0.0.tar.gz并将其内容解压缩至 debhello-0.0目录中。
• debmake命令对上游源码树进行 debian化(debianize),具体来说,是创建一个 debian目录并仅向该目录中添加各类模板文件。
– 名为 debhello_0.0.orig.tar.gz的符号链接被创建并指向 debhello-0.0.tar.gz文件。– 维护者须自行编辑修改模板文件。
• debuild命令基于已 debian化的源码树构建二进制软件包。
– debhello-0.0-1.debian.tar.xz将被创建,它包含了 debian目录。
软件包构建的大致流程
$ tar -xzmf debhello-0.0.tar.gz$ cd debhello-0.0$ debmake... manual customization
$ debuild...
15
CHAPTER 4. 简单例子 4.2. 什么是 DEBMAKE?
提示
此处和下面例子中的 debuild 命令可使用等价的命令进行替换,例如 pdebuild命令。
提示
如果上游源码压缩包提供了 .tar.xz 格式文件,请使用这样的压缩包来替代.tar.gz 或 .tar.bz2 格式。xz 压缩与 gzip 或 bzip2 压缩相比提供了更好的压缩比。
4.2 什么是 debmake?文中的 debmake命令是用于 Debian打包的一个帮助脚本。
• 它总是将大多数选项的状态与参数设置为合理的默认值。
• 它能产生上游源码包,并按需创建所需的符号链接。
• 它不会覆写 debian/目录下已存在的配置文件。
• 它支持多架构(multiarch)软件包。
• 它能创建良好的模板文件,例如符合 DEP-5的 debian/copyright文件。
这些特性使得使用 debmake进行 Debian打包工作变得简单而现代化。
注意
debmake 命令并不是制作一个 Debian 软件包的唯一途径。许多软件包是打包者模仿其它已有的打包示例,仅仅使用文本编辑器而编写完成打包脚本的。
4.3 什么是 debuild?这里给出与 debuild命令类似的一系列命令的一个汇总。
• debian/rules文件定义了 Debian二进制软件包该如何构建。
• dpkg-buildpackge是构建 Debian二进制软件包的正式命令。对于正常的二进制构建,它大体上会执行以下操作:
–“dpkg-source --before-build”(应用 Debian补丁,除非它们已被应用)–“fakeroot debian/rules clean”–“dpkg-source --build”(构建 Debian源码包)–“fakeroot debian/rules build”–“fakeroot debian/rules binary”–“dpkg-genbuildinfo”(产生一个 *.buildinfo文件)–“dpkg-genchanges”(产生一个 *.changes文件)
16

CHAPTER 4. 简单例子 4.4. 第一步:获取上游源代码
–“fakeroot debian/rules clean”–“dpkg-source --after-build”(取消 Debian补丁,如果它们在 --before-build阶段已被应用)–“debsign”(对 *.dsc和 *.changes文件进行签名)
* 如果您按照第 3.5 节的说明设置了 -us和 -us选项的话,本步骤将会被跳过。您需要手动运行 debsign命令。
• debuild命令是 dpkg-buildpackage命令的一个封装脚本,它可以使用合适的环境变量来构建 Debian二进制软件包。
• pdebuild命令是另一个封装脚本,它可以在合适的 chroot环境下使用合适的环境变量构建 Debian二进制软件包。
• git-pbuilder命令是又一个用于构建 Debian二进制软件包的封装脚本,它同样可以确保使用合适的环境变量和 chroot环境。不同之处在于它提供了一个更容易使用的命令行用户界面,可以较方便地在不同的构建环境之间进行切换。
注意
如需了解详细内容,请见 dpkg-buildpackage(1)。
4.4 第一步:获取上游源代码
我们先要获取上游源代码。下载 debhello-0.0.tar.gz
$ wget http://www.example.org/download/debhello-0.0.tar.gz...$ tar -xzmf debhello-0.0.tar.gz$ tree
.├── debhello-0.0│ ├── LICENSE│ ├── Makefile│ └── src│ └── hello.c└── debhello-0.0.tar.gz
2 directories, 4 files
这里的 C源代码 hello.c非常的简单。hello.c
$ cat debhello-0.0/src/hello.c#include <stdio.h>intmain(){
printf("Hello, world!\n");return 0;
}
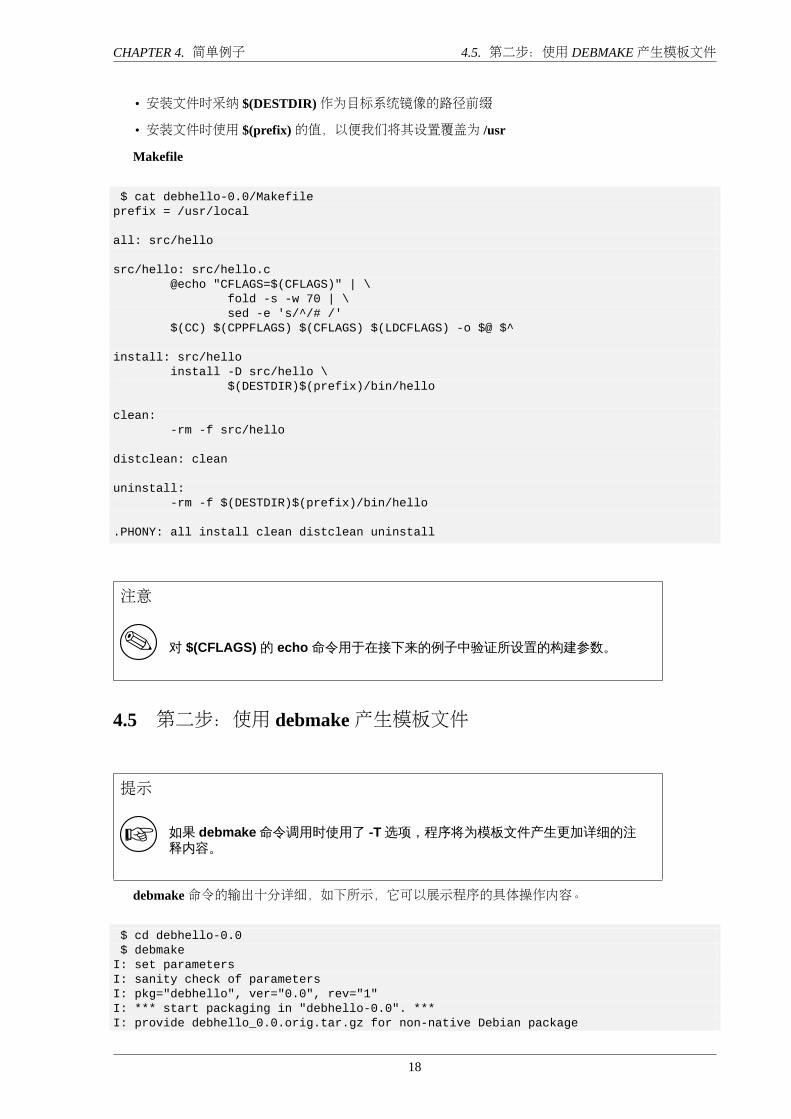
这里,源码中的Makefile支持 GNU编码标准和 FHS(文件系统层级规范)。特别地:
• 构建二进制程序时会考虑 $(CPPFLAGS)、$(CFLAGS)、$(LDFLAGS),等等。
17
CHAPTER 4. 简单例子 4.5. 第二步:使用 DEBMAKE产生模板文件
• 安装文件时采纳 $(DESTDIR)作为目标系统镜像的路径前缀
• 安装文件时使用 $(prefix)的值,以便我们将其设置覆盖为 /usr
Makefile
$ cat debhello-0.0/Makefileprefix = /usr/local
all: src/hello
src/hello: src/hello.c@echo "CFLAGS=$(CFLAGS)" | \
fold -s -w 70 | \sed -e 's/^/# /'
$(CC) $(CPPFLAGS) $(CFLAGS) $(LDCFLAGS) -o $@ $^
install: src/helloinstall -D src/hello \
$(DESTDIR)$(prefix)/bin/hello
clean:-rm -f src/hello
distclean: clean
uninstall:-rm -f $(DESTDIR)$(prefix)/bin/hello
.PHONY: all install clean distclean uninstall
注意
对 $(CFLAGS) 的 echo 命令用于在接下来的例子中验证所设置的构建参数。
4.5 第二步:使用 debmake产生模板文件
提示
如果 debmake 命令调用时使用了 -T 选项,程序将为模板文件产生更加详细的注释内容。
debmake命令的输出十分详细,如下所示,它可以展示程序的具体操作内容。
$ cd debhello-0.0$ debmake
I: set parametersI: sanity check of parametersI: pkg="debhello", ver="0.0", rev="1"I: *** start packaging in "debhello-0.0". ***I: provide debhello_0.0.orig.tar.gz for non-native Debian package
18
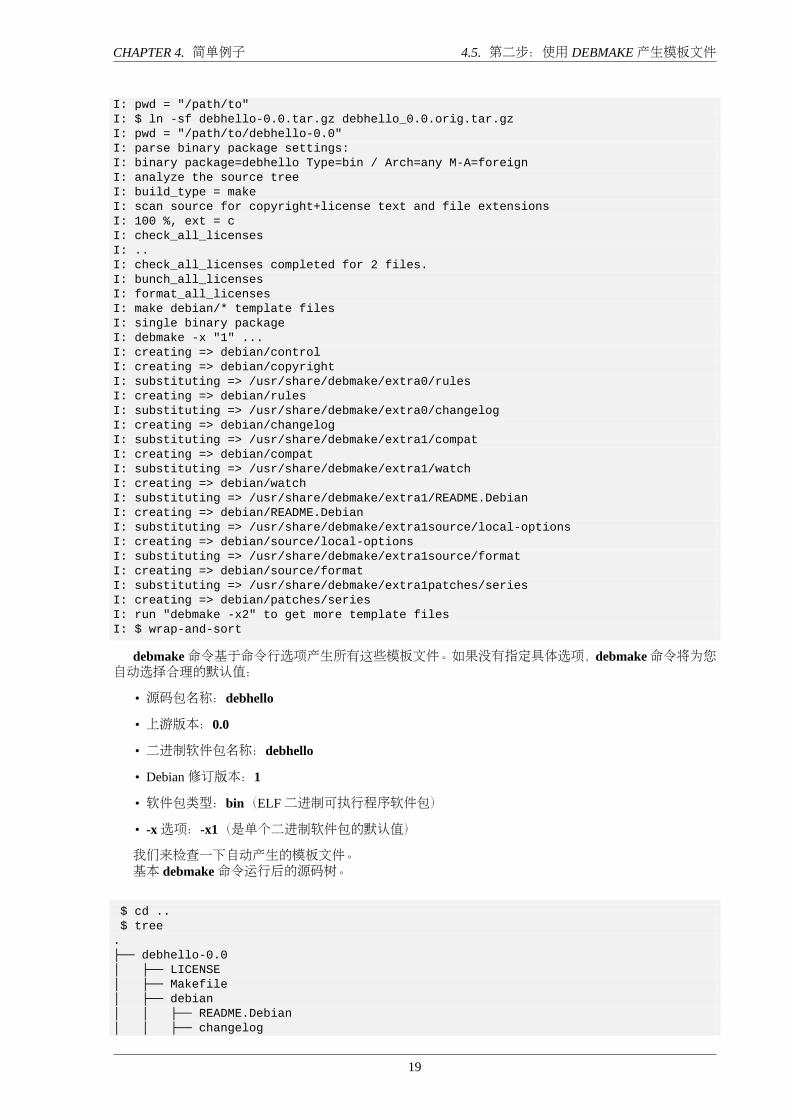
CHAPTER 4. 简单例子 4.5. 第二步:使用 DEBMAKE产生模板文件
I: pwd = "/path/to"I: $ ln -sf debhello-0.0.tar.gz debhello_0.0.orig.tar.gzI: pwd = "/path/to/debhello-0.0"I: parse binary package settings:I: binary package=debhello Type=bin / Arch=any M-A=foreignI: analyze the source treeI: build_type = makeI: scan source for copyright+license text and file extensionsI: 100 %, ext = cI: check_all_licensesI: ..I: check_all_licenses completed for 2 files.I: bunch_all_licensesI: format_all_licensesI: make debian/* template filesI: single binary packageI: debmake -x "1" ...I: creating => debian/controlI: creating => debian/copyrightI: substituting => /usr/share/debmake/extra0/rulesI: creating => debian/rulesI: substituting => /usr/share/debmake/extra0/changelogI: creating => debian/changelogI: substituting => /usr/share/debmake/extra1/compatI: creating => debian/compatI: substituting => /usr/share/debmake/extra1/watchI: creating => debian/watchI: substituting => /usr/share/debmake/extra1/README.DebianI: creating => debian/README.DebianI: substituting => /usr/share/debmake/extra1source/local-optionsI: creating => debian/source/local-optionsI: substituting => /usr/share/debmake/extra1source/formatI: creating => debian/source/formatI: substituting => /usr/share/debmake/extra1patches/seriesI: creating => debian/patches/seriesI: run "debmake -x2" to get more template filesI: $ wrap-and-sort
debmake命令基于命令行选项产生所有这些模板文件。如果没有指定具体选项,debmake命令将为您自动选择合理的默认值:
• 源码包名称:debhello
• 上游版本:0.0
• 二进制软件包名称:debhello
• Debian修订版本:1
• 软件包类型:bin(ELF二进制可执行程序软件包)
• -x选项:-x1(是单个二进制软件包的默认值)
我们来检查一下自动产生的模板文件。基本 debmake命令运行后的源码树。
$ cd ..$ tree
.├── debhello-0.0│ ├── LICENSE│ ├── Makefile│ ├── debian│ │ ├── README.Debian│ │ ├── changelog
19
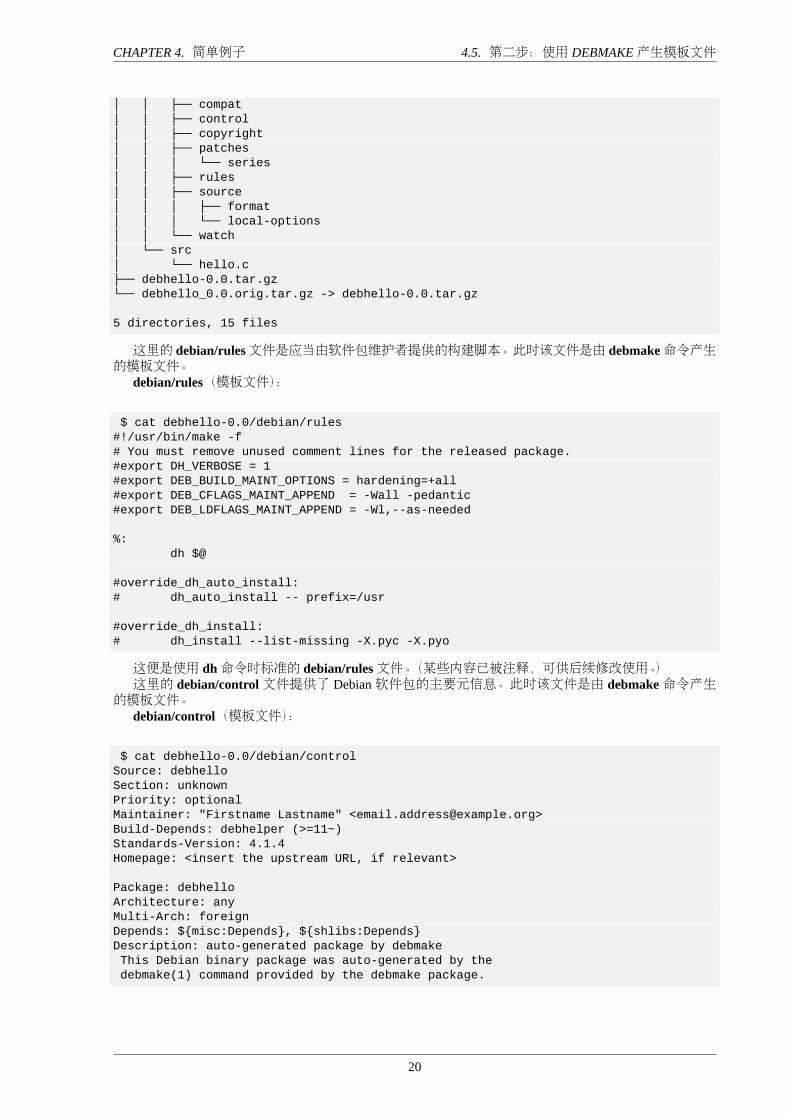
CHAPTER 4. 简单例子 4.5. 第二步:使用 DEBMAKE产生模板文件
│ │ ├── compat│ │ ├── control│ │ ├── copyright│ │ ├── patches│ │ │ └── series│ │ ├── rules│ │ ├── source│ │ │ ├── format│ │ │ └── local-options│ │ └── watch│ └── src│ └── hello.c├── debhello-0.0.tar.gz└── debhello_0.0.orig.tar.gz -> debhello-0.0.tar.gz
5 directories, 15 files
这里的 debian/rules文件是应当由软件包维护者提供的构建脚本。此时该文件是由 debmake命令产生的模板文件。
debian/rules(模板文件):
$ cat debhello-0.0/debian/rules#!/usr/bin/make -f# You must remove unused comment lines for the released package.#export DH_VERBOSE = 1#export DEB_BUILD_MAINT_OPTIONS = hardening=+all#export DEB_CFLAGS_MAINT_APPEND = -Wall -pedantic#export DEB_LDFLAGS_MAINT_APPEND = -Wl,--as-needed
%:dh $@
#override_dh_auto_install:# dh_auto_install -- prefix=/usr
#override_dh_install:# dh_install --list-missing -X.pyc -X.pyo
这便是使用 dh命令时标准的 debian/rules文件。(某些内容已被注释,可供后续修改使用。)这里的 debian/control文件提供了 Debian软件包的主要元信息。此时该文件是由 debmake命令产生
的模板文件。debian/control(模板文件):
$ cat debhello-0.0/debian/controlSource: debhelloSection: unknownPriority: optionalMaintainer: "Firstname Lastname" <[email protected]>Build-Depends: debhelper (>=11~)Standards-Version: 4.1.4Homepage: <insert the upstream URL, if relevant>
Package: debhelloArchitecture: anyMulti-Arch: foreignDepends: ${misc:Depends}, ${shlibs:Depends}Description: auto-generated package by debmakeThis Debian binary package was auto-generated by thedebmake(1) command provided by the debmake package.
20
CHAPTER 4. 简单例子 4.5. 第二步:使用 DEBMAKE产生模板文件
警告
如果您对 debian/control 模板文件中的“Section: unknown”部分不做修改的话,后续的 lintian 错误可能导致构建失败。
因为这是个 ELF二进制可执行文件软件包,debmake命令设置了“Architecture: any”和“Multi-Arch:foreign”两项。同时,它将所需的 substvar参数设置为“Depends: ${shlibs:Depends}, ${misc:Depends}”。这些内容将在第 5 章部分进行解释。
注意
请注意这个 debian/control 按照“Debian 政策手册”中 5.2 源码包控制文件——debian/control 的内容使用 RFC-822 风格进行编写。文件对空行和行首空格的使用有特别的要求。
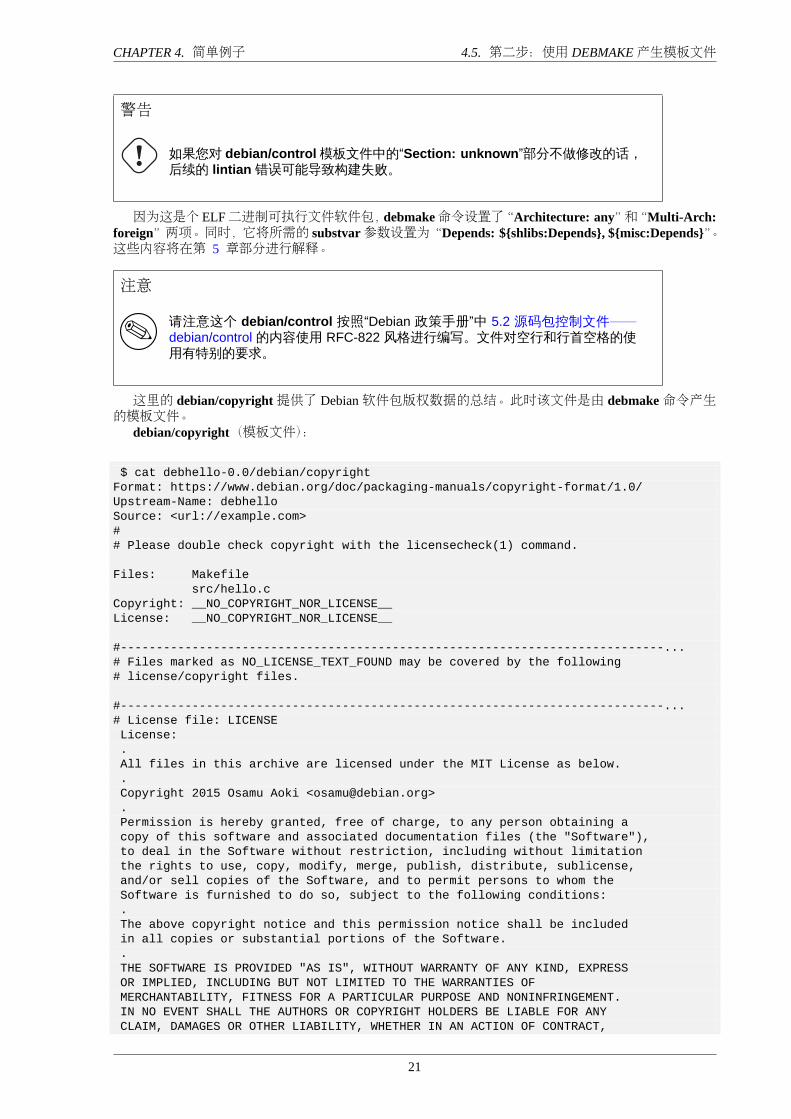
这里的 debian/copyright提供了 Debian软件包版权数据的总结。此时该文件是由 debmake命令产生的模板文件。
debian/copyright(模板文件):
$ cat debhello-0.0/debian/copyrightFormat: https://www.debian.org/doc/packaging-manuals/copyright-format/1.0/Upstream-Name: debhelloSource: <url://example.com>## Please double check copyright with the licensecheck(1) command.
Files: Makefilesrc/hello.c
Copyright: __NO_COPYRIGHT_NOR_LICENSE__License: __NO_COPYRIGHT_NOR_LICENSE__
#----------------------------------------------------------------------------...# Files marked as NO_LICENSE_TEXT_FOUND may be covered by the following# license/copyright files.
#----------------------------------------------------------------------------...# License file: LICENSELicense:.All files in this archive are licensed under the MIT License as below..Copyright 2015 Osamu Aoki <[email protected]>.Permission is hereby granted, free of charge, to any person obtaining acopy of this software and associated documentation files (the "Software"),to deal in the Software without restriction, including without limitationthe rights to use, copy, modify, merge, publish, distribute, sublicense,and/or sell copies of the Software, and to permit persons to whom theSoftware is furnished to do so, subject to the following conditions:.The above copyright notice and this permission notice shall be includedin all copies or substantial portions of the Software..THE SOFTWARE IS PROVIDED "AS IS", WITHOUT WARRANTY OF ANY KIND, EXPRESSOR IMPLIED, INCLUDING BUT NOT LIMITED TO THE WARRANTIES OFMERCHANTABILITY, FITNESS FOR A PARTICULAR PURPOSE AND NONINFRINGEMENT.IN NO EVENT SHALL THE AUTHORS OR COPYRIGHT HOLDERS BE LIABLE FOR ANYCLAIM, DAMAGES OR OTHER LIABILITY, WHETHER IN AN ACTION OF CONTRACT,
21
CHAPTER 4. 简单例子 4.6. 第三步:编辑模板文件
TORT OR OTHERWISE, ARISING FROM, OUT OF OR IN CONNECTION WITH THESOFTWARE OR THE USE OR OTHER DEALINGS IN THE SOFTWARE.
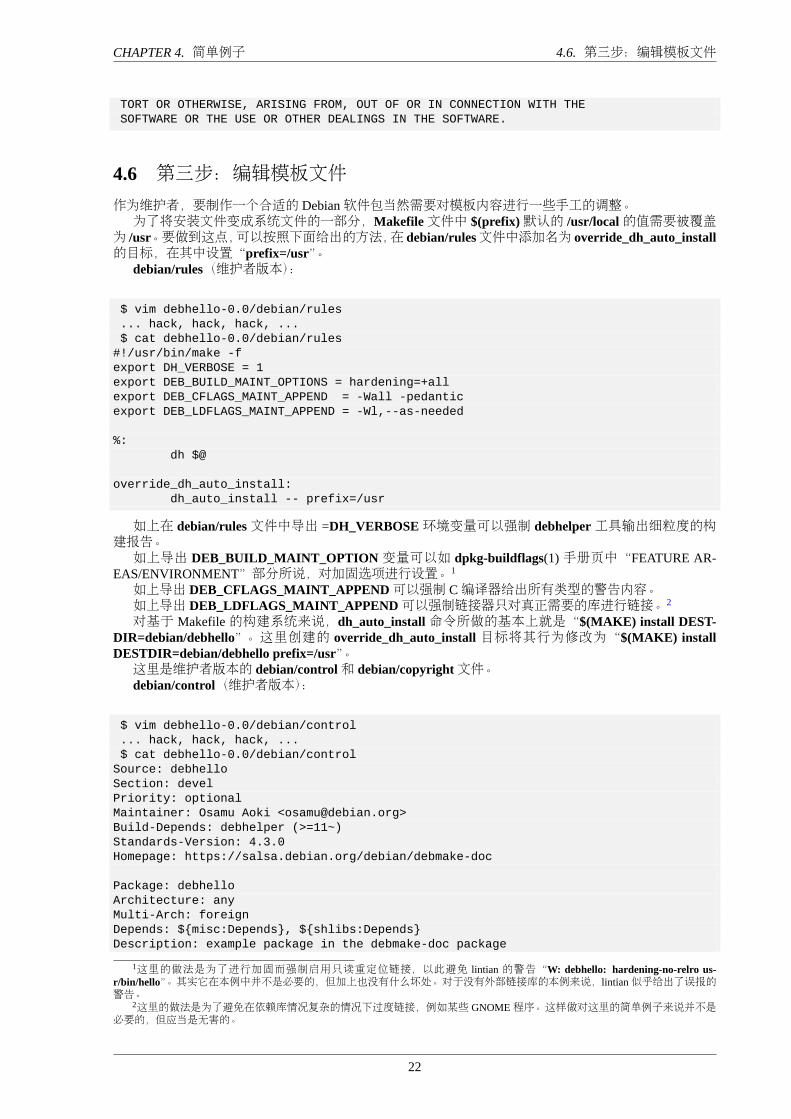
4.6 第三步:编辑模板文件
作为维护者,要制作一个合适的 Debian软件包当然需要对模板内容进行一些手工的调整。为了将安装文件变成系统文件的一部分,Makefile文件中 $(prefix)默认的 /usr/local的值需要被覆盖
为 /usr。要做到这点,可以按照下面给出的方法,在 debian/rules文件中添加名为 override_dh_auto_install的目标,在其中设置“prefix=/usr”。
debian/rules(维护者版本):
$ vim debhello-0.0/debian/rules... hack, hack, hack, ...$ cat debhello-0.0/debian/rules
#!/usr/bin/make -fexport DH_VERBOSE = 1export DEB_BUILD_MAINT_OPTIONS = hardening=+allexport DEB_CFLAGS_MAINT_APPEND = -Wall -pedanticexport DEB_LDFLAGS_MAINT_APPEND = -Wl,--as-needed
%:dh $@
override_dh_auto_install:dh_auto_install -- prefix=/usr
如上在 debian/rules文件中导出 =DH_VERBOSE环境变量可以强制 debhelper工具输出细粒度的构建报告。如上导出 DEB_BUILD_MAINT_OPTION变量可以如 dpkg-buildflags(1)手册页中“FEATURE AR-
EAS/ENVIRONMENT”部分所说,对加固选项进行设置。1
如上导出 DEB_CFLAGS_MAINT_APPEND可以强制 C编译器给出所有类型的警告内容。如上导出 DEB_LDFLAGS_MAINT_APPEND可以强制链接器只对真正需要的库进行链接。2
对基于 Makefile的构建系统来说,dh_auto_install命令所做的基本上就是“$(MAKE) install DEST-DIR=debian/debhello”。这里创建的 override_dh_auto_install 目标将其行为修改为“$(MAKE) installDESTDIR=debian/debhello prefix=/usr”。这里是维护者版本的 debian/control和 debian/copyright文件。debian/control(维护者版本):
$ vim debhello-0.0/debian/control... hack, hack, hack, ...$ cat debhello-0.0/debian/control
Source: debhelloSection: develPriority: optionalMaintainer: Osamu Aoki <[email protected]>Build-Depends: debhelper (>=11~)Standards-Version: 4.3.0Homepage: https://salsa.debian.org/debian/debmake-doc
Package: debhelloArchitecture: anyMulti-Arch: foreignDepends: ${misc:Depends}, ${shlibs:Depends}Description: example package in the debmake-doc package
1这里的做法是为了进行加固而强制启用只读重定位链接,以此避免 lintian 的警告“W: debhello: hardening-no-relro us-r/bin/hello”。其实它在本例中并不是必要的,但加上也没有什么坏处。对于没有外部链接库的本例来说,lintian似乎给出了误报的警告。
2这里的做法是为了避免在依赖库情况复杂的情况下过度链接,例如某些 GNOME程序。这样做对这里的简单例子来说并不是必要的,但应当是无害的。
22
CHAPTER 4. 简单例子 4.6. 第三步:编辑模板文件
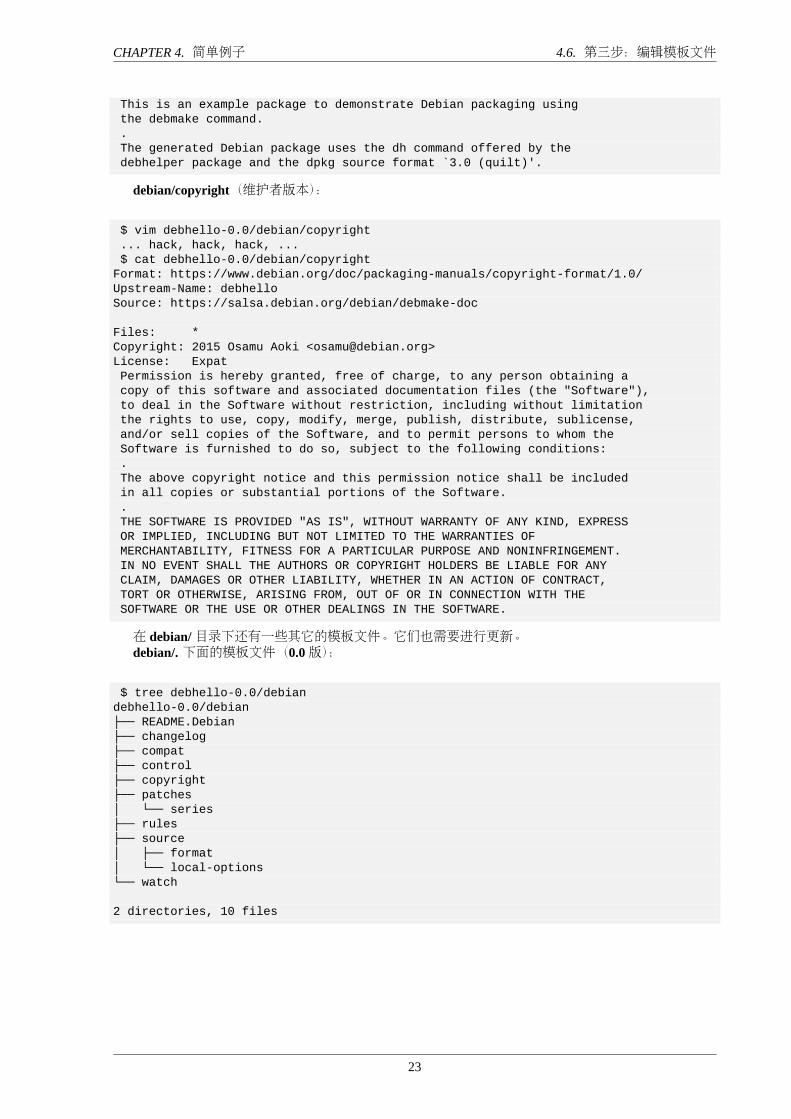
This is an example package to demonstrate Debian packaging usingthe debmake command..The generated Debian package uses the dh command offered by thedebhelper package and the dpkg source format `3.0 (quilt)'.
debian/copyright(维护者版本):
$ vim debhello-0.0/debian/copyright... hack, hack, hack, ...$ cat debhello-0.0/debian/copyright
Format: https://www.debian.org/doc/packaging-manuals/copyright-format/1.0/Upstream-Name: debhelloSource: https://salsa.debian.org/debian/debmake-doc
Files: *Copyright: 2015 Osamu Aoki <[email protected]>License: ExpatPermission is hereby granted, free of charge, to any person obtaining acopy of this software and associated documentation files (the "Software"),to deal in the Software without restriction, including without limitationthe rights to use, copy, modify, merge, publish, distribute, sublicense,and/or sell copies of the Software, and to permit persons to whom theSoftware is furnished to do so, subject to the following conditions:.The above copyright notice and this permission notice shall be includedin all copies or substantial portions of the Software..THE SOFTWARE IS PROVIDED "AS IS", WITHOUT WARRANTY OF ANY KIND, EXPRESSOR IMPLIED, INCLUDING BUT NOT LIMITED TO THE WARRANTIES OFMERCHANTABILITY, FITNESS FOR A PARTICULAR PURPOSE AND NONINFRINGEMENT.IN NO EVENT SHALL THE AUTHORS OR COPYRIGHT HOLDERS BE LIABLE FOR ANYCLAIM, DAMAGES OR OTHER LIABILITY, WHETHER IN AN ACTION OF CONTRACT,TORT OR OTHERWISE, ARISING FROM, OUT OF OR IN CONNECTION WITH THESOFTWARE OR THE USE OR OTHER DEALINGS IN THE SOFTWARE.
在 debian/目录下还有一些其它的模板文件。它们也需要进行更新。debian/. 下面的模板文件(0.0版):
$ tree debhello-0.0/debiandebhello-0.0/debian├── README.Debian├── changelog├── compat├── control├── copyright├── patches│ └── series├── rules├── source│ ├── format│ └── local-options└── watch
2 directories, 10 files
23
CHAPTER 4. 简单例子 4.7. 第四步:使用 DEBUILD构建软件包
提示
对于来自 debhelper 软件包的各个 dh_* 命令来说,它们在读取所使用的配置文件时通常把以 # 开头的行视为注释行。
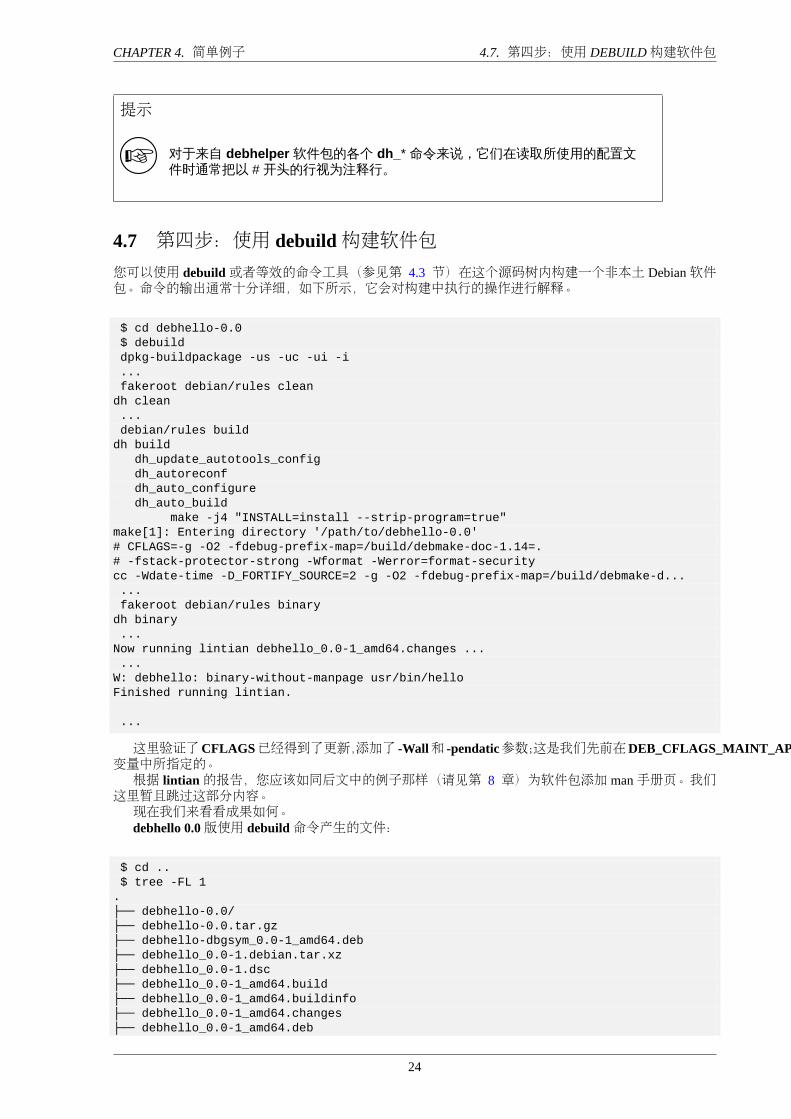
4.7 第四步:使用 debuild构建软件包您可以使用 debuild或者等效的命令工具(参见第 4.3 节)在这个源码树内构建一个非本土 Debian软件包。命令的输出通常十分详细,如下所示,它会对构建中执行的操作进行解释。
$ cd debhello-0.0$ debuilddpkg-buildpackage -us -uc -ui -i...fakeroot debian/rules clean
dh clean...debian/rules build
dh builddh_update_autotools_configdh_autoreconfdh_auto_configuredh_auto_build
make -j4 "INSTALL=install --strip-program=true"make[1]: Entering directory '/path/to/debhello-0.0'# CFLAGS=-g -O2 -fdebug-prefix-map=/build/debmake-doc-1.14=.# -fstack-protector-strong -Wformat -Werror=format-securitycc -Wdate-time -D_FORTIFY_SOURCE=2 -g -O2 -fdebug-prefix-map=/build/debmake-d......fakeroot debian/rules binary
dh binary...
Now running lintian debhello_0.0-1_amd64.changes ......
W: debhello: binary-without-manpage usr/bin/helloFinished running lintian.
...
这里验证了CFLAGS已经得到了更新,添加了 -Wall和 -pendatic参数;这是我们先前在DEB_CFLAGS_MAINT_APPEND变量中所指定的。根据 lintian的报告,您应该如同后文中的例子那样(请见第 8 章)为软件包添加 man手册页。我们
这里暂且跳过这部分内容。现在我们来看看成果如何。debhello 0.0版使用 debuild命令产生的文件:
$ cd ..$ tree -FL 1
.├── debhello-0.0/├── debhello-0.0.tar.gz├── debhello-dbgsym_0.0-1_amd64.deb├── debhello_0.0-1.debian.tar.xz├── debhello_0.0-1.dsc├── debhello_0.0-1_amd64.build├── debhello_0.0-1_amd64.buildinfo├── debhello_0.0-1_amd64.changes├── debhello_0.0-1_amd64.deb
24

CHAPTER 4. 简单例子 4.7. 第四步:使用 DEBUILD构建软件包
└── debhello_0.0.orig.tar.gz -> debhello-0.0.tar.gz
1 directory, 9 files
您可以看见生成的全部文件。
• debhello_0.0.orig.tar.gz是指向上游源码压缩包的符号链接。
• debhello_0.0-1.debian.tar.xz包含了维护者生成的内容。
• debhello_0.0-1.dsc是 Debian源码包的元数据文件。
• debhello_0.0-1_amd64.deb是 Debian二进制软件包。
• debhello-dbgsym_0.0-1_amd64.deb是 Debian的调试符号二进制软件包。另请参见第 5.17.1 节。
• debhello_0.0-1_amd64.build是构建日志文件。
• debhello_0.0-1_amd64.buildinfo是 dpkg-genbuildinfo(1)生成的元数据文件。
• debhello_0.0-1_amd64.changes是 Debian二进制软件包的元数据文件。
debhello_0.0-1.debian.tar.xz包含了 Debian对上游源代码的修改,具体如下所示。压缩文件 debhello_0.0-1.debian.tar.xz的内容:
$ tar -tzf debhello-0.0.tar.gzdebhello-0.0/debhello-0.0/Makefiledebhello-0.0/src/debhello-0.0/src/hello.cdebhello-0.0/LICENSE$ tar --xz -tf debhello_0.0-1.debian.tar.xz
debian/debian/README.Debiandebian/changelogdebian/compatdebian/controldebian/copyrightdebian/patches/debian/patches/seriesdebian/rulesdebian/source/debian/source/formatdebian/watch
debhello_0.0-1_amd64.deb包含了将要安装至目标系统中的文件。debhello-debsym_0.0-1_amd64.deb包含了将要安装至目标系统中的调试符号文件。所有二进制包的包内容:
$ dpkg -c debhello-dbgsym_0.0-1_amd64.debdrwxr-xr-x root/root ... ./drwxr-xr-x root/root ... ./usr/drwxr-xr-x root/root ... ./usr/lib/drwxr-xr-x root/root ... ./usr/lib/debug/drwxr-xr-x root/root ... ./usr/lib/debug/.build-id/drwxr-xr-x root/root ... ./usr/lib/debug/.build-id/8f/-rw-r--r-- root/root ... ./usr/lib/debug/.build-id/8f/6eac00576c538d13e7aea9...drwxr-xr-x root/root ... ./usr/share/drwxr-xr-x root/root ... ./usr/share/doc/lrwxrwxrwx root/root ... ./usr/share/doc/debhello-dbgsym -> debhello$ dpkg -c debhello_0.0-1_amd64.deb
drwxr-xr-x root/root ... ./drwxr-xr-x root/root ... ./usr/drwxr-xr-x root/root ... ./usr/bin/
25

CHAPTER 4. 简单例子 4.8. 第三步(备选):修改上游源代码
-rwxr-xr-x root/root ... ./usr/bin/hellodrwxr-xr-x root/root ... ./usr/share/drwxr-xr-x root/root ... ./usr/share/doc/drwxr-xr-x root/root ... ./usr/share/doc/debhello/-rw-r--r-- root/root ... ./usr/share/doc/debhello/README.Debian-rw-r--r-- root/root ... ./usr/share/doc/debhello/changelog.Debian.gz-rw-r--r-- root/root ... ./usr/share/doc/debhello/copyright
生成的依赖列表会给出所有二进制软件包的依赖。生成的所有二进制软件包的依赖列表(v=0.0):
$ dpkg -f debhello-dbgsym_0.0-1_amd64.deb pre-depends \depends recommends conflicts breaks
Depends: debhello (= 0.0-1)$ dpkg -f debhello_0.0-1_amd64.deb pre-depends \
depends recommends conflicts breaksDepends: libc6 (>= 2.2.5)
小心
在将软件包上传至 Debian 仓库之前,仍然有很多细节需要进行处理。
注意
如果跳过了对 debmake 命令自动生成的配置文件的手工调整步骤,所生成的二进制软件包可能缺少有用的软件包描述信息,某些政策的要求也无法满足。这个不正式的软件包对于 dpkg 命令来说可以正常处理,也许这样对您本地的部署来说已经足够好了。
4.8 第三步(备选):修改上游源代码
上面的例子中,在创建合适的 Debian软件包时没有修改上游的源代码。作为维护者,另一个备选的方案是对上游源代码做改动,如修改上游的Makefile以将 $(prefix)的值设
定为 /usr。打包操作基本上和上面的分步示例相同,除了在第 4.6 节中的两点:
• 要将维护者对上游源代码的修改形成对应的补丁文件存放在 debian/patches/目录内,并将它们的文件名写入 debian/patches/series文件,如第 5.8 节所述。有数种生成补丁文件的方式。下面的章节中给出了一些例子:
– 第 4.8.1 节– 第 4.8.2 节– 第 4.8.3 节
• 此时维护者对 debian/rules文件的修改如下所示,它不包含 override_dh_auto_install目标:debian/rules(备选的维护者版本):
$ cd debhello-0.0$ vim debian/rules... hack, hack, hack, ...
26
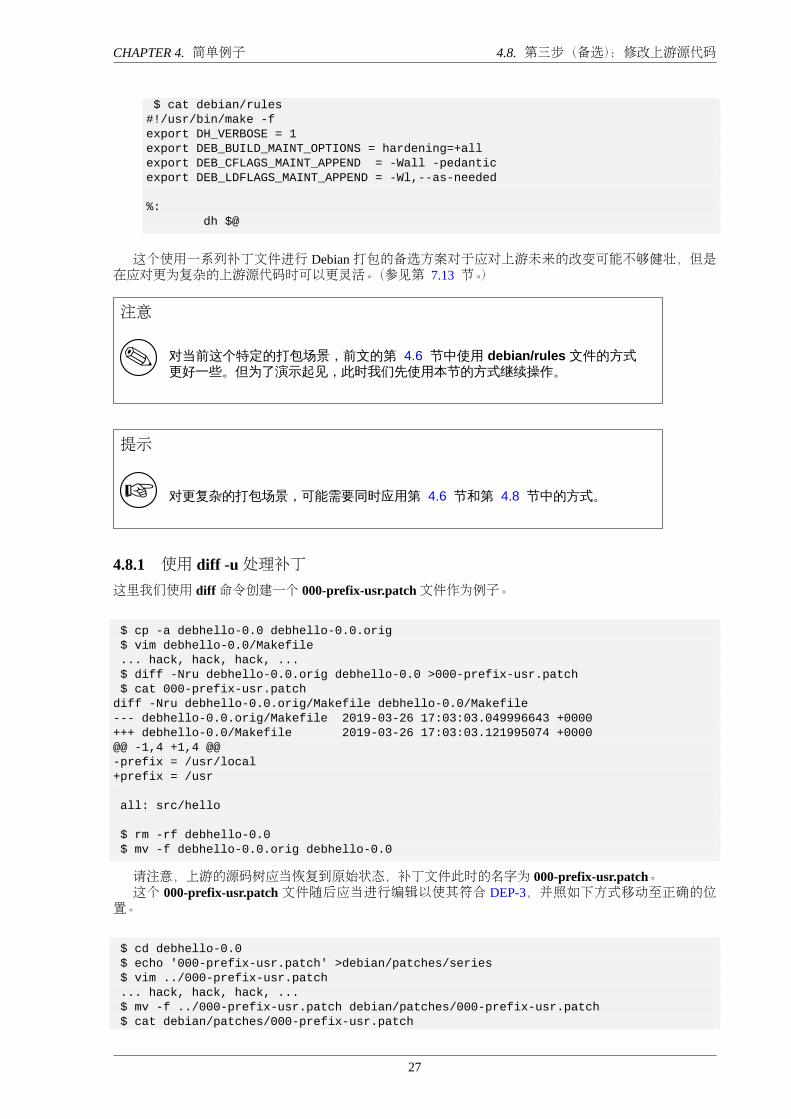
CHAPTER 4. 简单例子 4.8. 第三步(备选):修改上游源代码
$ cat debian/rules#!/usr/bin/make -fexport DH_VERBOSE = 1export DEB_BUILD_MAINT_OPTIONS = hardening=+allexport DEB_CFLAGS_MAINT_APPEND = -Wall -pedanticexport DEB_LDFLAGS_MAINT_APPEND = -Wl,--as-needed
%:dh $@
这个使用一系列补丁文件进行 Debian打包的备选方案对于应对上游未来的改变可能不够健壮,但是在应对更为复杂的上游源代码时可以更灵活。(参见第 7.13 节。)
注意
对当前这个特定的打包场景,前文的第 4.6 节中使用 debian/rules 文件的方式更好一些。但为了演示起见,此时我们先使用本节的方式继续操作。
提示
对更复杂的打包场景,可能需要同时应用第 4.6 节和第 4.8 节中的方式。
4.8.1 使用 diff -u处理补丁这里我们使用 diff命令创建一个 000-prefix-usr.patch文件作为例子。
$ cp -a debhello-0.0 debhello-0.0.orig$ vim debhello-0.0/Makefile... hack, hack, hack, ...$ diff -Nru debhello-0.0.orig debhello-0.0 >000-prefix-usr.patch$ cat 000-prefix-usr.patch
diff -Nru debhello-0.0.orig/Makefile debhello-0.0/Makefile--- debhello-0.0.orig/Makefile 2019-03-26 17:03:03.049996643 +0000+++ debhello-0.0/Makefile 2019-03-26 17:03:03.121995074 +0000@@ -1,4 +1,4 @@-prefix = /usr/local+prefix = /usr
all: src/hello
$ rm -rf debhello-0.0$ mv -f debhello-0.0.orig debhello-0.0
请注意,上游的源码树应当恢复到原始状态,补丁文件此时的名字为 000-prefix-usr.patch。这个 000-prefix-usr.patch文件随后应当进行编辑以使其符合 DEP-3,并照如下方式移动至正确的位
置。
$ cd debhello-0.0$ echo '000-prefix-usr.patch' >debian/patches/series$ vim ../000-prefix-usr.patch... hack, hack, hack, ...$ mv -f ../000-prefix-usr.patch debian/patches/000-prefix-usr.patch$ cat debian/patches/000-prefix-usr.patch
27
CHAPTER 4. 简单例子 4.8. 第三步(备选):修改上游源代码
From: Osamu Aoki <[email protected]>Description: set prefix=/usr patchdiff -Nru debhello-0.0.orig/Makefile debhello-0.0/Makefile--- debhello-0.0.orig/Makefile+++ debhello-0.0/Makefile@@ -1,4 +1,4 @@-prefix = /usr/local+prefix = /usr
all: src/hello
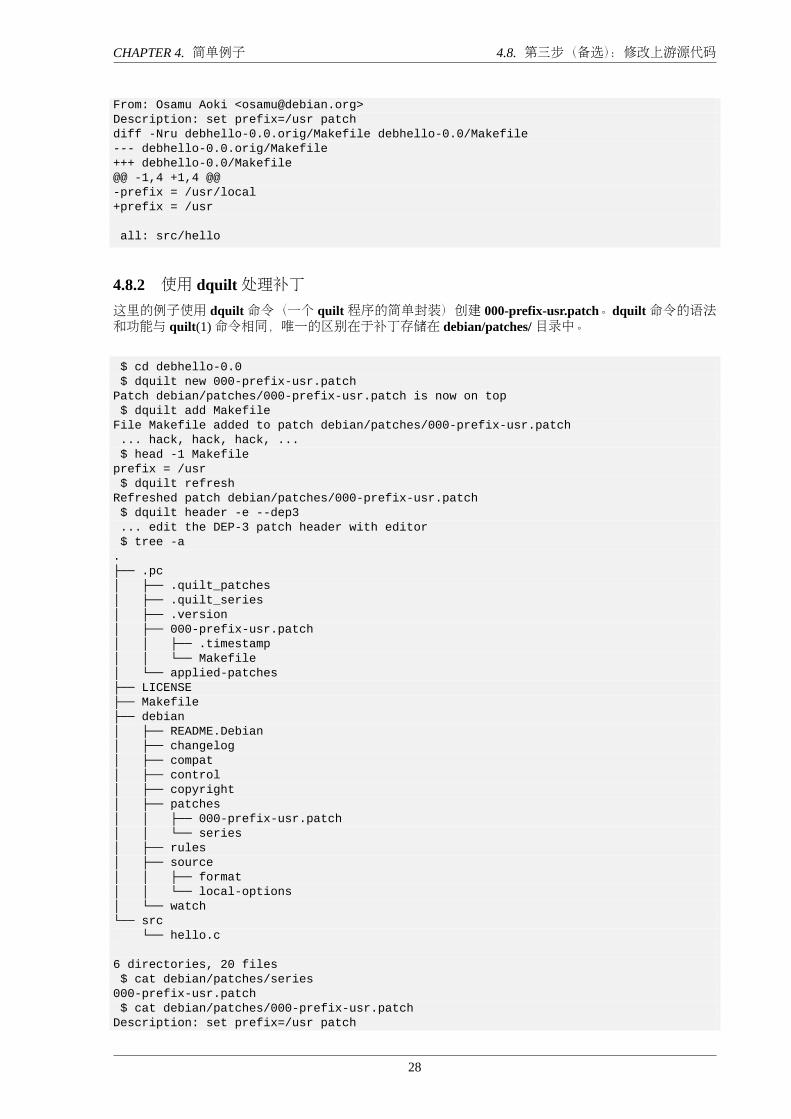
4.8.2 使用 dquilt处理补丁这里的例子使用 dquilt命令(一个 quilt程序的简单封装)创建 000-prefix-usr.patch。dquilt命令的语法和功能与 quilt(1)命令相同,唯一的区别在于补丁存储在 debian/patches/目录中。
$ cd debhello-0.0$ dquilt new 000-prefix-usr.patch
Patch debian/patches/000-prefix-usr.patch is now on top$ dquilt add Makefile
File Makefile added to patch debian/patches/000-prefix-usr.patch... hack, hack, hack, ...$ head -1 Makefile
prefix = /usr$ dquilt refresh
Refreshed patch debian/patches/000-prefix-usr.patch$ dquilt header -e --dep3... edit the DEP-3 patch header with editor$ tree -a
.├── .pc│ ├── .quilt_patches│ ├── .quilt_series│ ├── .version│ ├── 000-prefix-usr.patch│ │ ├── .timestamp│ │ └── Makefile│ └── applied-patches├── LICENSE├── Makefile├── debian│ ├── README.Debian│ ├── changelog│ ├── compat│ ├── control│ ├── copyright│ ├── patches│ │ ├── 000-prefix-usr.patch│ │ └── series│ ├── rules│ ├── source│ │ ├── format│ │ └── local-options│ └── watch└── src
└── hello.c
6 directories, 20 files$ cat debian/patches/series
000-prefix-usr.patch$ cat debian/patches/000-prefix-usr.patch
Description: set prefix=/usr patch
28
CHAPTER 4. 简单例子 4.8. 第三步(备选):修改上游源代码
Author: Osamu Aoki <[email protected]>Index: debhello-0.0/Makefile===================================================================--- debhello-0.0.orig/Makefile+++ debhello-0.0/Makefile@@ -1,4 +1,4 @@-prefix = /usr/local+prefix = /usr
all: src/hello
这里,上游源码树中的Makefile文件没有恢复到原始状态的必要。在第 4.7 节描述的 Debian打包过程中调用的 dpkg-source命令能够理解由 dquilt程序在 .pc/目录中记录的补丁应用情况。只要所有这些修改都是由 dquilt命令完成的,那么 Debian源码包就可以从经过修改的源码树中进行构建。
注意
如果 .pc/ 目录不存在,dpkg-source 命令就会假定没有应用任何补丁。这就是更为原始的补丁生成方法,例如第 4.8.1 节中未生成 .pc/ 目录的情况下要求将上游源码树进行恢复的原因。
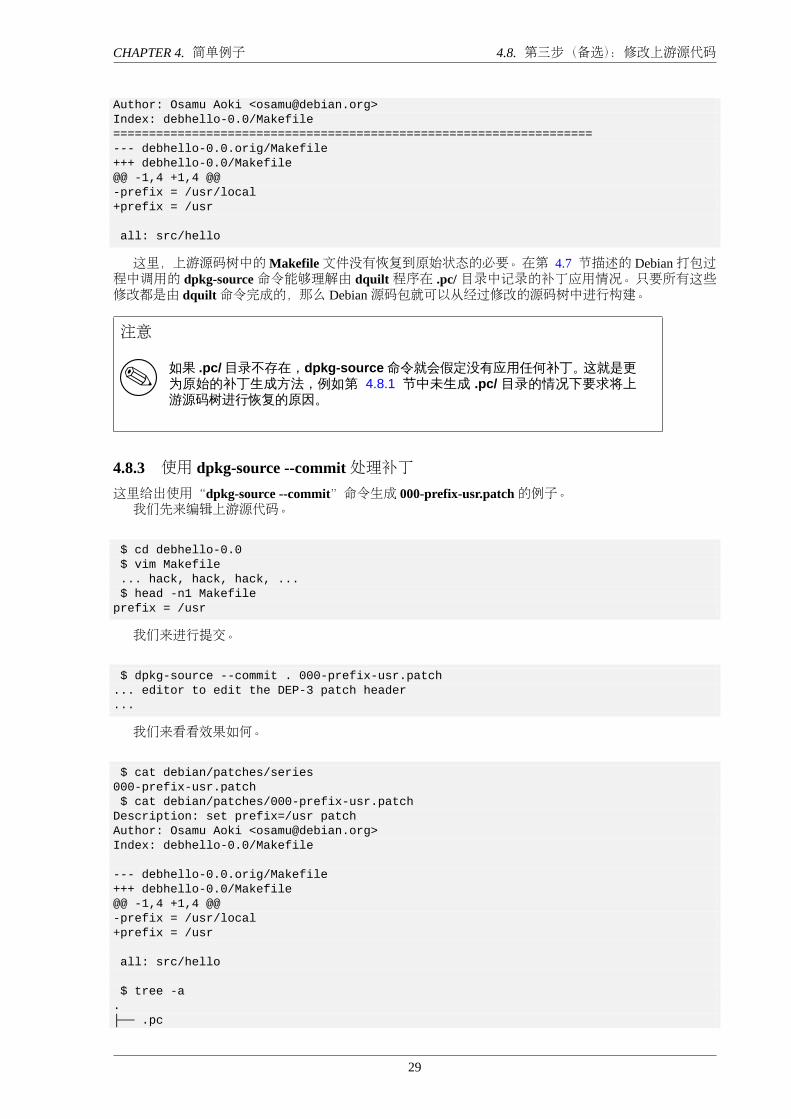
4.8.3 使用 dpkg-source --commit处理补丁这里给出使用“dpkg-source --commit”命令生成 000-prefix-usr.patch的例子。我们先来编辑上游源代码。
$ cd debhello-0.0$ vim Makefile... hack, hack, hack, ...$ head -n1 Makefile
prefix = /usr
我们来进行提交。
$ dpkg-source --commit . 000-prefix-usr.patch... editor to edit the DEP-3 patch header...
我们来看看效果如何。
$ cat debian/patches/series000-prefix-usr.patch$ cat debian/patches/000-prefix-usr.patch
Description: set prefix=/usr patchAuthor: Osamu Aoki <[email protected]>Index: debhello-0.0/Makefile
--- debhello-0.0.orig/Makefile+++ debhello-0.0/Makefile@@ -1,4 +1,4 @@-prefix = /usr/local+prefix = /usr
all: src/hello
$ tree -a.├── .pc
29

CHAPTER 4. 简单例子 4.8. 第三步(备选):修改上游源代码
│ ├── .quilt_patches│ ├── .quilt_series│ ├── .version│ ├── 000-prefix-usr.patch│ │ ├── .timestamp│ │ └── Makefile│ └── applied-patches├── LICENSE├── Makefile├── debian│ ├── README.Debian│ ├── changelog│ ├── compat│ ├── control│ ├── copyright│ ├── patches│ │ ├── 000-prefix-usr.patch│ │ └── series│ ├── rules│ ├── source│ │ ├── format│ │ └── local-options│ └── watch└── src
└── hello.c
6 directories, 20 files
这里,dpkg-source命令完成了与第 4.8.2 节一节中使用 dquilt命令完全相同的流程。
30
Chapter 5
基本内容
这里展示了 Debian打包工作中针对非本土软件包使用“3.0 (quilt)”格式进行打包所遵循基本规则的一个全局性概览。
注意
为简明起见,某些细节被有意跳过。请按需查阅对应命令的手册页,例如 dpkg-source(1)、dpkg-buildpackage(1)、dpkg(1)、dpkg-deb(1)、deb(5),等等。
Debian源码包是一组用于构建 Debian二进制软件包的输入文件,而非单个文件。Debian二进制软件包是一个特殊的档案文件,其中包含了一系列可安装的二进制数据及与它们相关的
信息。单个 Debian源码包可能根据 debian/control文件定义的内容产生多个 Debian二进制软件包。使用“3.0 (quilt)”格式的非本土 Debian软件包是最普通的 Debian源码包格式。
注意
有许多封装脚本可用。合理使用它们可以帮助您理顺工作流程,但是请确保您能理解它们内部的基本工作原理。
5.1 打包工作流
创建 Debian 二进制软件包的 Debian 打包工作流涉及创建数个特定名称的文件(参见第 5.2 节),与《Debian政策手册》的定义保持一致。
一个极其简化的 Debian打包工作流可以概括为以下五步。
1. 下载上游源码压缩包(tarball)并命名为 package-version.tar.gz文件。
2. 使上游提供的源码压缩包解压缩后的所有文件存储在 package-version/目录中。
3. 上游的源码压缩包被复制(或符号链接)至一个特定的文件名 packagename_version.orig.tar.gz。
• 分隔 package和 version的符号从 -(连字符)更改为 _(下划线)• 文件扩展名添加了 .orig部分。
4. Debian软件包规范文件将被添加至上游源代码中,存放在 package-version/debian/目录下。
• debian/*目录下的必需技术说明文件:debian/rules 构建 Debian软件包所需的可执行脚本(参见第 5.4 节)debian/control 软件包配置文件包含了源码包名称、源码构建依赖、二进制软件包名称、二进制软件包依赖,等等。(参见第 5.5 节)
31

CHAPTER 5. 基本内容 5.1. 打包工作流
debian/changelog Debian软件包历史文件,其中第一行定义了上游软件包版本号和 Debian修订版本号(参见第 5.6 节)
debian/copyright 版权和许可证摘要信息(参看第 5.7 节)• 在 debian/*下的可选配置文件(参见第 5.11 节):• 在 package-version/目录中调用 debmake命令将会提供这些配置文件的一套模板。
– 必备的配置文件总会生成,无论是否提供 -x0选项。– debmake命令永远不会覆写任何已经存在的配置文件。
• 这些文件必须手工编辑以达到理想状态。请使用《Debian政策手册》和《Debian开发者参考》作为编辑依据。
5. dpkg-buildpackage命令(通常由它的封装命令 debuild或 pdebuild所使用)会在 package-version/目录中被调用,进而以调用 debian/rules脚本的方式制作 Debian源码包和二进制软件包。
• 当前工作目录会被设为:$(CURDIR)=/path/to/package-version/• 使用 dpkg-source(1)以“3.0 (quilt)”格式创建 Debian源码包
– package_version.orig.tar.gz(package-version.tar.gz的副本或符号链接)– package_version-revision.debian.tar.xz(package-version/debian/*的 tar压缩包,即 tarball)– package_version-revision.dsc
• 使用“debian/rules build”构建源代码并安装到 $(DESTDIR)中– DESTDIR=debian/binarypackage/(单二进制包)– DESTDIR=debian/tmp/(多个二进制包)
• 使用 dpkg-deb(1)、dpkg-genbuildinfo(1)和 dpkg-genchanges(1)创建 Debian二进制软件包。– binarypackage_version-revision_arch.deb– ……(可能有多个 Debian二进制包文件。)– package_version-revision_arch.changes
6. 使用 lintian命令检查 Debian软件包的质量。(推荐)
• 遵守 ftp-master的拒绝(rejection)指导方针。– 软件包被拒绝常见问题解答(REJECT-FAQ)– 新软件包(NEW)检查清单– Lintian自动拒绝(autoreject)(lintian标签列表)
7. 使用debsign命令,用您的GPG私钥为 package_version-revision.dsc和 package_version-revision_arch.changes文件进行签名。
8. 使用 dput命令向 Debian仓库上传一套 Debian源码包和二进制软件包文件。
这里,请将文件名中对应的部分使用下面的方式进行替换:
• 将 package部分替换为 Debian源码包名称
• 将 binarypackage部分替换为 Debian二进制软件包名称
• 将 version部分替换为上游版本号
• 将 revision部分替换为 Debian修订号
• 将 arch部分替换为软件包对应架构
提示
有很多种通过实践摸索而得到的补丁管理方法和版本控制系统的使用策略与技巧。您没有必要将它们全部用上。
32
CHAPTER 5. 基本内容 5.2. 软件包名称和版本
提示
在“Debian 开发者参考”一文的 第 6 章最佳打包实践 部分有十分详尽的相关文档。请读一读这些内容。
5.1.1 debhelper软件包尽管 Debian软件包可以仅由编写 debian/rules脚本而不使用 debhelper软件包来生成,其实这样做是不切实际的。现代的 Debian“政策”对许多功能特性的实现做了要求,如应用适当的文件权限、使用合适的与硬件架构相关的软件库安装路径、安装脚本钩子的插入、调试符号软件包的生成、软件包依赖信息的生成、软件包信息文件的生成、对时间戳调节以符合可重现构建的要求,等等。
Debhelper软件包提供了一套实用脚本,用来简化 Debian打包工作流并减轻软件包维护者的负担。若能适当运用,它们可以帮助打包者自动地处理并实现 Debian”政策“所要求的功能。现代化的 Debian打包工作流可以组织成一个简单的模块化工作流,如下所示:
• 使用 dh命令以自动调用来自 debhelper软件包的许多实用脚本,以及
• 使用 debian/目录下的声明式配置文件配置它们的行为。
您几乎总是应当将 debhelper列为您的软件包的构建依赖之一。本文档在接下来的内容中也假设您正在使用一个版本足够新的 debhelper协助进行打包工作。
5.2 软件包名称和版本
如果所获取上游源代码的形式为 hello-0.9.12.tar.gz,您可以将 hello作为上游源代码名称,并将 0.9.12作为上游版本号。
debmake的目的是为软件包维护者提供开始工作的模板文件。注释行以 #开始,其中包含一些教程性文字。您在将软件包上传至 Debian仓库之前必须删除或者修改这样的注释行。许可证信息的提取和赋值过程应用了大量启发式操作,因此在某些情况下可能不会正常工作。强烈建
议您搭配使用其它工具,例如来自 devscripts软件包的 licensecheck工具,以配合 debmake的使用。组成 Debian软件包名称的字符选取存在一定的限制。最明显的限制应当是软件包名称中禁止出现大
写字母。这里给出正则表达式形式的规则总结:
• 上游软件包名称(-p):[-+.a-z0-9]{2,}
• 二进制软件包名称(-b):[-+.a-z0-9]{2,}
• 上游版本号(-u):[0-9][-+.:~a-z0-9A-Z]*
• Debian修订版本(-r):[0-9][+.~a-z0-9A-Z]*
请在《Debian政策手册》的第 5章 - Control文件及其字段一节中查看其精确定义。debmake所假设的打包情景是相对简单的。因此,所有与解释器相关的程序都会默认为“Architecture:
all”的情况。当然,这个假设并非总是成立。您必须为 Debian打包工作适当地调整软件包名称和上游版本号。为了能有效地使用一些流行的工具(如 aptitude)管理软件包名称和版本信息,最好能将软件包名称
保持在 30字符以下;版本号和修订号加起来最好能不超过 14个字符。1
为了避免命名冲突,对用户可见的二进制软件包名称不应选择任何常用的单词。如果上游没有使用像 2.30.32这样正常的版本编号方案,而是使用了诸如 11Apr29这样包含日期、某
些代号或者一个版本控制系统散列值等字符串作为版本号的一部分的话,请在上游版本号中将这些部分移除。这些信息可以稍后在 debian/changelog文件中进行记录。如果您需要为软件设计一个版本字符串,可以使用 YYYYMMDD格式,如 20110429的字符串作为上游版本号。这样能保证 dpkg命令在升级时能正确地确定版本的先后关系。如果您想要确保万一上游在未来重新采纳正常版本编号方案,例如 0.1时能够做到顺畅地迁移,可以另行使用 0~YYMMDD的格式,如 0~110429作为上游版本号。
1对九成以上的软件包来说,软件包名称都不会超过 24个字符;上游版本号通常不超过 10个字符,而 Debian修订版本号也通常不超过 3个字符。
33
CHAPTER 5. 基本内容 5.3. 本土 DEBIAN软件包
版本字符串可以按如下的方式使用 dpkg命令进行比较。
$ dpkg --compare-versions ver1 op ver2
版本比较的规则可以归纳如下:
• 字符串按照起始到末尾的顺序进行比较。
• 字符比数字大。
• 数字按照整数顺序进行比较。
• 字符按照 ASCII编码的顺序进行比较。
对于某些字符,如句点(.)、加号(+)和波浪号(~),有如下的特殊规则。
0.0 < 0.5 < 0.10 < 0.99 < 1 < 1.0~rc1 < 1.0 < 1.0+b1 < 1.0+nmu1 < 1.1 < 2.0
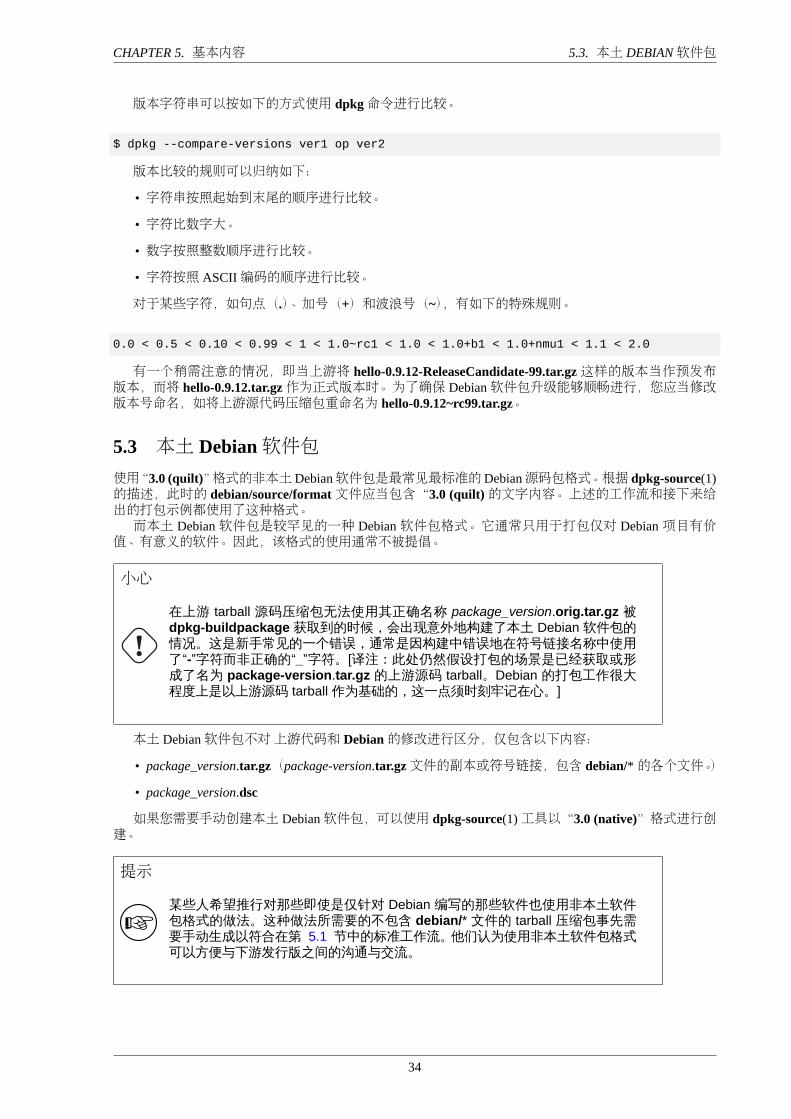
有一个稍需注意的情况,即当上游将 hello-0.9.12-ReleaseCandidate-99.tar.gz这样的版本当作预发布版本,而将 hello-0.9.12.tar.gz作为正式版本时。为了确保 Debian软件包升级能够顺畅进行,您应当修改版本号命名,如将上游源代码压缩包重命名为 hello-0.9.12~rc99.tar.gz。
5.3 本土 Debian软件包使用“3.0 (quilt)”格式的非本土Debian软件包是最常见最标准的Debian源码包格式。根据 dpkg-source(1)的描述,此时的 debian/source/format文件应当包含“3.0 (quilt)的文字内容。上述的工作流和接下来给出的打包示例都使用了这种格式。而本土 Debian软件包是较罕见的一种 Debian软件包格式。它通常只用于打包仅对 Debian项目有价
值、有意义的软件。因此,该格式的使用通常不被提倡。
小心
在上游 tarball 源码压缩包无法使用其正确名称 package_version.orig.tar.gz 被dpkg-buildpackage 获取到的时候,会出现意外地构建了本土 Debian 软件包的情况。这是新手常见的一个错误,通常是因构建中错误地在符号链接名称中使用了“-”字符而非正确的“_”字符。[译注:此处仍然假设打包的场景是已经获取或形成了名为 package-version.tar.gz 的上游源码 tarball。Debian 的打包工作很大程度上是以上游源码 tarball 作为基础的,这一点须时刻牢记在心。]
本土 Debian软件包不对上游代码和 Debian的修改进行区分,仅包含以下内容:
• package_version.tar.gz(package-version.tar.gz文件的副本或符号链接,包含 debian/*的各个文件。)
• package_version.dsc
如果您需要手动创建本土 Debian软件包,可以使用 dpkg-source(1)工具以“3.0 (native)”格式进行创建。
提示
某些人希望推行对那些即使是仅针对 Debian 编写的那些软件也使用非本土软件包格式的做法。这种做法所需要的不包含 debian/* 文件的 tarball 压缩包事先需要手动生成以符合在第 5.1 节中的标准工作流。他们认为使用非本土软件包格式可以方便与下游发行版之间的沟通与交流。
34
CHAPTER 5. 基本内容 5.4. DEBIAN/RULES
提示
如果使用本土软件包格式,没有必要事先创建 tarball 压缩包。要创建一个本土Debian 软件包,应当将 debian/source/format 文件的内容设置为“3.0 (native)”,适当编写 debian/changelog 文件使得版本号中不包含 Debian 修订号(例如,1.0 而非 1.0-1),最后在源码树中调用“dpkg-source -b .”命令。这样做便可以自动生成包含源代码的 tarball。
5.4 debian/rulesdebian/rules脚本是用于实际构建 Debian软件包的可执行脚本。
• debian/rules脚本重新封装了上游的构建系统(参见第 5.16 节)以达到将文件安装至 $(DESTDIR)并将生成的文件存入各个 deb格式文件中的目的。
– 这里的 deb文件用于二进制的文件分发,并将被 dpkg命令所使用以将软件安装至系统中。
• dh命令通常在 debian/rules脚本中使用,用作构建系统的一个前端。
• $(DESTDIR)路径具体值依赖于构建的类型。
– $(DESTDIR)=debian/binarypackage(单个二进制软件包)– $(DESTDIR)=debian/tmp(多个二进制软件包)
5.4.1 dh由 debhelper软件包提供的 dh命令与一些相关的软件包共同工作,作为典型的上游构建系统的一层封装,同时它支持所有 Debian政策(Debian Policy)规定必须在 debian/rules实现的目标(target),以此提供一个统一的访问接口。
• dh clean:清理源码树中的文件。
• dh build:在源码树中进行构建
• dh build-arch:在源码树中构建架构相关的软件包
• dh build-indep:在源代码中构建架构无关的软件包
• dh install:将二进制文件安装至 $(DESTDIR)
• dh install-arch:为架构相关的软件包将二进制文件安装至 $(DESTDIR)中
• dh install-indep:为架构无关的软件包将二进制文件安装进入 $(DESTDIR)中
• dh binary:产生 deb文件
• dh binary-arch:为架构相关的软件包产生 deb文件
• dh binary-indep:为架构无关的软件包产生 deb文件
注意
对使用了 debhelper“compat >=9”的情况,dh 命令将在编译参数未事先设置的情况下根据 dpkg-buildflags 命令返回的值设置并导出各个编译参数(如CFLAGS、CXXFLAGS、FFLAGS、CPPFLAGS 和 LDFLAGS)。(dh 命令将调用在 Debian::Debhelper::Dh_Lib 模块中定义的 set_buildflags。)
35

CHAPTER 5. 基本内容 5.4. DEBIAN/RULES
5.4.2 简单的 debian/rules受益于 dh命令对构建目标的抽象化 2,一个符合 Debian政策而支持所有必需目标(target)的 debian/rules文件可以简单地写成如下形式3:简单的 debian/rules:
#!/usr/bin/make -f#export DH_VERBOSE = 1
%:dh $@
从本质上来看,这里的 dh命令的作用是作为一个序列化工具,在合适的时候调用所有所需的 dh_*命令。
注意
debmake 命令会在 debian/control 文件中写入“Build-Depends: debhelper(>=9)”,并在 debian/compat 文件中写入“9”。
提示
设置“export DH_VERBOSE = 1”会输出构建系统中每一条会修改文件内容的命令。它同时会在某些构建系统中启用详细输出构建日志的选项。
5.4.3 自定义 debian/rules通过添加合适的 override_dh_*目标(target)并编写对应的规则,可以实现对 debian/rules脚本的灵活定制。如果需要在 dh命令调用某些特定的 dh_foo命令时采取某些特别的操作,则任何自动执行的操作均可
以被 debian/rules中额外添加的 override_dh_foo这样的Makefile目标所覆写。构建的过程可以使用某些上游提供的接口进行定制化,如使用传递给标准的源代码构建系统的参数。
这些构建系统包括但不限于:
• configure,
• Makefile,
• setup.py,或
• Build.PL。
在这种情况下,您应该添加一个 override_dh_auto_build目标并在其中执行“dh_auto_build --自定义参数”的命令。这样可以在 dh_auto_build默认传递的参数之后确保将用户给出的自定义参数继续传递给那些构建系统。
提示
如果上文提到的构建系统命令已知得到了 dh_auto_build 命令的支持的话,请避免直接调用这些命令(而让 dh_auto_build 自动处理)。
2这个简化形式在 debhelper软件包第七版或更新的版本中可用。本指南内容假设您在使用 debhelper第九版或更新的版本。3debmake命令会产生稍微复杂一些的 debian/rules文件。虽然如此,其核心结构没有什么变化。
36
CHAPTER 5. 基本内容 5.4. DEBIAN/RULES
debmake命令所创建的初始模版文件除了应用了上文提到的简单 debian/rules文件的优点外,同时为后续可能涉及的软件包加固等情景添加了一些额外的定制选项。您需要先了解整个构建系统背后的工作原理(参见第 5.16 节),之后才能收放自如地定制软件包来处理某些非常规的工作情况。
• 请参考第 4.6 节一节以了解如何对 debmake命令生成的 debian/rules文件模版进行定制。
• 请参见第 5.20 节以了解与 multiarch相关的定制方法。
• 请参见第 5.21 节以了解与软件包加固相关的定制方法。
5.4.4 debian/rules中的变量某些对自定义 debian/rules有用的变量定义可以在 /usr/share/dpkg/目录下的文件中找到。比较重要的包括:
pkg-info.mk DEB_SOURCE、DEB_VERSION、DEB_VERSION_EPOCH_UPSTREAM、DEB_VERSION_UPSTREAM_REVISION、DEB_VERSION_UPSTREAM和 DEB_DISTRIBUTION变量。它们在向后移植(backport)支持等场景下能起到一定的作用。
vendor.mk DEB_VENDOR和 DEB_PARENT_VENDOR变量,以及 dpkg_vendor_derives_from宏。它们在系统提供方的支持方面(Debian、Ubuntu等)有其特定用处。
architecture.mk 设置 DEB_HOST_*和 DEB_BUILD_*变量。除此之外存在一种替代方案,即直接调用dpkg-architecture来获取变量,一次调用查询得到一个变量值。如显式调用 dpkg-architecture以获取必需变量的话,便不再需要在 debian/rules中包含 architecture.mk了(后者会引入全部架构相关的变量)。
buildflags.mk 设置CFLAGS、CPPFLAGS、CXXFLAGS、OBJCFLAGS、OBJCXXFLAGS、GCJFLAGS、FFLAGS、FCFLAGS和 LDFLAGS这些构建标志(build flags)。
如果您希望在 debian/rules中使用其中的某些变量,您可以将相关的代码复制到 debian/rules文件中,或是重写一份简单的替代实现。总而言之请保持 debian/rules文件尽量简单。例如,您按如下的方法在 debian/rules 文件中添加内容,从而为 linux-any 目标架构添加额外的
CONFIGURE_FLAGS:
DEB_HOST_ARCH_OS ?= $(shell dpkg-architecture -qDEB_HOST_ARCH_OS)...
ifeq ($(DEB_HOST_ARCH_OS),linux)CONFIGURE_FLAGS += --enable-waylandendif
提示
历史上对于 debhelper 兼容等级小于等于 8 的情况下,在 debian/rules文件中包含 buildflags.mk 文件是很有用的,它可以合适地设置一些构建标志,如 CPPFLAGS、CFLAGS、LDFLAGS 等,同时保证对特定选项,如DEB_CFLAGS_MAINT_APPEND 和 DEB_BUILD_MAINT_OPTIONS 的合适处理。现在您应当使用的 debhelper 兼容等级大于等于 9,故如无特殊原因,请不要继续包含 buildflags.mk,请交由 dh 命令来处理和设置这些构建标志。
参见第 5.20 节、dpkg-architecture(1)和 dpkg-buildflags(1)。
5.4.5 可重现的构建
为了做到软件包可重现的构建,这里给出一些相关的建议。
• 不要嵌入基于系统时间的时间戳。
• 在 debian/rules中使用“dh $@”以应用最新的 debhelper特性。
37
CHAPTER 5. 基本内容 5.5. DEBIAN/CONTROL
• Export the build environment as“LC_ALL=C.UTF-8”(see第 7.15 节).
• 对上游源代码中使用的时间戳,使用 debhelper提供的环境变量 $SOURCE_DATE_EPOCH的值。
• 阅读可重现构建了解更多信息。
– 可重现构建操作方法。– 可重现构建时间戳处理提议。
由 dpkg-genbuildinfo(1)生成的控制文件 source-name_source-version_arch.buildinfo记录了构建环境信息。参见 deb-buildinfo(5)
5.5 debian/controldebian/control文件包含了由空行分隔的数块元信息数据。每块元数据按照如下的顺序定义了下面这些内容:
• Debian源码包的元信息数据
• Debian二进制软件包的元信息
参见《Debian政策手册》中的第 5章 - Control文件及其字段一章以了解每块元信息的具体定义。
5.5.1 Debian二进制软件包的拆分对行为良好的构建系统来说,对 Debian二进制包的拆分可以由如下方式实现。
• 为所有二进制软件包在 debian/control文件中创建对应的二进制软件包条目。
• 在对应的 debian/二进制软件包名.install文件中列出所有文件的路径(相对于 debian/tmp目录)。
请查看本指南中相关的例子:
• 第 8.11 节(基于 Autotools)
• 第 8.12 节(基于 CMake)
5.5.1.1 debmake -b
debmake命令的 -b选项提供了一个符合直觉又灵活的功能,可以用来创建 debian/control的初始模板文件,其中可以定义多个 Debian二进制软件包,每节中含有如下字段:
• Package:
• Architecture:
• Multi-Arch:
• Depends:
• Pre-Depends:
debmake命令也会在每个适当的依赖字段中设置合适的变量替换占位符(substvars)。我们在这里直接引用 debmake手册页中的相关一部分内容。
-b ”二进制软件包名 [:type],…”, --binaryspec ”二进制软件包名 [:type],…” 设置二进制软件包的指定类型内容,使用一个用逗号分隔的二进制软件包名:类型成对列表;例如,使用完整形式“foo:bin,foo-doc:doc,libfoo1:lib,libfoo-dev:dev”或者使用短形式,“-doc,libfoo1,libfoo-dev”。这里,二进制软件包是二进制软件包名称,可选的类型应当从下面的类型值中进行选取:
• bin:C/C++预编译 ELF二进制代码软件包(any,foreign)(默认,别名:””,即,空字符串)• data:数据(字体、图像、……)软件包(all,foreign)(别名:da)• dev:库开发软件包(any,same)(别名:de)• doc:文档软件包(all,foreign)(别名:do)
38
CHAPTER 5. 基本内容 5.5. DEBIAN/CONTROL
• lib:库软件包(any,same)(别名:l)• perl:Perl脚本软件包(all,foreign)(别名:pl)• python:Python脚本软件包(all,foreign)(别名:py)• python3:Python3脚本软件包(all,foreign)(别名:py3)• ruby:Ruby脚本软件包(all,foreign)(别名:rb)• script:Shell脚本软件包(all,foreign)(别名:sh)
括号内成对的值,例如(any,foreign),是软件包的架构和多架构(Multi-Arch)特性的值,它们将设置在 debian/control文件中。大多数情况下,debmake命令可以有效地从二进制软件包的名称猜测出正确的类型。如果类型的值并不明显,程序将回退到将类型设置为 bin。例如,libfoo设置类型为 lib,而 font-bar会令程序设置类型为 data,……如果源码树的内容和类型的设置不一致,debmake命令会发出警告。
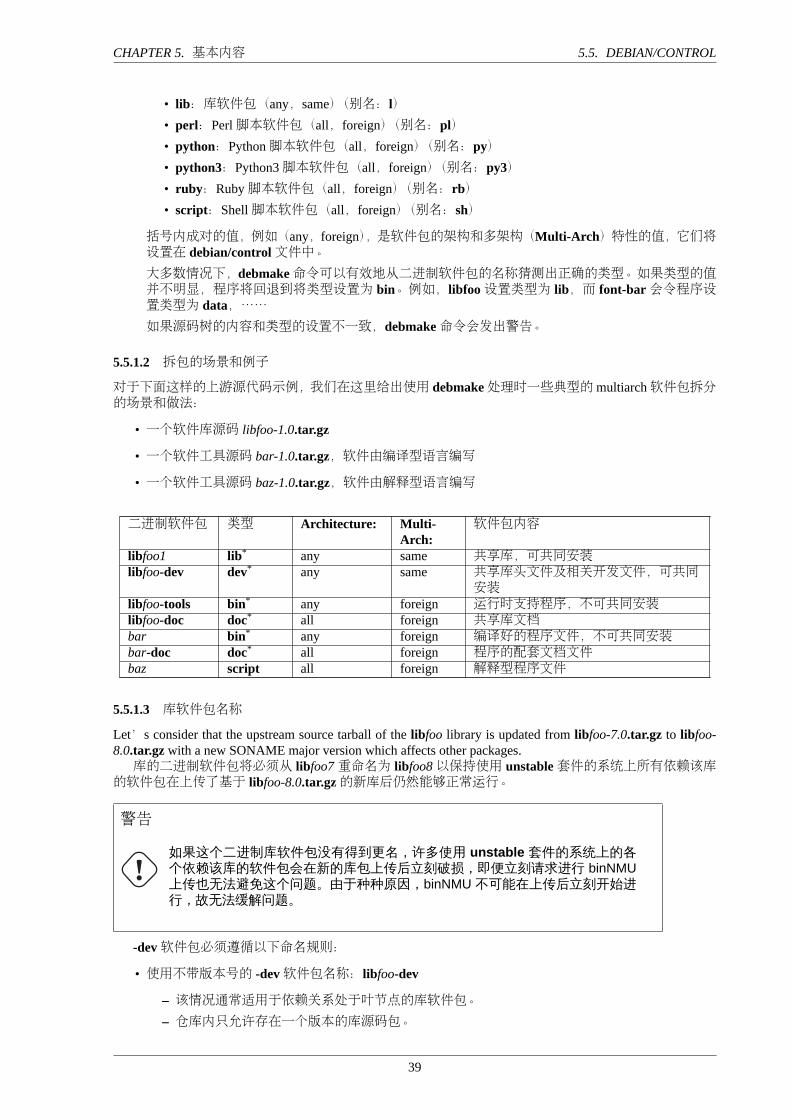
5.5.1.2 拆包的场景和例子
对于下面这样的上游源代码示例,我们在这里给出使用 debmake处理时一些典型的multiarch软件包拆分的场景和做法:
• 一个软件库源码 libfoo-1.0.tar.gz
• 一个软件工具源码 bar-1.0.tar.gz,软件由编译型语言编写
• 一个软件工具源码 baz-1.0.tar.gz,软件由解释型语言编写
二进制软件包 类型 Architecture: Multi-Arch:
软件包内容
libfoo1 lib* any same 共享库,可共同安装libfoo-dev dev* any same 共享库头文件及相关开发文件,可共同
安装libfoo-tools bin* any foreign 运行时支持程序,不可共同安装libfoo-doc doc* all foreign 共享库文档bar bin* any foreign 编译好的程序文件,不可共同安装bar-doc doc* all foreign 程序的配套文档文件baz script all foreign 解释型程序文件
5.5.1.3 库软件包名称
Let’s consider that the upstream source tarball of the libfoo library is updated from libfoo-7.0.tar.gz to libfoo-8.0.tar.gz with a new SONAME major version which affects other packages.库的二进制软件包将必须从 libfoo7重命名为 libfoo8以保持使用 unstable套件的系统上所有依赖该库
的软件包在上传了基于 libfoo-8.0.tar.gz的新库后仍然能够正常运行。
警告
如果这个二进制库软件包没有得到更名,许多使用 unstable 套件的系统上的各个依赖该库的软件包会在新的库包上传后立刻破损,即便立刻请求进行 binNMU上传也无法避免这个问题。由于种种原因,binNMU 不可能在上传后立刻开始进行,故无法缓解问题。
-dev软件包必须遵循以下命名规则:
• 使用不带版本号的 -dev软件包名称:libfoo-dev
– 该情况通常适用于依赖关系处于叶节点的库软件包。– 仓库内只允许存在一个版本的库源码包。
39
CHAPTER 5. 基本内容 5.5. DEBIAN/CONTROL
* 其相关联的库软件包在库变迁进行时需要从 libfoo7重命名为 libfoo8以避免 unstable仓库内依赖关系的破坏。
– 该方法适用于简单 binNMU可以快速解决所有受影响软件包对该库依赖的情况下。(ABI有变化,过时的 API被移除而常用、活跃的 API未变化。)
– 该方法有时也能适用于可协调进行手动的代码更新,影响范围限定在有限的一些软件包中的情况下。(API有变化)
• 使用带版本的 -dev软件包名称:libfoo7-dev和 libfoo8-dev
– 该情况通常适用于各类重要库软件包。– 两个版本的库源码包可同时出现在发行版仓库中。
* 令所有依赖该库的软件包依赖 libfoo-dev。
* 令 libfoo7-dev和 libfoo8-dev两者都提供 libfoo-dev。
* 源码包需要从 libfoo-?.0.tar.gz相应地重命名为 libfoo7-7.0.tar.gz和 libfoo8-8.0.tar.gz。
* 需要仔细选择 libfoo7和 libfoo8软件包文件安装时的路径,如头文件等等,以保证它们可以同时安装。
– 可能的话,不要使用这个重量级的、需要大量人为干预的方法。– 该方法适用于存在多个依赖该库的软件包,且升级时常常涉及手动代码更新的场景。(API有变化)否则,受影响的软件包会无法从源码重新构建并导致对发行而言致命的 bug出现。
提示
如果包内数据文件编码方案有所变化(如,从 latin1 变为 utf-8),该场景应比照API 变化做类似的考虑与处理。
参见第 5.18 节。
5.5.2 Substvardebian/control也定义了软件包的依赖关系,其中变量替换机制(substvar)的功能可以用来将软件包维护者从跟踪(大多数简单的)软件包依赖的重复劳动中解放出来。请参见 deb-substvars(5)。
debmake命令支持下列变量替换指令:
• ${misc:Depends},可用于所有二进制软件包
• ${misc:Pre-Depends},可用于所有 multiarch软件包
• ${shlibs:Depends},可用于所有含有二进制可执行文件或库的软件包
• ${python:Depends},可用于所有 Python软件包
• ${python3:Depends},可用于所有 Python3软件包
• ${perl:Depends},用于所有 Perl软件包
• ${ruby:Depends},用于所有 Ruby软件包
For the shared library, required libraries found simply by ”objdump -p /path/to/program | grep NEEDED” arecovered by the shlib substvar.对于 Python和其它解释器来说,所需的模块通常由对包含类似“import”、“use”、“require”等等关
键字的行进行解析,并会体现在各自对应的变量替换占位符所在位置上。对其它没有部署属于自己范畴内的变量替换机制的情况,misc变量替换占位符通常用来覆盖对应的
依赖替换需求。对 POSIX shell程序来说,并没有简单的办法来验证其依赖关系,substvar的变量替换也无法自动得出
它们的依赖。对使用动态加载机制,包括 GObject introspection机制的库和模块来说,现在没有简单的方法可以检查
依赖关系,变量替换机制也无法自动推导出所需的依赖。
40
CHAPTER 5. 基本内容 5.6. DEBIAN/CHANGELOG
5.5.3 binNMU安全一个 binNMU(二进制非维护者上传) 是为库迁移或其它目的所作的非维护者软件包上传。在一次binNMU上传中,只有“Architecture: any”的软件包会被重构建,其版本号会在末尾附加一个编号(例如,原来版本为 2.3.4-3,新上传的包版本会变成 2.3.4-3+b1)。所有“Architecture: all”的包将不会重新构建。来自同一个源码包的各个二进制包如果在 debian/control文件中有互相的依赖关系,这些二进制包通
常情况下应当对 binNMU是安全的(即,进行 binNMU不会破坏依赖关系)。然而,在“Architecture:any”和“Architecture: all”的软件包同时由同一源码包产出,且互相之间有依赖关系时,需要小心对待所依赖的版本,必要时应做出调整。
•“Architecture: any”的软件包依赖于“Architecture: any”foo软件包
– Depends: foo (= ${binary:Version})
•“Architecture: any”的软件包依赖于“Architecture: all”bar软件包
– Depends: bar (= ${source:Version}
•“Architecture: all”的软件包依赖于“Architecture: any”baz软件包
– Depends: baz (>= ${source:Version}), baz (<< ${source:Upstream-Version}.0~)
5.6 debian/changelogdebian/changelog文件记录了 Debian软件包的历史并在其第一行定义了上游软件包的版本和 Debian修订版本。所有改变的内容应当以明确、正式而简明的语言风格进行记录。
• 即便您在自己独立进行软件包上传,您也必须记录所有较重要、用户可见的变更,例如:
– 安全相关的漏洞修复。– 用户界面变动。
• 如果您需要他人协助您进行上传,您应当更详尽地记录变更内容,包括所有打包相关的变动,从而方便他人对您的软件包进行审查。
– 协助上传的人员不应该也通常不会猜测您没有写出来的想法,所以请认真书写变更信息。– 通常来说,协助您上传的人的时间比您的时间更宝贵。
debmake命令会创建初始的模板文件,其中带有上游软件包版本和 Debian打包修订编号。发行版部分被设置为 UNRELEASED以避免半成品不小心被上传进入 Debian仓库。通常使用 debchange命令(它具有一个别名,即 dch)对其进行编辑。
提示
您也可以手动使用任何文本编辑器修改 debian/changelog 文件,只要您能够遵循 debchange 命令所使用的特定文本排版格式即可。
提示
debian/changelog 文件使用的日期字符串可以使用“LC_ALL=C date -R”命令手动生成。
该文件将由dh_installchangelogs命令安装到 /usr/share/doc/binarypackage目录,文件名为 changelog.Debian.gz。上游的变更日志则会安装至 /usr/share/doc/binarypackage目录中,文件名为 changelog.gz。
41
CHAPTER 5. 基本内容 5.7. DEBIAN/COPYRIGHT
上游的变更日志是由 dh_installchangelogs程序自动进行搜索和处理的;它会使用大小写不敏感的搜索方式寻找上游代码中特定名称的文件,如 changelog、changes、changelog.txt、changes.txt、history、history.txt或 changelog.md。除了根目录,程序还会在 doc/目录和 docs/目录内进行搜索。当您完成了主要打包工作并验证了其质量之后,请考虑运行“dch -r”命令并将最终完成的 de-
bian/changelog文件中发行版(distribution)部分进行设置,通常该字段应当使用 unstable。4如果您的打包是一次向后移植(backports)、是安全更新或是对长期支持版的上传等等其它情况,请使用相应合适的发行版名称。
5.7 debian/copyrightDebian以十分严肃的态度对待版权和许可证信息。《Debian政策手册》强制规定软件包的 debian/copyright文件中需要提供相关信息的摘要。您应当按照机器可解析的 debian/copyright文件(DEP-5)对其进行排版。
小心
这里的 debian/copyright 文件中描述的许可证信息匹配信息应当合适地进行排序,以确保越宽泛的文件匹配越靠前。请参见第 6.4 节。
debmake命令会以扫描整个源码树的方式创建初步的、兼容 DEP-5的模板文件。它会内部调用许可证检查工具来对许可证文本进行分类。5
除非明确指定(有些严格过头的)-P选项,debmake命令会为了实用性而跳过对自动生成的文件的检查与报告,默认它们采用宽松的许可证。
注意
如果您发现了这个许可证检查工具存在一些问题,请向 debmake 软件包提交缺陷报告并提供包含出现问题的许可证和版权信息在内的相关文本内容。
注意
debmake 命令专注于在创建 debian/copyright 模板时聚合相同的授权和许可证信息并收录其详细内容。为了在有限的时间内尽可能完成工作,工具将只会提取文件中第一块看起来像授权文本或许可证声明的部分。因此,生成的许可证信息可能并不完美。请同时考虑使用其它工具,如 licensecheck 辅助进行检查。
提示
我们强烈推荐您使用 licensecheck(1) 命令再次检查源码许可证的状态,并在有必要的情况下进行人工代码审查。
4如果您在使用 vim编辑器,请确保使用“:wq”命令对内容进行保存。5程序以前会在内部调用来自 devscripts软件包的 licensecheck命令来进行检查。现在的 licensecheck命令由独立的 licensecheck
软件包所提供,相较从前的实现也有了较大的改进。
42
CHAPTER 5. 基本内容 5.8. DEBIAN/PATCHES/*
5.8 debian/patches/*在构建过程开始之前,debian/patches/目录内的 -p1等级的补丁将会按照在 debian/patches/series文件中指定的顺序依次应用于上游代码树中。
注意
本土 Debian 软件包(参见第 5.3 节)将不使用这些文件。
要准备这一系列 -p1等级的补丁,有几种不同的方式可供您选择。
• diff命令
– 参见第 4.8.1 节– 原始但万能的方法
* 补丁的来源多种多样,它可以来自其它发行版、邮件列表中的帖文或是来自上游 git仓库的拣选补丁,由“git format-patches”生成
– 不涉及 .pc/目录的问题– 不修改上游源代码树– 手工更新 debian/patches/series文件
• dquilt命令
– 参见第 3.4 节– 基本的便利方案– 会以合适方式生成 .pc/目录及其中的数据– 会修改上游源代码树
•“dpkg-source --commit”命令
– 参见第 4.8.3 节– 更新、更优雅一些的方案– 会以合适方式生成 .pc/目录及其中的数据– 会修改上游源代码树
• 由 dpkg-buildpackage自动生成补丁
– 参见第 5.14 节– 在 debian/source/local-options文件中添加 single-debian-patch这一行– 设置 debian/source/local-patch-header文件– 不涉及 .pc/目录的问题– 在 Debian分支中(常见为 master分支)存储经过修改的上游源代码树
• gbp-pq命令
– 配合 git-buildpackage工具的基本 git工作流– 不涉及 .pc/目录的问题– 在可丢弃分支上保存经过修改的上游源码树(patch-queue/master)– 在 Debian分支中(常见为 master分支)存储未经修改的源码树
• gbp-dpm命令
– 配合 git-dpm软件包的更细致的 git工作流– 不涉及 .pc/目录的问题
43
CHAPTER 5. 基本内容 5.9. DEBIAN/UPSTREAM/SIGNING-KEY.ASC
– 在补丁分支中(通常命名为 patched/随便啥名字)存储经过修改的上游源码树– 在 Debian分支中(通常命名为 master/随便啥名字)存储未经修改的上游源码树
无论这些补丁的来源如何,都建议使用兼容于 DEP-3的头部信息对其进行标记。
提示
dgit 软件包提供了另外一套直接使用 git 集成操作 Debian 软件包仓库的工具。
5.8.1 dpkg-source -x“dpkg-source -x”命令可以对 Debian源码包进行解压缩。
该命令通常会将 debian/patches/目录内的补丁应用在源码树中,并将补丁状态记录在 .pc/目录中。如果您想保持源码树不做修改(例如,为了在第 5.13 节中继续使用),请在命令行中使用 --skip-patches
选项。
5.8.2 dquilt和 dpkg-source在 dpkg-source工具 1.16.1版本之前,该工具还未提供 --commit选项对应的功能,此时需要 quilt命令(或者对它的封装,dquilt命令)来管理 debian/patches/目录中的 -p1等级的补丁。
在使用 dpkg-source命令时,补丁应当能够干净地进行应用。因此在补丁行数出现偏移或者其它情况出现时,您不能直接将旧补丁原封不动地复制到新版上游发布对应打包版本的目录中。与此相对的是 dquilt命令(参见第 3.4 节)对补丁的处理更加宽容。您可以调用 dquilt命令对补丁进
行正常化。
$ while dquilt push; do dquilt refresh ; done$ dquilt pop -a
使用 dpkg-source 命令比起使用 dquilt 命令来说存在一大优势:dquilt 命令无法自动处理二进制文件出现变更的情况,而 dpkg-source 命令能够探测出现内容变动的二进制文件,并将其列入debian/source/include-binaries文件以便在 Debian打包用压缩包中将文件囊括其中。
5.9 debian/upstream/signing-key.asc某些软件包由 GPG密钥进行了签名。例如,GNU hello可使用 HTTP协议从 https://ftp.gnu.org/gnu/hello/下载。它含有以下文件:
• hello-version.tar.gz(上游源代码)
• hello-version.tar.gz.sig(分离的签名)nature)
我们现在来选择最新的版本套装。
$ wget https://ftp.gnu.org/gnu/hello/hello-2.9.tar.gz...
$ wget https://ftp.gnu.org/gnu/hello/hello-2.9.tar.gz.sig...
$ gpg --verify hello-2.9.tar.gz.siggpg: Signature made Thu 10 Oct 2013 08:49:23 AM JST using DSA key ID 80EE4A00gpg: Can't check signature: public key not found
如果您从邮件列表获知上游维护者所使用的 GPG 公钥信息,请将它作为 debian/upstream/signing-key.asc文件进行存储。否则,请使用 hkp公钥服务器并经由您的信任网进行验证。
44
CHAPTER 5. 基本内容 5.10. DEBIAN/WATCH和 DFSG
$ gpg --keyserver hkp://keys.gnupg.net --recv-key 80EE4A00gpg: requesting key 80EE4A00 from hkp server keys.gnupg.netgpg: key 80EE4A00: public key "Reuben Thomas <[email protected]>" importedgpg: no ultimately trusted keys foundgpg: Total number processed: 1gpg: imported: 1$ gpg --verify hello-2.9.tar.gz.siggpg: Signature made Thu 10 Oct 2013 08:49:23 AM JST using DSA key ID 80EE4A00gpg: Good signature from "Reuben Thomas <[email protected]>"...
Primary key fingerprint: 9297 8852 A62F A5E2 85B2 A174 6808 9F73 80EE 4A00
提示
如 果 您 的 网 络 环 境 阻 挡 了 对 HKP 11371 端 口 的 访 问, 请 考 虑 使 用“hkp://keyserver.ubuntu.com:80”。
在确认密钥身份 80EE4A00值得信任之后,应当下载其公钥并将其保存在 debian/upstream/signing-key.asc文件中。
$ gpg --armor --export 80EE4A00 >debian/upstream/signing-key.asc
之后,应相应地在 debian/watch文件中做如下的修改。
version=4pgpsigurlmangle=s/$/.sig/ https://ftp.gnu.org/gnu/hello/ hello-(\d[\d.]*)\.tar ←↩
\.(?:gz|bz2|xz)
现在 uscan命令会在扫描时自动使用 GPG签名验证上游源码包的真实性。
5.10 debian/watch和 DFSGDebian严肃地对待软件自由,遵循 Debian自由软件指导方针(DFSG)。在使用 uscan命令来更新 Debian打包所用代码时,上游源码包(tarball)中不符合Debian自由软件指
导方针(DFSG)的部分可以利用该工具简单地进行移除。
• 在 debian/copyright文件中的 Files-Excluded一节中列出需要移除的文件。
• 在 debian/watch文件中列出下载上游源码包(tarball)所使用的 URL。
• 运行 uscan命令以下载新的上游源码包(tarball)。
– 作为替代方案,您也可以使用“gbp import-orig --uscan --pristine-tar”命令。
• 最后得到 tarball的版本编号会附加一个额外的后缀 +dfsg。
5.11 其它 debian/*文件另外也可以添加一些可选的配置文件并放入 debian/目录。它们大多用于控制由 debhelper软件包提供的dh_*命令的行为,但也有一些文件会影响 dpkg-source、lintian和 gbp这些命令。
提示
请检查 debhelper(7) 的内容以了解当前可用的 dh_* 命令列表。
45
CHAPTER 5. 基本内容 5.11. 其它 DEBIAN/*文件
这些 debian/binarypackage.*的文件提供了设置文件安装路径的强大功能。即使上游源代码没有构建系统,这个软件依然可以利用这里提到的这些文件来进行打包。请参考第 8.2 节的示例。下面列表中出现的“-x[1234]”上标指示了 debmake -x选项生成对应模板文件所需要的最小值。请参
考 debmake(1)以了解详情。下面按照字母表顺序列出一些值得注意的可选配置文件。
binarypackage.bug-control -x3 将安装至 binarypackage软件包的 usr/share/bug/binarypackage/control位置。另请参考第 5.24 节。
binarypackage.bug-presubj -x3 将安装至 binarypackage 软件包的 usr/share/bug/binarypackage/presubj 位置。另请参考第 5.24 节。
binarypackage.bug-script -x3 将安装至 binarypackage软件包的usr/share/bug/binarypackage orusr/share/bug/binarypackage/script位置。另请参考第 5.24 节。
binarypackage.bash-completion 列出需要安装的 bash补全脚本。
需要在构建环境和用户环境内均安装 bash-completion软件包。
另请参考 dh_bash-completion(1)。
clean -x2 列出(构建前)未被 dh_auto_clean命令清理,且需要手工清理的文件。另请参考 dh_auto_clean(1)和 dh_clean(1)。
compat -x1 设置 debhelper兼容等级(当前为“9”)。另请参考 debhelper(8)中“COMPATIBILITY LEVELS”一节。
binarypackage.conffile 如果兼容等级大于 3(“compat >= 3”),您没有创建该文件的必要,因为所有 etc/目录下的文件都是配置文件(conffiles)。如果您正要打包的程序要求每个用户都对 /etc目录下的配置文件进行修改,可以采取两种常见办法使其不作为 conffile配置文件出现,避免 dpkg命令处理软件包时给出不必要的处理选项。
• 在 /etc目录下创建一个符号链接,指向 /var目录下的某些文件;实际存在的文件则使用维护者脚本(maintainer script)予以创建。
• 使用维护者脚本(maintainer script)在 /etc目录下创建并维护配置所需的文件。
另请参考 dh_installdeb(1)。
binarypackage.config 这是 debconf config脚本,用来在配置软件包时向用户询问任何必需的问题。另请参见第 5.19 节。
binarypackage.cron.hourly -x3 安装至 binarypackage包内的 etc/cron/hourly/binarypackage文件。另请参见 dh_installcron(1)和 cron(8)。
binarypackage.cron.daily -x3 安装至 binarypackage包内的 etc/cron/daily/binarypackage文件。另请参见 dh_installcron(1)和 cron(8)。
binarypackage.cron.weekly -x3 安装至 binarypackage包内的 etc/cron/weekly/binarypackage文件。另请参见 dh_installcron(1)和 cron(8)。
binarypackage.cron.monthly -x3 安装至 binarypackage包内的 etc/cron/monthly/binarypackage文件。另请参见 dh_installcron(1)和 cron(8)。
binarypackage.cron.d -x3 安装至 binarypackage包内的 etc/cron.d/binarypackage文件。参见 dh_installcron(1)、cron(8)和 crontab(5)。
binarypackage.default -x3 若该文件存在,它将被安装至 binarypackage包中的 etc/default/binarypackage位置。
参见 dh_installinit(1)。
binarypackage.dirs -x3 列出 binarypackage包中要创建的目录。参见 dh_installdirs(1)。通常情况下您并不需要这么做,因为所有的 dh_install*命令都会自动创建所需的目录。请仅在遇到问题时考虑使用这一工具。
46
CHAPTER 5. 基本内容 5.11. 其它 DEBIAN/*文件
binarypackage.doc-base -x2 作为 binarypackage包中的 doc-base控制文件进行安装。参见 dh_installdocs(1)和 doc-base软件包提供的 Debian doc-base手册。
binarypackage.docs -x2 列出要安装在 binarypackage包中的文档文件。参见 dh_installdocs(1)。
binarypackage.emacsen-compat -x3 安装至 binarypackage包中的usr/lib/emacsen-common/packages/compat/binarypackage文件。
参见 dh_installemacsen(1)。
binarypackage.emacsen-install -x3 安装至 binarypackage包中的usr/lib/emacsen-common/packages/install/binarypackage文件。
参见 dh_installemacsen(1)。
binarypackage.emacsen-remove -x3 安装至 binarypackage包中的usr/lib/emacsen-common/packages/remove/binarypackage文件。
参见 dh_installemacsen(1)。
binarypackage.emacsen-startup -x3 安装至 binarypackage包中的usr/lib/emacsen-common/packages/startup/binarypackage文件。
参见 dh_installemacsen(1)。
binarypackage.examples -x2 列出要安装至 binarypackage包中 usr/share/doc/binarypackage/examples/位置下的示例文件或目录。
参见 dh_installexamples(1)。
gbp.conf 如果该文件存在,它将作为 gbp命令的配置文件发挥作用。参见 gbp.conf(5)、gbp(1)和 git-buildpackage(1)。
binarypackage.info -x2 列出要安装至 binarypackage包中的 info文件。参见 dh_installinfo(1)。
binarypackage.init -x3 安装至 binarypackage包中的 etc/init.d/binarypackage文件。参见 dh_installinit(1)。
binarypackage.install -x2 列出未被 dh_auto_install命令安装的其它应当安装的文件。参见 dh_install(1)和 dh_auto_install(1)。
license-examples/* -x4 这是 debmake命令生成的版权声明文件示例,请用它们作为 debian/copyright文件的参考。
请在最终工作成果中删除这些文件。
binarypackage.links -x2 列出要生成符号链接的源文件和目标文件对。每一对链接均应在单独的一行中列出,源文件和目标文件之间使用空白字符分隔。
参见 dh_link(1)。
binarypackage.lintian-overrides -x3 安装至软件包构建目录的 usr/share/lintian/overrides/binarypackage位置。该文件用于消除 lintian错误生成的诊断信息。参见 dh_lintian(1)、lintian(1)和 Lintian用户手册。
manpage.* -x3 这些文件是 debmake命令生成的 man手册页模板文件。请将其重命名为合适的文件名并更新其内容。
Debian的政策要求软件包为其包含的每个程序、工具和函数同时提供一份相关的手册页。手册页使用 nroff(1)语法写成。如果您不熟悉如何编写用户手册页,请以 manpage.asciidoc或 manpage.1为起点。
binarypackage.manpages -x2 列出要安装的 man手册页。参见 dh_installman(1)。
47
CHAPTER 5. 基本内容 5.11. 其它 DEBIAN/*文件
binarypackage.menu(已过时,不再安装) tech-ctte #741573 决定“Debian 应该在合适的情况下使用.desktop文件”。安装至 binarypackage包中的 usr/share/menu/binarypackage Debian菜单文件。参见 menufile(5)以了解其格式。另请参见 dh_installmenu(1)。
NEWS 安装至 usr/share/doc/binarypackage/NEWS.Debian文件。参见 dh_installchangelogs(1)。
patches/* 这是 -p1补丁文件的集合,它们将在使用源代码构建之前应用在上游源码上。参见 dpkg-source(1)、第 3.4 节和第 4.8 节。debmake默认不会生成补丁文件。
patches/series -x1 patches/*补丁文件的应用顺序。
binarypackage.preinst -x2, binarypackage.postinst -x2, binarypackage.prerm -x2, binarypackage.postrm -x2 这些维护者脚本将安装至软件包的 DEBIAN目录下。在这些脚本中,#DEBHELPER#记号将由其它 debhelper命令进行处理,将其替换为相应的 shell脚本片段。
参考《Debian政策手册》的 dh_installdeb(1)和第六章 -软件包维护脚本和安装过程一节。参考《Debian政策手册》的 debconf-devel(7)和 3.9.1维护者脚本中的用户交互提示一节。
README.Debian -x1 安装至debian/control文件列出的第一个二进制软件包中的usr/share/doc/binarypackage/README.Debian位置。
参见 dh_installdocs(1)。该文件提供了针对该 Debian软件包的信息。
binarypackage.service -x3 如果该文件存在,它将被安装到 binarypackage包下面的 lib/systemd/system/binarypackage.service位置。
参见 dh_systemd_enable(1)、dh_systemd_start(1)和 dh_installinit(1)。
source/format -x1 Debian软件包格式。
• 使用“3.0 (quilt)”以制作这个非本土软件包(推荐)• 使用“3.0 (native)”以制作这个本土软件包
参见 dpkg-source(1)的“源码包格式”一节。
source/lintian-overrides或 source.lintian-overrides -x3 这些文件不会最终被安装,但 lintian会对它们进行扫描以提供源码包的 override信息。另请参考 dh_lintian(1)和 lintian(1)。
source/local-options -x1 dpkg-source命令使用此内容作为它的选项,比较重要的选项有:
• unapply-patches• abort-on-upstream-changes• auto-commit• single-debian-patch
该文件不会包含在生成的源码包中,仅对维护者在版本控制系统中维护软件包有意义。
参见 dpkg-source(1)中的“文件格式”一节。
source/local-patch-header 自由格式的文本,将被包含在自动生成补丁的顶部。该文件不会包含在生成的源码包中,仅对维护者在版本控制系统中维护软件包有意义。
+参见 dpkg-source(1)的“文件格式”一节。
binarypackage.symbols -x2 这些符号文件如果存在,将交由 dpkg-gensymbols命令进行处理和安装。参见 dh_makeshlibs(1)和第 5.18.1 节。
48

CHAPTER 5. 基本内容 5.12. DEBIAN打包的定制化
binarypackage.templates 这是 debconf模板文件,用于在安装过程中向用户询问必需的问题以正确配置软件包。请参阅第 5.19 节。
tests/control 这是一个 RFC822格式的测试元数据文件,定义在 DEP-8。参见 autopkgtest(1)和第 5.22 节。
TODO 安装至debian/control文件列出的第一个二进制包中的usr/share/doc/binarypackage/TODO.Debian文件。
参见 dh_installdocs(1)。
binarypackage.tmpfile -x3 如果该文件存在,它将被安装至 binarypackage包中的usr/lib/tmpfiles.d/binarypackage.conf文件。
参见 dh_systemd_enable(1)、dh_systemd_start(1)和 dh_installinit(1)。
binarypackage.upstart -x3 如果该文件存在,它将被安装至软件包构建目录的 etc/init/package.conf位置。(已弃用)
参见 dh_installinit(1)和第 8.1 节。
watch -x1 用于下载最新上游版本的 uscan命令的控制文件。该控制文件也可配置以使用其 GPG签名自动验证上游 tarball的真实性(参见第 5.9 节)。参见第 5.10 节和 uscan(1)。
这里给出针对上面列表中信息的一些额外提醒。
• 对只生成一个二进制包的情况,列表文件名中的 binarypackage. 这一部分可以不出现。
• 对有多个二进制包的源码包,一个缺少文件名里 binarypackage. 部分的配置文件,会被应用于debian/control里列出的第一个二进制包。
• 在生成多个二进制包的情况下,各个二进制包可以分别指定配置文件;只需在其对应配置文件的文件名之前加上它们各自对应的包名即可,如 package-1.install、package-2.install等等。
• debmake可能没有自动生成某些模板配置文件。如遇到这种情况,您可以使用文本编辑器手动创建缺失的文件。
• debmake命令生成的带额外 .ex后缀名的配置文件必须在移除这个多余后缀名后才能发挥作用。
• 您应当删除 .ex命令生成但对您无用的配置模板文件。
• 请按需复制配置模板文件以匹配其对应的二进制包名称以及您的需求。
5.12 Debian打包的定制化我们来重新归纳一下 Debian打包定制化的相关内容。所有对 Debian软件包进行定制化的数据都存在于 debian/目录中。我们在第 4.6 节这里给出了一个
简单的例子。通常情况下,定制化会涉及以下各个项目:
• Debian软件包构建系统可以经由 debian/rules文件进行定制(参见第 5.4.3 节)。
• 可以使用额外的配置文件(如 debian/ directory目录下的 package.install和 package.docs文件)以配合来自 debhelper软件包的 dh_*命令自定义 Debian软件包文件的安装路径等信息(请参见第 5.11 节)。
如果以上提到的手段仍然不足以制作满足要求的 Debian软件包的话,对上游源代码的修改应当使用-p1补丁文件存放在打包源码树 debian/patches/目录下。这些补丁将按照 debian/patches/series文件所规定的顺序在构建软件包之前应用(参见第 5.8 节)。第 4.8 节这里给出了一些简单的例子。您应当以引入最少修改的方式解决打包中出现的根本问题。所生成的软件包应当考虑到未来的更新需
求并有一定的健壮性。
49
CHAPTER 5. 基本内容 5.13. 在版本控制系统中进行记录(标准)
注意
如果补丁对上游有所帮助的话,也请将解决根本问题的补丁反馈给上游作者和维护者。
5.13 在版本控制系统中进行记录(标准)
通常情况下,Debian打包活动使用 Git作为版本控制系统(VCS)进行记录;通常会用到下列的分支。
• master分支
– 记录用于 Debian打包的源代码树。– 源码树的上游部分将照原样记录,不做修改。– Debian打包中需要对上游源代码所作的修改记录在 debian/patches/目录中,以 -p1等级的补丁形式存在。
• upstream分支
– 记录从上游发布的 tarball(源码压缩文件)解压缩所得到的源代码树。
提示
添加一个 .gitignore 文件并将 .pc 文件列入其中也是一个好主意。
提示
可以在 debian/source/local-options 文件中添加 unapply-patches 和 abort-on-upstream-changes 这两行以保持上游源码处于未修改状态。
提示
您也可以使用除 upstream 分支以外其它名称的分支跟踪上游版本控制数据以方便拣选补丁。
5.14 在版本控制系统中进行记录(备选方案)
您也可以选择不创建 -p1等级的补丁。这时,您可以使用下列分支来记录 Debian打包活动。
• master分支
– 记录用于 Debian打包的源代码树。– 源码树的上游部分在应用了为 Debian打包所作的修改之后进行记录。
• upstream分支
50
CHAPTER 5. 基本内容 5.15. 构建软件包时排除不必要的内容
– 记录从上游发布的 tarball(源码压缩文件)解压缩所得到的源代码树。
如下在 debian/目录下额外添加一些文件即可达到目的。
$ tar -xvzf <package-version>.tar.gz$ ln -sf <package_version>.orig.tar.gz$ cd <package-version>/... hack...hack...$ echo "single-debian-patch" >> debian/source/local-options$ cat >debian/source/local-patch-header <<ENDThis patch contains all the Debian-specific changes mixedtogether. To review them separately, please inspect the VCShistory at https://git.debian.org/?=collab-maint/foo.git.
如此可让 Debian打包过程(dpkg-buildpackage、debuild等)所调用的 dpkg-source命令自动生成一个 -p1等级的补丁文件 debian/patches/debian-changes。
提示
这种做法可以应用在任何版本控制工具中。这么做会把所有修改合并到同一个补丁文件中而丢失其开发历史,因此请务必保持版本控制系统的数据公开可见。
提示
debian/source/local-options 和 debian/source/local-patch-header 文件只用于在版本控制系统中记录信息。它们不应包含在 Debian 源码包中。
5.15 构建软件包时排除不必要的内容
在某些情况下,直接使用自动生成的 Debian源码包会引入不必要的一些内容。
• 上游源码树可能由某个版本控制系统进行管理。直接从这个源码树进行构建时,所生成的 Debian源码包会包含来自版本控制系统的多余文件。
• 上游源码树可能包含了一些自动生成的文件。当从这个源码树重新构建软件包时,所生成的 Debian源码包会包含这些自动生成的不必要的文件。
通常情况下,第 3.5 节中设置的用于 dpkg-source命令的 -i和 -I选项可以避免这些问题。这里 -i针对非本土软件包而 -I则针对本土软件包。请参见 dpkg-source(1)和“dpkg-source --help”的输出。以下几种方法均可避免引入不必要的内容。
5.15.1 使用 debian/rules clean进行修复含有多余文件的问题可以使用“debian/rules clean”这个Makefile目标的调用来解决,只需在该目标内删除文件即可。它也能处理自动生成的文件。
注意
运行 dpkg-buildpackage 命令时,它会在“dpkg-source --build”命令之前被调用“debian/rules clean”目标,而“dpkg-source --build”命令会忽略被删除的文件。
51

CHAPTER 5. 基本内容 5.15. 构建软件包时排除不必要的内容
5.15.2 使用版本控制系统修复
含有多余文件的问题还可以使用版本控制系统修复;具体来说,可以在首次构建之前将源码树提交到版本控制系统中。您可以在第二次构建软件包之前恢复最初的源码树。例如:
$ git reset --hard$ git clean -dfx$ debuild
这里工作的原理是 dpkg-source命令会忽略源码树中典型的版本控制系统相关的文件,相关的设置可以在第 3.5 节的 DEBUILD_DPKG_BUILDPACKAGE_OPTS设置中找到。
提示
如果源码树未受版本控制系统管理,您可以在第一次构建之前运行“git init; gitadd -A .; git commit”来初始化。
5.15.3 使用 extend-diff-ignore修复这种做法仅适合非本土软件包。含有多余文件的问题可以使用在 debian/source/options文件中添加忽略信息的方式解决,令编译系统
忽略多余的文件;具体配置语法为添加 extend-diff-ignore=…”一行内容。如需排除 config.sub、config.guess和Makefile文件:
# Don't store changes on autogenerated filesextend-diff-ignore = "(^|/)(config\.sub|config\.guess|Makefile)$"
注意
即使您无法删除文件,这种做法总可以正常工作。您无需在每次构建之前手动删除文件并手动进行恢复。
提示
如果您转而使用 debian/source/local-options 文件,您可以在生成的源码包中隐藏该项设置。这种做法在本地非标准版本控制系统和您的打包工作有冲突时可能有用。
5.15.4 使用 tar-ignore修复这个方法只适用于本土软件包。您可以使用这种做法在生成的源码包中排除某些文件;只需在 debian/source/options 文件或者
debian/source/local-options文件中添加含有通配符的“tar-ignore=…”一行内容即可。
52
CHAPTER 5. 基本内容 5.16. 上游构建系统
注意
例如,如果您的本土软件包的源码包使用了一些具有 .o 扩展名的文件作为测试数据的话,第 3.5 节的默认设置就过于激进了,这些文件会被当作多余的文件默认自动排除。如需解决这个问题,您可以在第 3.5 节中的 DE-BUILD_DPKG_BUILDPACKAGE_OPTS 参数中移除 -I 选项,同时在每个软件包的 debian/source/local-options 文件中添加“tar-ignore=…”的配置行。
5.16 上游构建系统
上游的构建系统设计为经过数个步骤以从源码发行文件得到并在系统中安装所生成的二进制文件。
提示
在尝试制作 Debian 软件包之前,您应当熟悉了解上游源代码所使用的构建系统并尝试构建软件。
5.16.1 Autotools使用 Autotools(autoconf + automake)包括四个步骤。
1. 设置构建系统(“vim configure.ac Makefile.am”和“autoreconf -ivf”)
2. 配置构建系统(“./configure”)
3. 构建源码树(“make”)
4. 安装二进制文件(“make install”)
第一步通常由上游维护者完成并使用“make dist”命令生成上游源码压缩包(tarball)。(所生成的源码压缩包不仅含有原始的版本控制系统中的文件,也含有其它生成的文件。)软件包维护者至少要处理第二步到第四步的工作。可以在 debian/rules 文件中使用“dh $@ --with
autotools-dev”的命令以自动处理这些步骤。软件包维护者也可以想要处理第一步到第四步所有的工作。这时,可以在 debian/rules文件中使用
“dh $@ --with autoreconf”命令。这样会将所有自动生成的文件更新到最新的版本,通常可以提供对新架构的更好支持。对于使用 compat level(兼容等级)10或更高等级的源码包,使用最简单的“dh $@”而不带“--with
autoreconf”选项已可自动处理上述第一步到第四步全部内容。如果您想进一步学习 Autotools,请参考:
• GNU Automake文档
• GNU Autoconf文档
• Autotools教程
• 对 autotools的介绍(autoconf、automake和 libtool)
• Autotools流言终结者
5.16.2 CMake使用 CMake通常也包含四个步骤。
1. 设置构建系统(“vim CMakeLists.txt config.h.in”)
2. 配置构建系统(“cmake”)
53
CHAPTER 5. 基本内容 5.17. 调试信息
3. 构建源码树(“make”)
4. 安装二进制文件(“make install”)
上游源码包(tarball)不包含自动生成的文件,通常是在第一步之后直接由 tar命令打包生成。软件包维护者需要处理第二步到第四步的工作。如果您想进一步学习 CMake,请参考:
• CMake
• CMake教程
5.16.3 Python distutils使用 Python distutils通常包含三个步骤。
1. 设置并配置构建系统(“vim setup.py”)
2. 构建源码树(“python setup.py build”)
3. 安装二进制文件(“python setup.py install”)
上游维护者通常会处理好第一步并使用“python setup.py sdist”命令构建好上游源码包并进行发行。软件包维护者需要处理第二步工作。在 jessie发布后,打包时只需要在 debian/rules文件中使用最简
单的“dh $@”命令。其它构建系统,如 CMake,其使用方法和 Python这里的情况都很类似。要更多了解 Python3和 distutils请参见:
• Python3
• distutils
5.17 调试信息
Debian软件吧在构建时都会带上调试信息;但打包生成二进制软件包时,这些打包信息会按照《Debian政策手册》中第十章 -文件的要求进行剥离。参见
•《Debian开发者参考》中的 6.7.9. 调试软件包的最佳实践。
•“Debugging with gdb”中的 18.2单独文件中的调试信息
• dh_strip(1)
• strip(1)
• readelf(1)
• objcopy(1)
• Debian维基调试软件包
• Debian维基自动调试软件包
• Debian debian-devel列表发布的邮件:自动调试软件包状态 (2015-08-15)
54
CHAPTER 5. 基本内容 5.18. 库软件包
5.17.1 新的 -dbgsym软件包(Stretch 9.0或更新)调试信息由 dh_strip命令的默认行为自动打包并进行剥离。所分离得到的调试软件包名具有 -dbgsym的后缀。
If there were no -dbg packages defined in the debian/control file, no special care is needed for updating thepackage after the Stretch 9.0 release.
• debian/rules文件不应显式包括 dh_strip。
• 把 debian/compat设置到 11或更新版本。
• 把 Build-Depends设置为 debhelper (>=11~)或更新的版本。
如果在 debian/control文件中曾经定义过 -dbg软件包,在 Stretch 9.0发布之后对旧软件包更新需要进行额外的处理。
• 在 debian/control文件中删除 -dbg软件包定义的部分。
• 将debian/rules文件中“dh_strip --dbg-package=package”这部分替换为“dh_strip --dbgsym-migration=package”以避免自动产生的调试软件包与(现在过时的)-dbg文件产生冲突。参见 dh_strip(1)。
• 把 debian/compat设置到 11或更新版本。
• 把 Build-Depends设置为 debhelper (>=11~)或更新的版本。
5.18 库软件包
打包软件库需要您投入更多的工作。下面有一些打包软件库的提醒和建议:
• 库二进制软件包必须根据第 5.5.1.3 节进行命名。
• Debian按照 /usr/lib/<triplet>/libfoo-0.1.so.1.0.0这样的路径提供共享链接库(参见第 5.20 节)。
• Debian鼓励在共享库中使用带版本的符号(见第 5.18.1 节)。
• Debian不提供 *.la libtool库归档文件。
• Debian不推荐使用、提供 *.a静态库文件。
在打包共享库软件之前,请查阅:
•《Debian政策手册》的第八章 -共享库
•《Debian政策手册》的10.2软件库
•《Debian开发者参考》中的 6.7.2. 软件库
如需研究其历史背景,请参见:
• 逃离依赖地狱 6
– 该文档鼓励在共享库中使用带版本的符号。
• Debian库打包指南 7
– 也请阅读这里的公告后面跟随的讨论串。6该文档是在 symbols文件被引入之前写成的。7在第六章 -开发(-DEV)软件包中,存在强烈的使用含有 SONAME版本号的 -dev软件包名而非仅使用 -dev作为名称的偏好,
但前 ftp-master成员(Steve Langasek)对此有不同意见。请注意该文档在 multiarch系统和 symbols引入之前写成,可能有一定程度的过时。
55
CHAPTER 5. 基本内容 5.18. 库软件包
5.18.1 库符号
Debian lenny(5.0,2009年 5月)中引入的 dpkg符号支持可以帮助我们管理同一共享链接库软件包的向后 ABI兼容性(backward ABI compatibility)。二进制软件包中的 DEBIAN/symbols文件提供了每个符号及其对应的最小版本号。一个极其简化的软件库打包流程大概如下所示。
• 从前一个二进制软件包中使用“dpkg-deb -e”命令解压缩得到旧有的 DEBIAN/symbols文件。
– 或者,mc命令也可以用来解压得到 DEBIAN/symbols文件。
• 将其复制为 debian/binarypackage.symbols文件。
– 如果这是第一次打包的话,可以只创建一个空文件。
• 构建二进制软件包。
– 如果 dpkg-gensymbols命令警告添加了新的符号的话:
* 使用“dpkg-deb -e”命令解压得到更新的 DEBIAN/symbols文件。
* 将其中的 Debian修订版本号,例如 -1,从文件中去除。
* 将其复制为 debian/binarypackage.symbols文件。
* 重新构建二进制软件包。– 如果 dpkg-gensymbols命令不报和新链接符号有关的警告:
* 您已完成了共享库的打包工作。
如需了解详细信息,您应当阅读下列第一手参考资料。
•《Debian政策手册》的8.6.3符号(symbols)系统
• dh_makeshlibs(1)
• dpkg-gensymbols(1)
• dpkg-shlibdeps(1)
• deb-symbols(5)
您也应当查看:
• Debian维基使用符号文件
• Debian维基项目/改进的 DpkgShlibdeps
• Debian kde团队处理 symbols文件
• 第 8.11 节
• 第 8.12 节
提示
对于 C++ 软件库或者其它一些难以跟踪符号变化的场景,请遵循《Debian 政策手册》的 -1 一节的内容。请确保这样操作时事先删除 debmake 命令生成的空的 debian/binarypackage.symbols 文件。在这种情况下,应当转而使用DEBIAN/shlibs 文件。
56

CHAPTER 5. 基本内容 5.19. DEBCONF
5.18.2 库变迁
当您打包新版本的库软件包而且此次更新影响到其它的软件包时,您必须向 release.debian.org伪软件包提交一个变迁 bug报告并附带一个ben文件;您可以使用 reportbug工具进行提交。提交后,请等待发行团队的审核批准方可进行下一步。发行团队提供了变迁跟踪系统。参见变迁(Transition)。
小心
请确保您按照第 5.5.1.3 节的描述正确地对二进制软件包进行了重命名。
5.19 debconfdebconf软件包可以帮助我们在下列两种情况下配置软件包:
• 在 debian-installer(Debian安装器)预安装时进行非交互式配置。
• 使用菜单界面进行交互式配置(对话框(dialog)、gnome、kde等等)
– 软件包安装时:由 dpkg命令调用– 对已安装软件包:由 dpkg-reconfigure命令调用
软件包安装时的所有用户交互都必须由这里的 debconf系统进行处理,下列配置文件对这个过程进行控制。
• debian/binarypackage.config
– 这是 debconf config脚本,用于向用户询问对于配置软件包必需的问题。
• debian/binarypackage.template
– 这是 debconf templates(模板)文件,用于向用户询问对于配置软件包必需的问题。
• 软件包配置脚本
– debian/binarypackage.preinst– debian/binarypackage.prerm– debian/binarypackage.postinst– debian/binarypackage.postrm
参见 dh_installdebconf(1)、debconf(7)、debconf-devel(7)和《Debian政策手册》中的 3.9.1维护者脚本中的用户交互提示。
5.20 多体系结构
Debian wheezy(7.0,2013年 5月)在 dpkg和 apt中引入了对跨架构二进制软件包安装的多架构支持(特别是 i386架构和 amd64架构,但也支持其它的组合),这部分内容值得我们额外关注。您应当详细阅读下列参考内容。
• Ubuntu维基(上游)
– 多架构规范(MultiarchSpec)
• Debian维基(Debian的现状)
– Debian多架构支持– 多架构支持/实现(Multiarch/Implementation)
57
CHAPTER 5. 基本内容 5.20. 多体系结构
多架构支持使用三元组(<triplet>)的值,例如 i386-linux-gnu和 x86_64-linux-gnu;它们出现在共享链接库的安装路径中,例如 /usr/lib/<triplet>/,等等。
• 三元组 <triplet>的值由 debhelper脚本隐式提前设置好,软件包维护者无需担心。
• 不过,在 debian/rules文件中用于 override_dh_*目标的三元组 <triplet>值需要由维护者手动进行显式设置。三元组 <triplet>的值可由 $(DEB_HOST_MULTIARCH)变量在 debian/rules文件中获取到,具体方法如下:
DEB_HOST_MULTIARCH = $(shell dpkg-architecture -qDEB_HOST_MULTIARCH)...override_dh_install:
mkdir -p package1/lib/$(DEB_HOST_MULTIARCH)cp -dR tmp/lib/. package1/lib/$(DEB_HOST_MULTIARCH)
参见:
• 第 5.4.4 节
• dpkg-architecture(1)
• 第 5.5.1.1 节
• 第 5.5.1.2 节
5.20.1 多架构库路径
Debian政策要求遵守文件系统层级标准。其中 /usr/lib:程序和软件包的库声明“/usr/lib包含目标文件、库和其它不应由用户或 shell脚本直接调用的内部二进制文件。”
Debian在文件系统层级标准的基础上添加一项例外,即使用 /usr/lib/<triplet>/而非 /usr/lib<qual>/(例如,/lib32/和 /lib64/)以对多架构库提供支持。
Table 5.1多架构库路径选项经典路径 i386多体系结构路径 amd64多体系结构路径/lib/ /lib/i386-linux-gnu/ /lib/x86_64-linux-gnu//usr/lib/ /usr/lib/i386-linux-gnu/ /usr/lib/x86_64-linux-gnu/
对基于Autotools且由 debhelper(compat>=9)管理的软件包来说,这些路径设置已由 dh_auto_configure命令自动处理。对于其它使用不支持的构建系统的软件包,您需要按照下面的方式手动调整安装路径。
• 如果在 debian/rules 文件中设置了 override_dh_auto_configure 目标且其中手动调用了“./config-ure”命令,请确保将其替换为“dh_auto_configure --”,这样可以将安装路径从 /usr/lib/ 替换为/usr/lib/$(DEB_HOST_MULTIARCH)/。
• 请在 debian/foo.install文件中将所有出现的 /usr/lib/字符串替换为 /usr/lib/*/。
所有启用多架构的软件包安装至相同路径的文件必须内容完全相同。您必须小心处理,避免数据字节序或者压缩算法等等问题带来的文件内容差异。
注意
./configure 的 --libexecdir 选项指定了由程序而非用户所使用的可执行文件的默认安装路径。其 Autotools 的默认值为 /usr/libexec/ 但在未启用多架构特性的Debian 系统上其默认值是 /usr/lib/。如果这些可执行程序属于被标记为“Multi-arch: foreign”的软件包,最好还是使用例如 /usr/lib/ 或者 /usr/lib/软件包名这样的路径而非使用 dh_auto_configure 设置的 /usr/lib/<triplet>/ 路径。GNU 编程规范:7.2.5 用于安装目录的变量 对 libexecdir 的描述是“libexecdir 的定义对所有软件包相同,所以您应当将您的数据安装在其下的一个子目录中。大多数软件包将数据安装至 $(libexecdir)/package-name/ 之中……”(在与 Debian 政策不冲突的前提下,遵守 GNU 的标准总是更好的。)
58
CHAPTER 5. 基本内容 5.21. 编译加固
位于默认路径 /usr/lib/和 /usr/lib/<triplet>/的共享库可被自动加载。对位于其它路径的共享库,必须使用 pkg-config命令设置 GCC选项 -l以正确进行加载。
5.20.2 多架构头文件路径
在支持多架构的 Debian系统上,GCC默认会同时包含、使用 /usr/include/和 /usr/include/<triplet>/下的头文件。如果头文件不在这些路径中,必须使用 pkg-config命令设置 GCC的 -I参数以使得“#include <foo.h>”
正常工作。
Table 5.2多架构头文件路径选项经典路径 i386多体系结构路径 amd64多体系结构路径/usr/include/ /usr/include/i386-linux-gnu/ /usr/include/x86_64-linux-gnu//usr/include/软件包名/ /usr/include/i386-linux-gnu/软件包
名//usr/include/x86_64-linux-gnu/软件包名/
/usr/lib/i386-linux-gnu/软件包名/ /usr/lib/x86_64-linux-gnu/软件包名/
为库文件使用 /usr/lib/<triplet>/软件包名/路径可帮助上游维护者对使用 /usr/lib/<triplet>的多架构系统和使用 /usr/lib<qual>/的双架构系统使用相同的安装脚本。8
使用包含 packagename的文件路径也使得在同一系统上同时安装多个架构的开发库成为可能。
5.20.3 多架构支持下的 *.pc文件路径packagename用来获取系统上已安装库的信息。它在 *.pc文件中存储配置参数,用来设置 GCC的 -I和 -l选项。
Table 5.3 *.pc文件路径选项经典路径 i386多体系结构路径 amd64多体系结构路径/usr/lib/pkgconfig/ /usr/lib/pkgconfig/ /usr/lib/x86_64-linux-
gnu/pkgconfig/
5.21 编译加固
自 Debian jessie(8.0开始)的编译器加固支持要求我们在打包时加以注意。您应当详细阅读下列参考内容。
• Debian维基 Hardening(加固)
• Debian维基 Hardening Walkthrough(加固指南)
debmake命令会向debian/rules文件中按需添加DEB_BUILD_MAINT_OPTIONS、DEB_CFLAGS_MAINT_APPEND和 DEB_LDFLAGS_MAINT_APPEND的项目(参见第 4 章和 dpkg-buildflags(1))。
5.22 持续集成
DEP-8定义了 debian/tests/control文件的格式,它是 RFC822风格的测试元数据文件,用于 Debian软件包的持续集成(CI)。它在完成构建包含 debian/tests/control文件的源码包、得到二进制包之后发挥作用。在运行 autop-
kgtest命令时,所生成的二进制软件包会根据这个文件在虚拟环境中自动进行安装和测试。请参考 /usr/share/doc/autopkgtest/目录下的文档和《Debian打包指导”中的 3. autopkgtest: 软件包的
自动测试。您可以在 Debian系统上探索使用不同的持续集成系统。8这个路径和 FHS兼容。文件系统层级标准:/usr/lib:程序和软件包的库称“应用程序可以使用 /usr/lib下的一个子目录。如果
一个应用程序使用一个子目录,所有由此程序所使用的架构相关数据均须放置于该子目录下。”
59
CHAPTER 5. 基本内容 5.23. 自举
• debci软件包:建立在 autopkgtest之上的持续集成平台
• jenkins软件包:通用持续集成平台
5.23 自举
Debian关心对新硬件架构的移植工作。新架构的移植工作对自举(bootstrapping)操作有所要求,以完成对初始最小本地构建系统的交叉编译。为了在自举(bootstrapping)时避免构建依赖成环的问题,需要使用配置类型(profile)的构建功能特性来缩减所需构建依赖。
提示
如果一个核心软件包 foo 构建时依赖于 bar 软件包,但后者会引入一长串构建依赖链而且 bar 仅在 foo 的 test 目标中使用(即仅用于构建后测试),那么您可以安全地在 foo 软件包的 Build-depends 一栏中将 bar 标记为 <!nocheck> 以规避构建依赖环。
5.24 错误报告
reportbug命令用于提交 binarypackage软件包的错误报告;usr/share/bug/binarypackage/可以对针对该软件所提交报告的内容进行自定义。
dh_bugfiles命令将安装以下位于 debian/目录中的的模板文件。
• debian/binarypackage.bug-control → usr/share/bug/binarypackage/control
– 该文件包含诸如重定向错误报告至其它软件包的一些指导性内容。
• debian/binarypackage.bug-presubj → usr/share/bug/binarypackage/presubj
– 该文件的内容将由 reportbug命令向用户展示。
• debian/binarypackage.bug-script→usr/share/bug/binarypackage orusr/share/bug/binarypackage/script
– reportbug命令运行此脚本以生成错误报告的模板文件。
参见 dh_bugfiles(1)和为开发者提供的 reportbug功能特性
提示
如果您总是需要提醒提交报告的用户某些注意事项或询问他们某些问题,使用这些文件可以将这个过程自动化。
60
Chapter 6
debmake选项
这里提供 debmake命令的一些重要选项。
6.1 快捷选项(-a,-i)debmake命令提供了两个快捷选项。
• -a:打开上游源码压缩包
• -i:执行构建二进制包的脚本
前文中第 4 章的例子可以使用下面的命令直接达到目的。
$ debmake -a package-1.0.tar.gz -i debuild
提示
-a 选项也可以使用“https://www.example.org/DL/package-1.0.tar.gz”这样的URL。
提示
-a选项也可以使用“https://arm.koji.fedoraproject.org/packages/ibus/1.5.7/3.fc21/src/ibus-1.5.7-3.fc21.src.rpm”这样的 URL。
6.1.1 Python模块您可以使用以源码压缩包(tarball)形式提供的 pythonmodule-1.0.tar.gz Python模块包直接生成一个独立二进制 Debian软件包。这里的 -b选项可以指定软件包类型为 python,-s选项可以从上游压缩包中提取并复制软件包描述内容至指定位置。
$ debmake -s -b':python' -a pythonmodule-1.0.tar.gz -i debuild
对其他支持 -b选项的解释式编程语言,请给 -b选项指定恰当的 type。对没有 -b选线支持的其它解释性语言,您可以指定其为脚本类型(script类型)并调整 debian/control
文件而将解释器对应的软件包添加为软件包依赖。
61

CHAPTER 6. DEBMAKE选项 6.2. 上游快照(-D,-T)
6.2 上游快照(-d,-t)如果上游软件包支持“make dist”或者等效的目标,您可以使用 -d选项从上游源码树版本控制系统中得到上游代码的快照。
$ cd /path/to/upstream-vcs$ debmake -d -i debuild
除此之外,也可使用 -t选项以使用 tar命令生成上游源码包。
$ cd /path/to/upstream-vcs$ debmake -p package -t -i debuild
除非您明确使用 -u选项或者在 debian/changelog文件中提前指定好版本号,默认情况下快照生成的上游版本号将应用协调世界时的日期和时间使用 0~%y%m%d%H%M格式生成,例如 0~1403012359。如果上游版本控制系统位于软件包名/目录而非任意的上游版本控制系统/目录,参数中的“-p软件
包名”这部分可以跳过。如果版本控制系统中的上游源码树包含了 debian/*文件,debmake命令在带有 -d选项或者 -t选项并
结合 -i选项可以自动化进行使用这些 debian/*文件从版本控制系统快照中构建非本土软件包的流程。
$ cp -r /path/to/package-0~1403012359/debian/. /path/to/upstream-vcs/debian$ dch... update debian/changelog
$ git add -A .; git commit -m "vcs with debian/*"$ debmake -t -p package -i debuild
这里的使用“debmake -t -i debuild”命令构建非本土 Debian二进制包的流程可以看做拟似本土软件包类型进行构建,因为其打包场景和本土 Debian软件包不使用上游源码包直接使用 debuild命令打包很类似。使用非本土的(non-native)软件包有助于简化与下游发行版(如 Ubuntu)之间在缺陷、问题修复上
的沟通。
6.3 debmake -ccdebmake命令在带上 -cc选项时可以向标准输出打印整个源码树的版权和许可证概要信息。
$ tar -xvzf package-1.0.tar.gz$ cd package-1.0$ debmake -cc | less
如果转而使用 -c选项,程序将提供较短的报告。
6.4 debmake -k在使用上游新发行版本更新软件包时,debmake可以使用已有的 debian/copyright文件和整个更新的源码树文件进行对比验证版权和许可证信息。
$ cd package-vcs$ gbp import-orig --uscan --pristine-tar... update source with the new upstream release$ debmake -k | less
“debmake -k”命令可以完整解析 debian/copyright并将当前软件包中的所有非二进制文件内含的许可证信息按照最后一项匹配的方式与 debian/copyright文件中的信息进行对比。在您编辑自动生成的 debian/copyright文件时,请确保将最通用的文件匹配模式放在文件前部,最精
确的匹配模式放在后部。
62
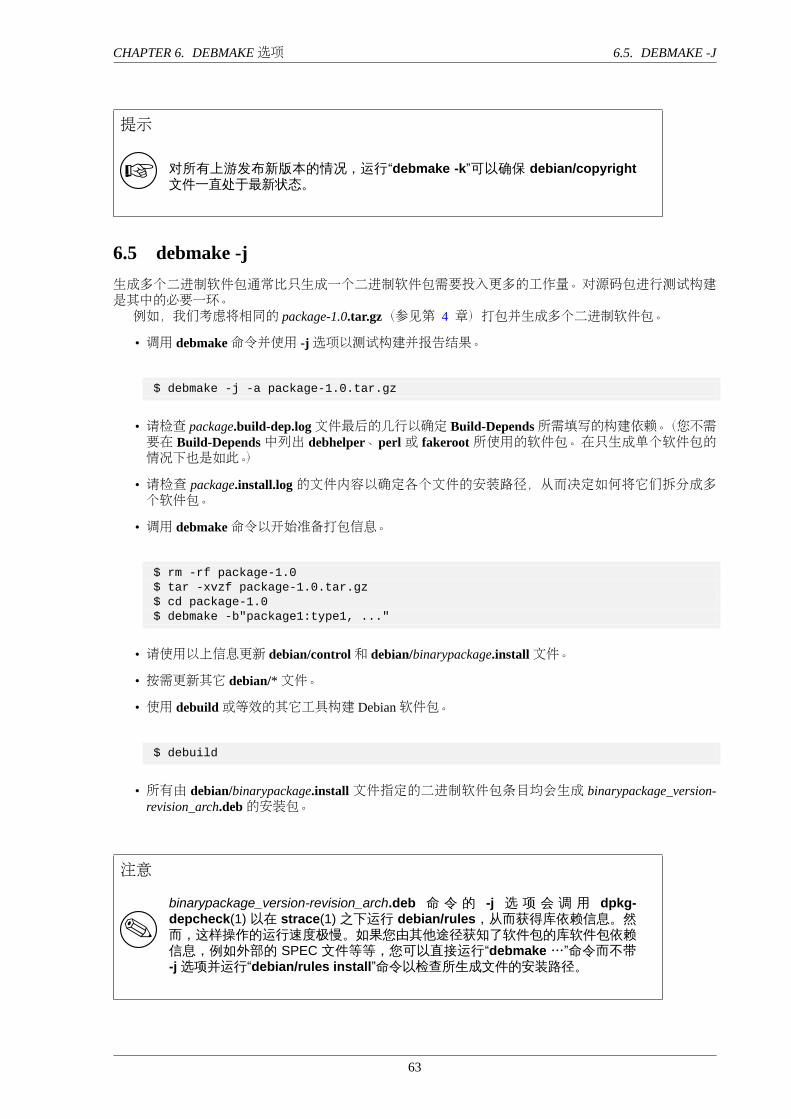
CHAPTER 6. DEBMAKE选项 6.5. DEBMAKE -J
提示
对所有上游发布新版本的情况,运行“debmake -k”可以确保 debian/copyright文件一直处于最新状态。
6.5 debmake -j生成多个二进制软件包通常比只生成一个二进制软件包需要投入更多的工作量。对源码包进行测试构建是其中的必要一环。例如,我们考虑将相同的 package-1.0.tar.gz(参见第 4 章)打包并生成多个二进制软件包。
• 调用 debmake命令并使用 -j选项以测试构建并报告结果。
$ debmake -j -a package-1.0.tar.gz
• 请检查 package.build-dep.log文件最后的几行以确定 Build-Depends所需填写的构建依赖。(您不需要在 Build-Depends中列出 debhelper、perl或 fakeroot所使用的软件包。在只生成单个软件包的情况下也是如此。)
• 请检查 package.install.log的文件内容以确定各个文件的安装路径,从而决定如何将它们拆分成多个软件包。
• 调用 debmake命令以开始准备打包信息。
$ rm -rf package-1.0$ tar -xvzf package-1.0.tar.gz$ cd package-1.0$ debmake -b"package1:type1, ..."
• 请使用以上信息更新 debian/control和 debian/binarypackage.install文件。
• 按需更新其它 debian/*文件。
• 使用 debuild或等效的其它工具构建 Debian软件包。
$ debuild
• 所有由 debian/binarypackage.install文件指定的二进制软件包条目均会生成 binarypackage_version-revision_arch.deb的安装包。
注意
binarypackage_version-revision_arch.deb 命 令 的 -j 选 项 会 调 用 dpkg-depcheck(1) 以在 strace(1) 之下运行 debian/rules,从而获得库依赖信息。然而,这样操作的运行速度极慢。如果您由其他途径获知了软件包的库软件包依赖信息,例如外部的 SPEC 文件等等,您可以直接运行“debmake …”命令而不带-j 选项并运行“debian/rules install”命令以检查所生成文件的安装路径。
63
CHAPTER 6. DEBMAKE选项 6.6. DEBMAKE -X
6.6 debmake -xdebmake生成的模板文件数量由 -x[01234]选项进行控制。
• 请参见第 8.1 节以了解与拣选使用模板文件的方式。
注意
debmake 命令不会修改任何已存在的配置文件。
6.7 debmake -P调用 debmake命令并带上 -P选项将会严厉地检查所有自动生成文件的版权和许可证文本信息;即使它们都使用宽松的许可证也是如此。此选项不止会影响正常执行过程中所生成的 debian/copyright文件的内容,也会影响带参数 -k、-c、
-cc和 -ccc选项的输出内容。
6.8 debmake -T调用 debmake命令并带上 -T选项会额外输出详细的教程注释行。这些行在模板文件中用 ###进行标注。
64

Chapter 7
提示
这里有一些关于 Debian打包的值得注意的提示。
7.1 debdiff您可以使用 debdiff命令来对比两个 Debian软件包组成的差别。
$ debdiff old-package.dsc new-package.dsc
您也可以使用 debdiff命令来对比两组二进制 Debian软件包中的文件列表。
$ debdiff old-package.changes new-package.changes
当检查源代码包中哪些文件被修改时,这个命令非常有用。它还可以用来检测二进制包中是否有文件在更新过程中发生变动,比如被意外替换或删除。
7.2 dget您可以使用 dget命令来下载 Debian源包的文件集。
$ dget https://www.example.org/path/to/package_version-rev.dsc
7.3 debc您应该使用 debc命令安装生成的软件包以在本地测试它。
$ debc package_version-rev_arch.changes
7.4 piuparts您应该使用 piuparts命令安装生成的软件包以自动进行测试。
$ sudo piuparts package_version-rev_arch.changes
65
CHAPTER 7. 提示 7.5. DEBSIGN
注意
这是一个非常慢的过程,因为它需要访问远程 APT 软件包仓库。
7.5 debsign完成软件包的测试后,您可以使用 debsign命令对其进行签名。
$ debsign package_version-rev_arch.changes
7.6 dput使用 debsign命令对包进行签名后,您可以使用 dput命令上传 Debian源和二进制包的文件集。
$ dput package_version-rev_arch.changes
7.7 bts上传软件包后,您将收到错误报告。如《Debian开发者参考》5.8. 处理缺陷中所述,正确地管理这些错误是软件包维护者的一项重要职责。
bts命令是一个用以处理 Debian缺陷追踪系统上的错误的便捷工具。
$ bts severity 123123 wishlist , tags -1 pending
7.8 git-buildpackagegit-buildpackage软件包提供了许多命令来使用 git仓库自动打包。
• gbp import-dsc:向 git仓库中导入先前的 Debian源码包。
• gbp import-orig:向 git仓库中导入新的上游源码。
– git import-orig命令的 --pristine-tar选项允许将上游源码包储存在同一个 git仓库中。– 将 --uscan选项作为 gbp import-orig命令的最后一个参数会允许下载上游原始码并提交到 git仓库中。
• gbp dch:从 git提交信息中生成 Debian变更信息(changelog)。
• gbp buildpackage:从 git仓库中构建 Debian二进制包。
• gbp pull:从远程仓库中安全更新 debian, upstream and pristine-tar分支。
• git-pbuilder:使用 pbuilder软件包从 git仓库构建 Debian二进制软件包。
– 使用 cowbuilder软件包作为后端。
• gbp pq、git-dpm或 quilt(或者其别名 dquilt)命令用于管理兼容 quilt的补丁。
– dquilt命令是学起来最简单的,它只要求您使用 git命令手动提交最后的文件至 master分支。
66

CHAPTER 7. 提示 7.9. 上游 GIT仓库
–“gbp pq”命令提供了等效的补丁集管理功能,而不需要使用 dquilt 并且使用 git 的拣选(cherry-pick)功能简化了包含上游 git仓库修改的操作流程。–“git dpm”命令提供了比“gbp pq”更强大的功能。
使用 git-buildpackage软件包来管理软件包历史正成为绝大多数 Debian维护者的实践标准。参见:
• 使用 git-buildpackage构建 Debian软件包
• https://wiki.debian.org/GitPackagingWorkflow
• https://wiki.debian.org/GitPackagingWorkflow/DebConf11BOF
• https://raphaelhertzog.com/2010/11/18/4-tips-to-maintain-a-3-0-quilt-debian-source-package-in-a-vcs/
• systemd打包实践文档在从源码构建。
提示
放松。您并不需要使用全部的打包工具,您只需要使用您所需要的那个就行。
7.8.1 gbp import-dscs --debsnap对于记录在 snapshot.debian.org 归档中的名为 <source-package> 的 Debian 源码包,可以生成包含所有Debian版本历史的初始 git存储库,如下所示。
$ gbp import-dscs --debsnap --pristine-tar '<source-package>'
7.9 上游 git仓库对于使用 git-buildpackage打包的 Debian软件包,远程存储库 origin上的 upstream分支通常用于跟踪已发布的上游原始码的内容。也可以通过将其远程存储库命名为 upstream而不是默认的 origin来跟踪上游 git仓库。然后,您可以
通过使用 gitk命令和 gbp-pq命令进行挑选,轻松地将最近的上游更改添加到 Debian修订版中。
提示
“gbp import-orig --upstream-vcs-tag”命令可以通过使用上游 git 仓库中的指定标签在 upstream 分支上创建一个合并提交的方式来生成干净的打包历史信息。
小心
已发布的上游原始码的内容可能与上游 git 存储库的相应内容并不完全匹配。它可能包含一些自动生成的文件或遗漏一些文件。(Autotools、distutils......)
67
CHAPTER 7. 提示 7.10. CHROOT
7.10 chroot可以使用第 3 章中描述的工具创建和管理干净包构建环境的 chroot。1
以下是可用的软件包构建命令的快速总结。有很多方法可以做同样的事情。
• dpkg-buildpackage =软件包打包工具的核心
• debuild = dpkg-buildpackage + lintian(在清理后的环境变量下构建)
• pbuilder = Debian chroot环境工具的核心
• pdebuild = pbuilder + dpkg-buildpackage(在 chroot环境下构建)
• cowbuilder =提升 pbuilder执行的速度
• git-pbuilder = pdebuild的易于使用的命令行语法(由 gbp buildpackge使用)
• gbp =在 git下管理 Debian源代码
• gbp buildpackge = pbuilder + dpkg-buildpackage + gbp
可以根据如下方式使用干净的 sid版本的 chroot环境。
• 用于 sid发行版的 chroot文件系统创建命令
– pbuilder create– git-pbuilder create
• sid版本的 chroot文件系统的文件路径
– /var/cache/pbuilder/base.cow
• sid发行版 chroot的包构建命令
– pdebuild– git-pbuilder– gbp buildpackage
• 更新 sid chroot的命令
– pbuilder --update– git-pbuilder update
• 要登录到 sid修改 chroot文件系统的命令
– git-pbuilder login --save-after-login
可以根据如下方式使用任意的 dist版本环境。
• 用于 dist版本的 chroot文件系统创建命令
– pbuilder create --distribution dist– DIST=dist git-pbuilder create
• dist版本的 chroot文件系统的文件路径
– path: /var/cache/pbuilder/base-dist.cow
• dist版本 chroot的包构建命令
– pdebuild -- --basepath=/var/cache/pbuilder/base-dist.cow– DIST=dist git-pbuilder– gbp buildpackage --git-dist=dist
• 更新 dist chroot的命令1https://wiki.debian.org/git-pbuilder采用了 git-pbuilder风格管理。请小心,因为许多 HOWTO使用了不同的组织。
68
CHAPTER 7. 提示 7.11. 新的 DEBIAN版本
– pbuilder update --basepath=/var/cache/pbuilder/base-dist.cow– DIST=dist git-pbuilder update
• 登入 dist chroot环境以进行修改的命令
– pbuilder --login --basepath=/var/cache/pbuilder/base-dist.cow --save-after-login– DIST=dist git-pbuilder login --save-after-login
提示
使用这个“git-pbuilder login --save-after-login”命令可以非常方便地创建一个包含一些新实验包所需的预加载包的自定义环境。
提示
如果您的旧 chroot 文件系统缺少例如 libeatmydata1、ccache 和 lintian 等软件包,您可能需要使用“git-pbuilder login --save-after-login”命令来安装这些软件包。
提示
只需使用“cp -a base-dist.cow base-customdist.cow”命令即可克隆 chroot文件系统。新的 chroot 可以以“gbp buildpackage --git-dist=customdist”和“DIST=customdist git-pbuilder …”访问。
提示
当需要为除 0 和 1 之外的 Debian 修订版上传 orig.tar.gz 文件时(例如,对于安全性上传),将 -sa 选项添加到 dpkg-buildpackage,debuild,pdebuild 和git-pbuilder 命令末尾。对于“gbp buildpackage”命令,临时修改 ~/.gbp.conf中的 builder 设置。
注意
本节中的描述过于简洁,对大多数潜在的维护者都没用。这是作者的有意为之。我们强烈建议您搜索并阅读与所用命令相关的所有文档。
7.11 新的 Debian版本让我们假设有一个错误报告 #bug_number是针对您的软件包的。它描述了一个问题,您可以通过编辑上游源码中的错误文件来解决。以下是使用 bugname.patch文件创建软件包的新 Debian软件包修订版所需的操作。
69
CHAPTER 7. 提示 7.12. 新上游版本
使用 dquilt命令准备新的 Debian软件包修订版本
$ dquilt push -a$ dquilt new bugname.patch$ dquilt add buggy$ vim buggy...
$ dquilt refresh$ dquilt header -e$ dquilt pop -a$ dch -i
此外,如果软件包是用 git-buildpackage命令以其默认配置管理的 git仓库:使用 gbp-pq命令进行新的 Debian修订
$ git checkout master$ gbp pq import$ vim buggy$ git add buggy$ git commit$ git tag pq/<newrev>$ gbp pq export$ gbp drop$ git add debian/patches/*$ dch -i$ git commit -a -m "Closes: #<bug_number>"
请确保简明扼要地描述修复报告错误的更改并通过在 debian/changelog文件中添加“Closes: #<bug_number>”来关闭这些错误。
提示
在实验时使用带有版本字符串的 debian/changelog 条目,例如 1.0.1-1~rc1 。然后,将这些更改日志条目整理到官方软件包的条目中。
7.12 新上游版本
如果 foo 包是以现代“3.0 (native)”或“3.0 (quilt)”格式正确打包的,则打包新的上游版本时需要将旧的 debian/目录移动到新的源码路径中。这可以通过在新提取的源码路径中运行“tar -xvzf /path/to/-foo_oldversion.debian.tar.gz”命令来完成。2 当然,你还需要做一些修改。有很多的工具可以用以处理这些情况。在使用这些软件来更新上游版本后,请在 debian/changelog文
件中简要描述修复错误的上游修改,并添加“Closes: #bug_number”来关闭错误。
7.12.1 uupdate + tarball您可以使用来自 uupdate软件包中的 uupdate命令来自动更新到新的上游源码。该命令需要旧的 Debian源码包和新的上游源码包。
$ wget https://example.org/foo/foo-newversion.tar.gz$ cd foo-oldversion$ uupdate -v newversion ../foo-newversion.tar.gz...$ cd ../foo-newversion$ while dquilt push; do dquilt refresh; done
2如果 foo包是以旧的 1.0格式打包的,则相对的,只要在新的源代码路径中执行“zcat /path/to/foo_oldversion.diff.gz|patch -p1”命令。
70
CHAPTER 7. 提示 7.12. 新上游版本
$ dch
7.12.2 uscan您可以使用来自 uupdate 软件包中的 uscan 命令来自动更新到新的上游源码。该命令需要包含 de-bian/watch文件的旧的 Debian源码包。
$ cd foo-oldversion$ uscan...$ while dquilt push; do dquilt refresh; done$ dch
7.12.3 gbp您可以使用来自 git-buildpackage软件包中的“gbp import-orig --pristine-tar”命令来自动更新到新的上游源码。该命令需要在 git仓库中的 Debian源码和新的上游源码包。
$ ln -sf foo-newversion.tar.gz foo_newversion.orig.tar.gz$ cd foo-vcs$ git checkout master$ gbp pq import$ git checkout master$ gbp import-orig --pristine-tar ../foo_newversion.orig.tar.gz...$ gbp pq rebase$ git checkout master$ gbp pq export$ gbp pq drop$ git add debian/patches$ dch -v <newversion>$ git commit -a -m "Refresh patches"
提示
如果上游也使用 git 仓库,请为 gbp import-orig 命令加上 --upstream-vcs-tag选项。
7.12.4 gbp + uscan您可以使用来自 git-buildpackage软件包中的“gbp import-orig --pristine-tar --uscan”命令来自动更新到新的上游源码。该命令需要在 git仓库中的包含 debian/watch文件的 Debian源码。
$ cd foo-vcs$ git checkout master$ gbp pq import$ git checkout master$ gbp import-orig --pristine-tar --uscan...$ gbp pq rebase$ git checkout master$ gbp pq export$ gbp pq drop$ git add debian/patches
71
CHAPTER 7. 提示 7.13. 3.0源代码格式
$ dch -v <newversion>$ git commit -a -m "Refresh patches"
提示
如果上游也使用 git 仓库,请为 gbp import-orig 命令加上 --upstream-vcs-tag选项。
7.13 3.0源代码格式更新软件包的风格并不是更新软件包所必须的步骤。但是,这么做可以让您充分利用现代 debhelper和3.0源码格式的所有能力。
• 如果您因任何原因需要重新创建已删除的模板文件,您可以在同一个 Debian软件包源码树中再次运行 debmake。然后适当地编辑它们。
• 如果软件包还未更新到可为 debian/rules 文件使用 dh 命令,请升级它以便使用该命令(参见第 5.4.2 节)。请根据具体情况更新 debian/control文件。
• 如果你有一个带有 foo.diff.gz 文件的 1.0 格式的源码包,你可以通过创建带有“3.0 (quilt)”的debian/source/format文件来升级至新的“3.0 (quilt)”格式。剩下的 debian/*文件可以直接复制。如果需要的话,可以将“filterdiff -z -x /debian/ foo.diff.gz > big.diff”命令生成的 big.diff文件导入到你的 quilt系统中。3
• 如果它使用了其他的补丁系统,例如 dpatch、dbs或者是带有 -p0、-p1、-p2参数的 cdbs。请使用quilt包中的 deb3脚本来转换它。
• 如果它使用了带有“--with quilt”选项的 dh命令或者使用了 dh_quilt_patch和 dh_quilt_unpatch命令,请移除这些并且使其使用新的“3.0 (quilt)”格式。
• 如果您有一个不带 foo.diff.gz 文件的 1.0 格式的源码包,您可以通过创建包含“3.0 (native)”的debian/source/format文件,然后将其余的 debian/*文件直接复制的方式来更新至新的“3.0 (native)”的源码格式。
您应该核对一下 DEP——Debian增强提议并且采用已接受的提议。参见 ProjectsDebSrc3.0以核对 Debian工具链对新 Debian源码格式的支持情况。
7.14 CDBSCommon Debian Build System(CDBS)是 debhelper软件包的包装系统。CDBS基于Makefile包含机制并且由 debian/rules文件中设置的 DEB_*变量配置。在将 dh命令引入第七版的 debhelper软件包之前,CDBS是创建简单干净的 debian/rules文件的唯一
方法。对于很多简单的软件包,现在 dh命令使 debian/rules文件很简洁,建议保持构建系统简洁,而非使用
冗长的 CDBS。
注意
“CDBS 神奇地让我用更少的命令来完成工作”和“我不懂新的 dh 的语法”都不是您继续使用旧的 CDBS 系统的借口。
3您可以使用 splitdiff命令来将 big.diff文件分割成多个小的增量更新补丁文件。
72
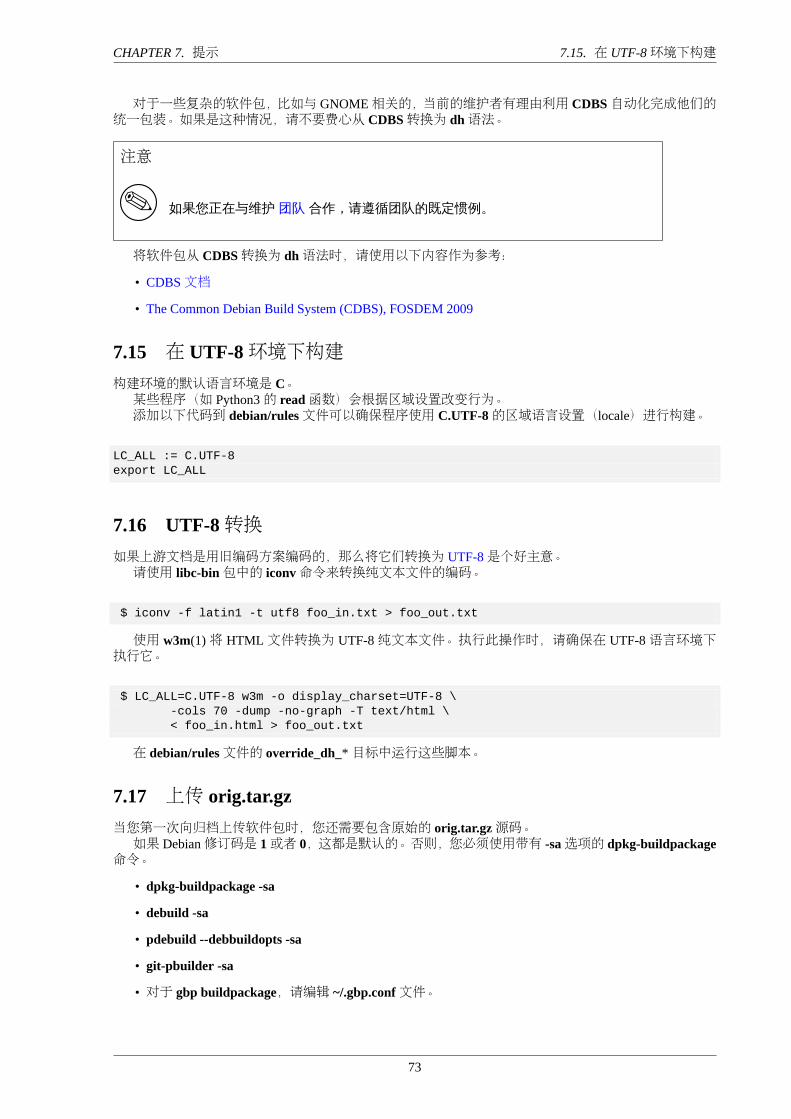
CHAPTER 7. 提示 7.15. 在 UTF-8环境下构建
对于一些复杂的软件包,比如与 GNOME相关的,当前的维护者有理由利用 CDBS自动化完成他们的统一包装。如果是这种情况,请不要费心从 CDBS转换为 dh语法。
注意
如果您正在与维护 团队 合作,请遵循团队的既定惯例。
将软件包从 CDBS转换为 dh语法时,请使用以下内容作为参考:
• CDBS文档
• The Common Debian Build System (CDBS), FOSDEM 2009
7.15 在 UTF-8环境下构建构建环境的默认语言环境是 C。某些程序(如 Python3的 read函数)会根据区域设置改变行为。添加以下代码到 debian/rules文件可以确保程序使用 C.UTF-8的区域语言设置(locale)进行构建。
LC_ALL := C.UTF-8export LC_ALL
7.16 UTF-8转换如果上游文档是用旧编码方案编码的,那么将它们转换为 UTF-8是个好主意。请使用 libc-bin包中的 iconv命令来转换纯文本文件的编码。
$ iconv -f latin1 -t utf8 foo_in.txt > foo_out.txt
使用 w3m(1)将 HTML文件转换为 UTF-8纯文本文件。执行此操作时,请确保在 UTF-8语言环境下执行它。
$ LC_ALL=C.UTF-8 w3m -o display_charset=UTF-8 \-cols 70 -dump -no-graph -T text/html \< foo_in.html > foo_out.txt
在 debian/rules文件的 override_dh_*目标中运行这些脚本。
7.17 上传 orig.tar.gz当您第一次向归档上传软件包时,您还需要包含原始的 orig.tar.gz源码。如果 Debian修订码是 1或者 0,这都是默认的。否则,您必须使用带有 -sa选项的 dpkg-buildpackage
命令。
• dpkg-buildpackage -sa
• debuild -sa
• pdebuild --debbuildopts -sa
• git-pbuilder -sa
• 对于 gbp buildpackage,请编辑 ~/.gbp.conf文件。
73
CHAPTER 7. 提示 7.18. 跳过的上传
提示
另一方面,-sd 选项将会强制排除原始的 orig.tar.gz 源码。
提示
添加至 ~/.bashrc 文件。
7.18 跳过的上传
如果当跳过上传时,你在 debian/changelog中创建了多个条目,你必须创建一个包含自上次上传以来所有变更的 debian/changelog文件。这可以通过指定 dpkg-buildpackage选项 -v以及上次上传的版本号,比如 1.2来完成。
• dpkg-buildpackage -v1.2
• debuild -v1.2
• pdebuild --debbuildopts -v1.2
• git-pbuilder -v1.2
• 对于 gbp buildpackage,请编辑 ~/.gbp.conf文件。
7.19 高级打包
关于以下内容的提示可以在 debhelper(7)手册页中找到:
• debhelper工具在“compat <= 8”选项下不同的行为
• 在数种不同构建条件下构建多种二进制包
– 制作上游源码的多个副本– 在 override_dh_auto_configure目标中调用多个“dh_auto_configure -S…”指令– 在 override_dh_auto_build目标中调用多个“dh_auto_build -S…”指令– 在 override_dh_auto_install目标中调用多个“dh_auto_install -S…”指令
• 在 debian/control中以“Package-Type: udeb”选项来构建 udeb包(参见 Package-Type)
• 从引导进程中排除某些包(参见 BuildProfileSpec)
– 在 debian/control中的二进制包节中添加 Build-Profiles字段– 在 DEB_BUILD_PROFILES环境变量设置成相关配置文件名的条件下构建软件包
关于以下内容的提示可以在 dpkg-source(1)手册页中找到:
• 多个上游源码包的命名约定
– 软件包名 _版本.orig.tar.gz– 软件包名 _版本.orig-部件名.tar.gz
• 将 Debian更改记录到上游源码包中
– dpkg-source --commit
74
CHAPTER 7. 提示 7.20. 其他发行版
7.20 其他发行版
尽管上游的原始码有着所有构建 Debian软件包所需的信息,找出使用何种选项的组合仍然不是一件简单的事。此外,上游的包可能更专注于功能的增强,而并不那么重视向后兼容性等特性,这是 Debian打包实践
中的一个重要方面。利用其他发行版的信息是解决上述问题的一种选择。如果其他发行版是由 Debian派生的,重新使用它是没有价值的。如果其他发行版是基于 RPM的发行版,请参见 Repackage src.rpm。通过 rget命令,可以下载并打开 src.rpm文件。(请将 rget脚本添加至 PATH中)rget脚本
#!/bin/shFCSRPM=$(basename $1)mkdir ${FCSRPM}; cd ${FCSRPM}/wget $1rpm2cpio ${FCSRPM} | cpio -dium
许多上游源码包包含 RPM系统使用的、以 packagename.spec或者 packagename.spec.in命名的 SPEC文件。这可以被用做 Debian软件包的基点。
7.21 除错
当您遇到构建问题或者生成的二进制程序核心转储时,您需要自行解决他们。这就是除错(debug)。This is too deep a topic to describe here. So, let me just list few pointers and hints for some typical debug tools.
• 核心转储
–“man core”– 更新“/etc/security/limits.conf”文件来包含以下代码:
* soft core unlimited
– 在 ~/.bashrc中添加“ulimit -c unlimited”– 使用“ulimit -a”来检查– 按下 Ctrl-\或者“kill -ABRT PID”来建立一个核心转储文件
• gdb - The GNU Debugger
–“info gdb”– 参见 /usr/share/doc/gdb-doc/html/gdb/index.html中的“Debugging with GDB”
• strace -跟踪系统调用和信号
– 使用 /usr/share/doc/strace/examples/中的 strace-graph脚本来建立一个好看的树形图–“man strace”
• ltrace -跟踪库调用
–“man ltrace”
•“sh -n script.sh” - Shell脚本的语法检查
•“sh -x script.sh” -跟踪 Shell脚本
•“python -m py_compile script.py” - Python脚本的语法检查
•“python -mtrace --trace script.py” -跟踪 Python脚本
•“perl -I ../libpath -c script.pl” - Perl脚本的语法检查
75

CHAPTER 7. 提示 7.21. 除错
•“perl -d:Trace script.pl” -跟踪 Perl脚本
– 安装 libterm-readline-gnu-perl 软件包或者同类型软件来添加输入行编辑功能与历史记录支持。
• lsof -按进程列出打开的文件
–“man lsof”
提示
script 命令能帮助记录控制台输出。
提示
在 ssh 命令中搭配使用 screen 和 tmux 命令,能够提供安全并且强健的远程连接终端。
提示
libreply-perl(新的)软件包和来自 libdevel-repl-perl(旧的)软件包的 re.pl 命令为 Perl 提供了一个类似 Python 和 Shell 的 REPL (=READ + EVAL + PRINT +LOOP) 环境。
提示
rlwrap 和 rlfe 命令为所有交互命令提供了输入行编辑功能。例如“rlwrap dash-i”。
76
Chapter 8
更多示例
有一句古老的拉丁谚语:“fabricando fit faber”(“熟能生巧”)。强烈建议使用简单的包来练习和试验 Debian打包的所有步骤。本章为您的练习提供了许多上游案例。这也可以作为许多编程主题的介绍性示例。
• 在 POSIX shell,Python3和 C中编程。
• 使用图标图形创建桌面 GUI程序启动器的方法。
• 将命令行界面命令转换为图形界面命令。
• 转化程序以使用 gettext来为 POSIX shell、Python3和 C源码的程序进行国际化和本地化。
• 构建系统概述:Makefile、Python distutils、Autotools以及 CMake。
请注意,Debian对以下事项非常注意:
• 自由软件
• 操作系统的稳定性与安全性
• 通过以下方式以实现通用操作系统:
– 上游源码的自由选择,– CPU架构的自由选择,以及– 用户界面语言的自由选择。
在第 4 章中介绍的典型打包示例是本章节的先决条件。在以下数小节中,有些细节被刻意模糊。请尝试阅读相关文件,并且尝试自行厘清它们。
提示
打包示例的最佳来源就是目前的 Debian 归档本身。请使用“Debian 代码搜索”服务来查找相关示例。
8.1 挑选最好的模板
以下是一个从空目录由零开始构建简单的 Debian软件包的示例。这是一个很棒的平台,可以使您获得所有的模板文件,而不会使您正在处理的上游源码树变得一团糟。让我们假设这个空目录为 debhello-0.1。
77
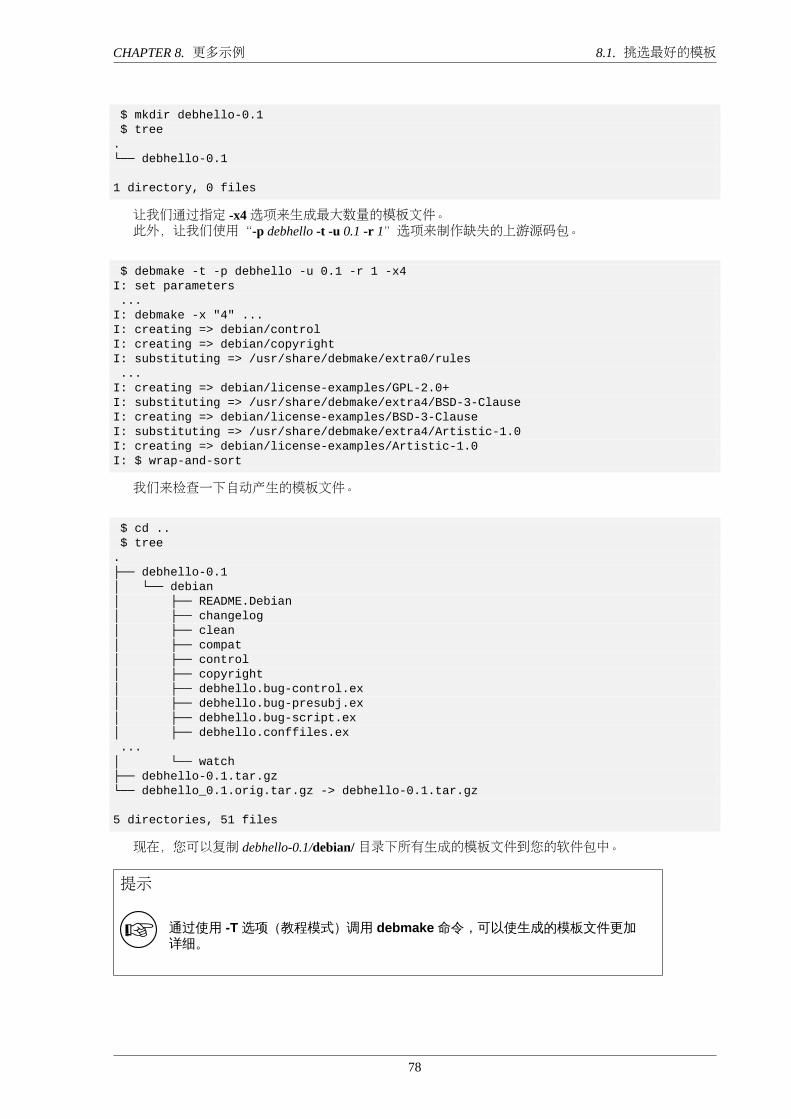
CHAPTER 8. 更多示例 8.1. 挑选最好的模板
$ mkdir debhello-0.1$ tree
.└── debhello-0.1
1 directory, 0 files
让我们通过指定 -x4选项来生成最大数量的模板文件。此外,让我们使用“-p debhello -t -u 0.1 -r 1”选项来制作缺失的上游源码包。
$ debmake -t -p debhello -u 0.1 -r 1 -x4I: set parameters...
I: debmake -x "4" ...I: creating => debian/controlI: creating => debian/copyrightI: substituting => /usr/share/debmake/extra0/rules...
I: creating => debian/license-examples/GPL-2.0+I: substituting => /usr/share/debmake/extra4/BSD-3-ClauseI: creating => debian/license-examples/BSD-3-ClauseI: substituting => /usr/share/debmake/extra4/Artistic-1.0I: creating => debian/license-examples/Artistic-1.0I: $ wrap-and-sort
我们来检查一下自动产生的模板文件。
$ cd ..$ tree
.├── debhello-0.1│ └── debian│ ├── README.Debian│ ├── changelog│ ├── clean│ ├── compat│ ├── control│ ├── copyright│ ├── debhello.bug-control.ex│ ├── debhello.bug-presubj.ex│ ├── debhello.bug-script.ex│ ├── debhello.conffiles.ex...
│ └── watch├── debhello-0.1.tar.gz└── debhello_0.1.orig.tar.gz -> debhello-0.1.tar.gz
5 directories, 51 files
现在,您可以复制 debhello-0.1/debian/目录下所有生成的模板文件到您的软件包中。
提示
通过使用 -T 选项(教程模式)调用 debmake 命令,可以使生成的模板文件更加详细。
78
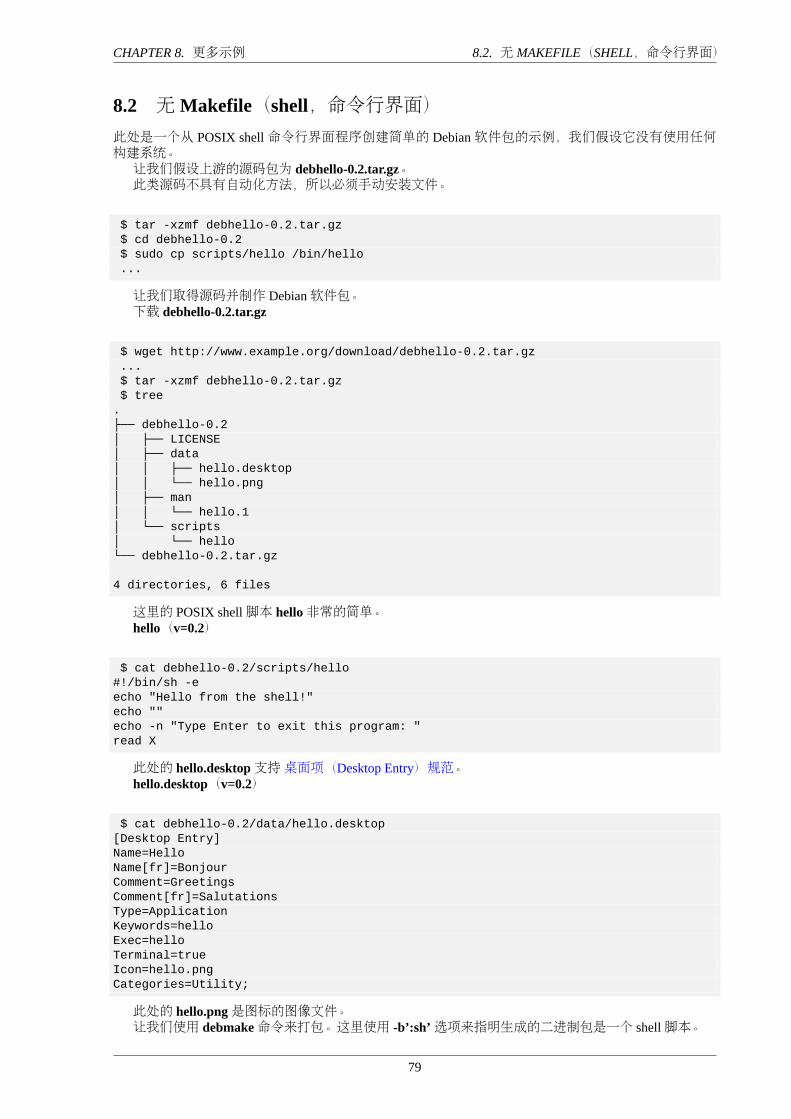
CHAPTER 8. 更多示例 8.2. 无 MAKEFILE(SHELL,命令行界面)
8.2 无Makefile(shell,命令行界面)此处是一个从 POSIX shell命令行界面程序创建简单的 Debian软件包的示例,我们假设它没有使用任何构建系统。让我们假设上游的源码包为 debhello-0.2.tar.gz。此类源码不具有自动化方法,所以必须手动安装文件。
$ tar -xzmf debhello-0.2.tar.gz$ cd debhello-0.2$ sudo cp scripts/hello /bin/hello...
让我们取得源码并制作 Debian软件包。下载 debhello-0.2.tar.gz
$ wget http://www.example.org/download/debhello-0.2.tar.gz...$ tar -xzmf debhello-0.2.tar.gz$ tree
.├── debhello-0.2│ ├── LICENSE│ ├── data│ │ ├── hello.desktop│ │ └── hello.png│ ├── man│ │ └── hello.1│ └── scripts│ └── hello└── debhello-0.2.tar.gz
4 directories, 6 files
这里的 POSIX shell脚本 hello非常的简单。hello(v=0.2)
$ cat debhello-0.2/scripts/hello#!/bin/sh -eecho "Hello from the shell!"echo ""echo -n "Type Enter to exit this program: "read X
此处的 hello.desktop支持桌面项(Desktop Entry)规范。hello.desktop(v=0.2)
$ cat debhello-0.2/data/hello.desktop[Desktop Entry]Name=HelloName[fr]=BonjourComment=GreetingsComment[fr]=SalutationsType=ApplicationKeywords=helloExec=helloTerminal=trueIcon=hello.pngCategories=Utility;
此处的 hello.png是图标的图像文件。让我们使用 debmake命令来打包。这里使用 -b’:sh’选项来指明生成的二进制包是一个 shell脚本。
79

CHAPTER 8. 更多示例 8.2. 无 MAKEFILE(SHELL,命令行界面)
$ cd debhello-0.2$ debmake -b':sh'
I: set parametersI: sanity check of parametersI: pkg="debhello", ver="0.2", rev="1"I: *** start packaging in "debhello-0.2". ***I: provide debhello_0.2.orig.tar.gz for non-native Debian packageI: pwd = "/path/to"I: $ ln -sf debhello-0.2.tar.gz debhello_0.2.orig.tar.gzI: pwd = "/path/to/debhello-0.2"I: parse binary package settings: :shI: binary package=debhello Type=script / Arch=all M-A=foreign...
让我们来检查一下自动产生的模板文件。执行基本的 debmake命令后的源码树。(v=0.2)
$ cd ..$ tree
.├── debhello-0.2│ ├── LICENSE│ ├── data│ │ ├── hello.desktop│ │ └── hello.png│ ├── debian│ │ ├── README.Debian│ │ ├── changelog│ │ ├── compat│ │ ├── control│ │ ├── copyright│ │ ├── patches│ │ │ └── series│ │ ├── rules│ │ ├── source│ │ │ ├── format│ │ │ └── local-options│ │ └── watch│ ├── man│ │ └── hello.1│ └── scripts│ └── hello├── debhello-0.2.tar.gz└── debhello_0.2.orig.tar.gz -> debhello-0.2.tar.gz
7 directories, 17 files
debian/rules(模板文件,v=0.2):
$ cat debhello-0.2/debian/rules#!/usr/bin/make -f# You must remove unused comment lines for the released package.#export DH_VERBOSE = 1
%:dh $@
这基本上是带有 dh命令的标准 debian/rules文件。因为这是个脚本软件包,所以这个 debian/rules模板文件没有与构建标记(build flag)相关的内容。
debian/control(模板文件,v=0.2):
80
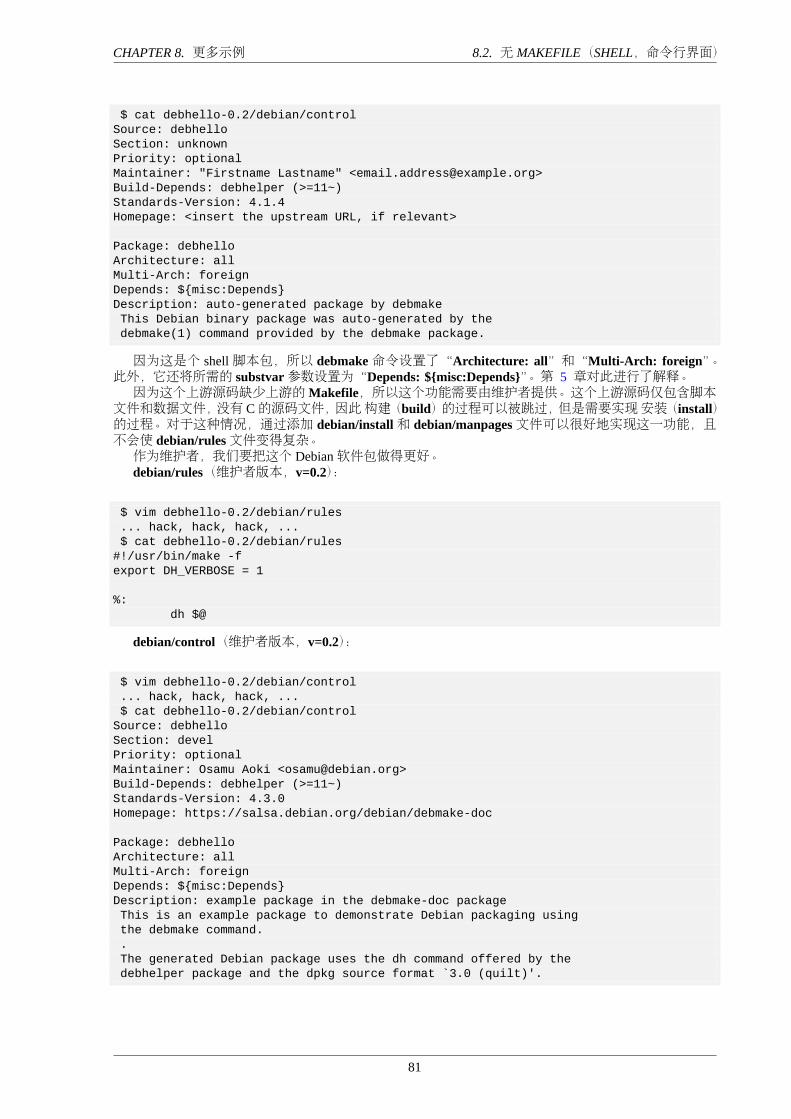
CHAPTER 8. 更多示例 8.2. 无 MAKEFILE(SHELL,命令行界面)
$ cat debhello-0.2/debian/controlSource: debhelloSection: unknownPriority: optionalMaintainer: "Firstname Lastname" <[email protected]>Build-Depends: debhelper (>=11~)Standards-Version: 4.1.4Homepage: <insert the upstream URL, if relevant>
Package: debhelloArchitecture: allMulti-Arch: foreignDepends: ${misc:Depends}Description: auto-generated package by debmakeThis Debian binary package was auto-generated by thedebmake(1) command provided by the debmake package.
因为这是个 shell脚本包,所以 debmake命令设置了“Architecture: all”和“Multi-Arch: foreign”。此外,它还将所需的 substvar参数设置为“Depends: ${misc:Depends}”。第 5 章对此进行了解释。因为这个上游源码缺少上游的Makefile,所以这个功能需要由维护者提供。这个上游源码仅包含脚本
文件和数据文件,没有 C的源码文件,因此构建(build)的过程可以被跳过,但是需要实现安装(install)的过程。对于这种情况,通过添加 debian/install和 debian/manpages文件可以很好地实现这一功能,且不会使 debian/rules文件变得复杂。作为维护者,我们要把这个 Debian软件包做得更好。debian/rules(维护者版本,v=0.2):
$ vim debhello-0.2/debian/rules... hack, hack, hack, ...$ cat debhello-0.2/debian/rules
#!/usr/bin/make -fexport DH_VERBOSE = 1
%:dh $@
debian/control(维护者版本,v=0.2):
$ vim debhello-0.2/debian/control... hack, hack, hack, ...$ cat debhello-0.2/debian/control
Source: debhelloSection: develPriority: optionalMaintainer: Osamu Aoki <[email protected]>Build-Depends: debhelper (>=11~)Standards-Version: 4.3.0Homepage: https://salsa.debian.org/debian/debmake-doc
Package: debhelloArchitecture: allMulti-Arch: foreignDepends: ${misc:Depends}Description: example package in the debmake-doc packageThis is an example package to demonstrate Debian packaging usingthe debmake command..The generated Debian package uses the dh command offered by thedebhelper package and the dpkg source format `3.0 (quilt)'.
81
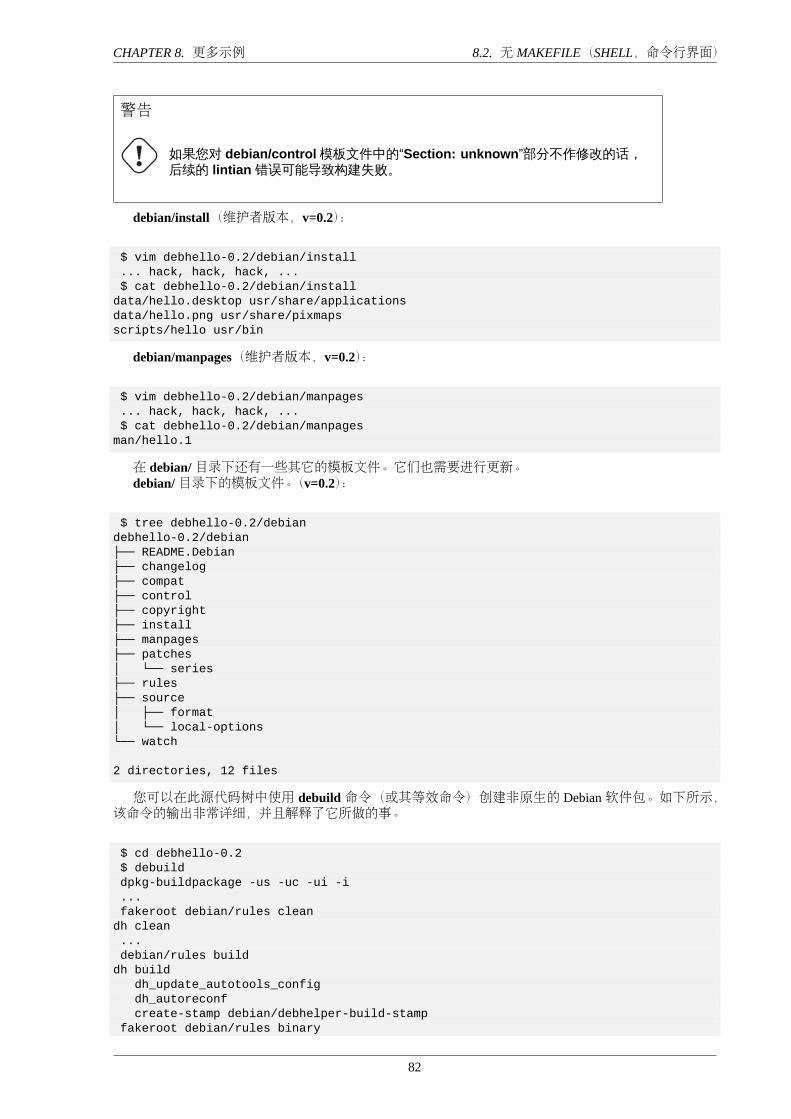
CHAPTER 8. 更多示例 8.2. 无 MAKEFILE(SHELL,命令行界面)
警告
如果您对 debian/control 模板文件中的“Section: unknown”部分不作修改的话,后续的 lintian 错误可能导致构建失败。
debian/install(维护者版本,v=0.2):
$ vim debhello-0.2/debian/install... hack, hack, hack, ...$ cat debhello-0.2/debian/install
data/hello.desktop usr/share/applicationsdata/hello.png usr/share/pixmapsscripts/hello usr/bin
debian/manpages(维护者版本,v=0.2):
$ vim debhello-0.2/debian/manpages... hack, hack, hack, ...$ cat debhello-0.2/debian/manpages
man/hello.1
在 debian/目录下还有一些其它的模板文件。它们也需要进行更新。debian/目录下的模板文件。(v=0.2):
$ tree debhello-0.2/debiandebhello-0.2/debian├── README.Debian├── changelog├── compat├── control├── copyright├── install├── manpages├── patches│ └── series├── rules├── source│ ├── format│ └── local-options└── watch
2 directories, 12 files
您可以在此源代码树中使用 debuild命令(或其等效命令)创建非原生的 Debian软件包。如下所示,该命令的输出非常详细,并且解释了它所做的事。
$ cd debhello-0.2$ debuilddpkg-buildpackage -us -uc -ui -i...fakeroot debian/rules clean
dh clean...debian/rules build
dh builddh_update_autotools_configdh_autoreconfcreate-stamp debian/debhelper-build-stamp
fakeroot debian/rules binary
82
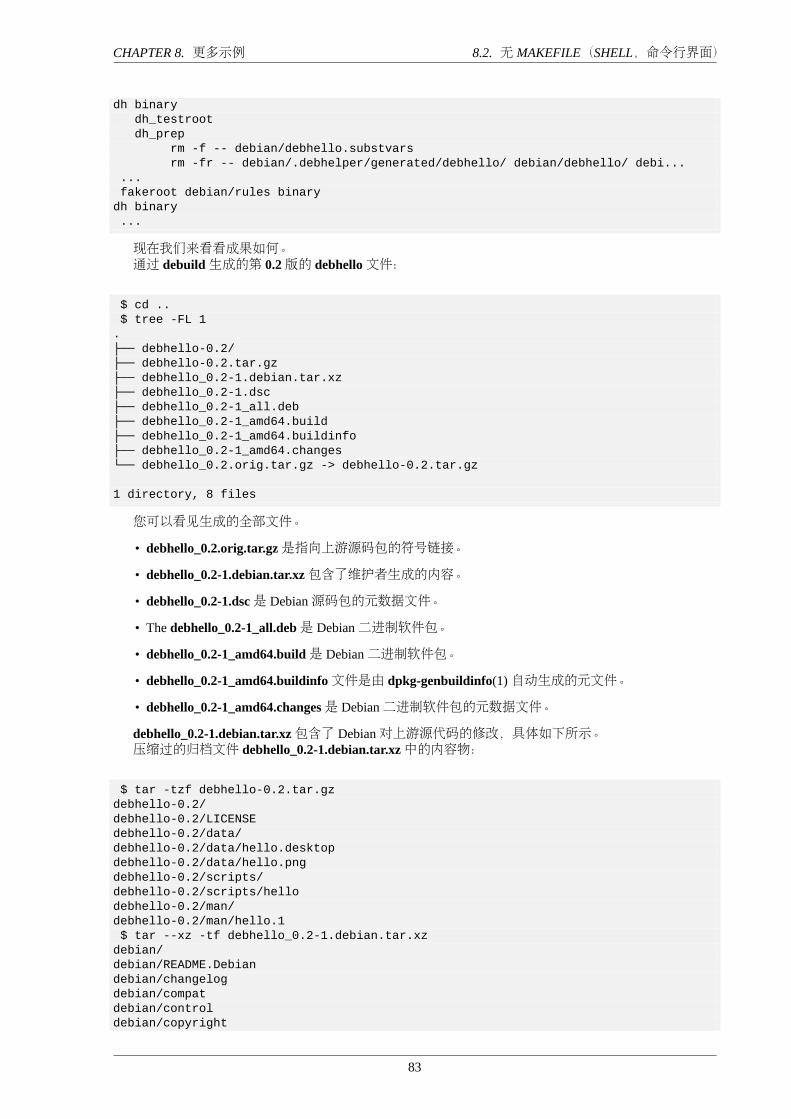
CHAPTER 8. 更多示例 8.2. 无 MAKEFILE(SHELL,命令行界面)
dh binarydh_testrootdh_prep
rm -f -- debian/debhello.substvarsrm -fr -- debian/.debhelper/generated/debhello/ debian/debhello/ debi...
...fakeroot debian/rules binary
dh binary...
现在我们来看看成果如何。通过 debuild生成的第 0.2版的 debhello文件:
$ cd ..$ tree -FL 1
.├── debhello-0.2/├── debhello-0.2.tar.gz├── debhello_0.2-1.debian.tar.xz├── debhello_0.2-1.dsc├── debhello_0.2-1_all.deb├── debhello_0.2-1_amd64.build├── debhello_0.2-1_amd64.buildinfo├── debhello_0.2-1_amd64.changes└── debhello_0.2.orig.tar.gz -> debhello-0.2.tar.gz
1 directory, 8 files
您可以看见生成的全部文件。
• debhello_0.2.orig.tar.gz是指向上游源码包的符号链接。
• debhello_0.2-1.debian.tar.xz包含了维护者生成的内容。
• debhello_0.2-1.dsc是 Debian源码包的元数据文件。
• The debhello_0.2-1_all.deb是 Debian二进制软件包。
• debhello_0.2-1_amd64.build是 Debian二进制软件包。
• debhello_0.2-1_amd64.buildinfo文件是由 dpkg-genbuildinfo(1)自动生成的元文件。
• debhello_0.2-1_amd64.changes是 Debian二进制软件包的元数据文件。
debhello_0.2-1.debian.tar.xz包含了 Debian对上游源代码的修改,具体如下所示。压缩过的归档文件 debhello_0.2-1.debian.tar.xz中的内容物:
$ tar -tzf debhello-0.2.tar.gzdebhello-0.2/debhello-0.2/LICENSEdebhello-0.2/data/debhello-0.2/data/hello.desktopdebhello-0.2/data/hello.pngdebhello-0.2/scripts/debhello-0.2/scripts/hellodebhello-0.2/man/debhello-0.2/man/hello.1$ tar --xz -tf debhello_0.2-1.debian.tar.xz
debian/debian/README.Debiandebian/changelogdebian/compatdebian/controldebian/copyright
83

CHAPTER 8. 更多示例 8.3. MAKEFILE(SHELL,命令行界面)
debian/installdebian/manpagesdebian/patches/debian/patches/seriesdebian/rulesdebian/source/debian/source/formatdebian/watch
debhello_0.2-1_amd64.deb包含了将要安装至系统中的文件,如下所示。debhello_0.2-1_all.deb二进制软件包中的内容:
$ dpkg -c debhello_0.2-1_all.debdrwxr-xr-x root/root ... ./drwxr-xr-x root/root ... ./usr/drwxr-xr-x root/root ... ./usr/bin/-rwxr-xr-x root/root ... ./usr/bin/hellodrwxr-xr-x root/root ... ./usr/share/drwxr-xr-x root/root ... ./usr/share/applications/-rw-r--r-- root/root ... ./usr/share/applications/hello.desktopdrwxr-xr-x root/root ... ./usr/share/doc/drwxr-xr-x root/root ... ./usr/share/doc/debhello/-rw-r--r-- root/root ... ./usr/share/doc/debhello/README.Debian-rw-r--r-- root/root ... ./usr/share/doc/debhello/changelog.Debian.gz-rw-r--r-- root/root ... ./usr/share/doc/debhello/copyrightdrwxr-xr-x root/root ... ./usr/share/man/drwxr-xr-x root/root ... ./usr/share/man/man1/-rw-r--r-- root/root ... ./usr/share/man/man1/hello.1.gzdrwxr-xr-x root/root ... ./usr/share/pixmaps/-rw-r--r-- root/root ... ./usr/share/pixmaps/hello.png
此处是生成的 debhello_0.2-1_all.deb的依赖项列表。debhello_0.2-1_all.deb的依赖项列表:
$ dpkg -f debhello_0.2-1_all.deb pre-depends depends recommends conflicts br...
8.3 Makefile(shell,命令行界面)下面是从 POSIX shell命令行界面程序创建简单的 Debian软件包的示例,我们假设它使用Makefile作为构建系统。让我们假设上游的源码包为 debhello-1.0.tar.gz。这一类源代码设计可以用这样的方式安装成为非系统文件:
$ tar -xzmf debhello-1.0.tar.gz$ cd debhello-1.0$ make install
Debian的打包需要对“make install”流程进行改变,从而将文件安装至目标系统镜像所在位置,而非通常使用的 /usr/local下的位置。让我们取得源码并制作 Debian软件包。下载 debhello-1.0.tar.gz
$ wget http://www.example.org/download/debhello-1.0.tar.gz...$ tar -xzmf debhello-1.0.tar.gz$ tree
.├── debhello-1.0│ ├── LICENSE
84
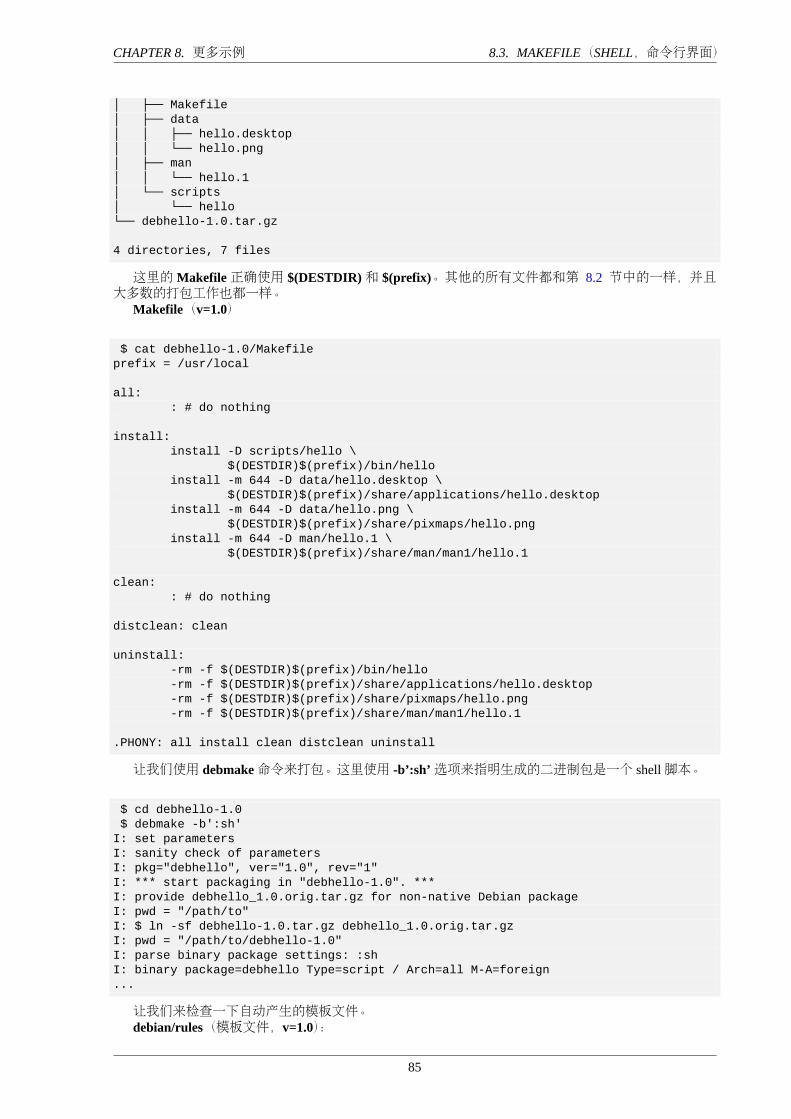
CHAPTER 8. 更多示例 8.3. MAKEFILE(SHELL,命令行界面)
│ ├── Makefile│ ├── data│ │ ├── hello.desktop│ │ └── hello.png│ ├── man│ │ └── hello.1│ └── scripts│ └── hello└── debhello-1.0.tar.gz
4 directories, 7 files
这里的Makefile正确使用 $(DESTDIR)和 $(prefix)。其他的所有文件都和第 8.2 节中的一样,并且大多数的打包工作也都一样。
Makefile(v=1.0)
$ cat debhello-1.0/Makefileprefix = /usr/local
all:: # do nothing
install:install -D scripts/hello \
$(DESTDIR)$(prefix)/bin/helloinstall -m 644 -D data/hello.desktop \
$(DESTDIR)$(prefix)/share/applications/hello.desktopinstall -m 644 -D data/hello.png \
$(DESTDIR)$(prefix)/share/pixmaps/hello.pnginstall -m 644 -D man/hello.1 \
$(DESTDIR)$(prefix)/share/man/man1/hello.1
clean:: # do nothing
distclean: clean
uninstall:-rm -f $(DESTDIR)$(prefix)/bin/hello-rm -f $(DESTDIR)$(prefix)/share/applications/hello.desktop-rm -f $(DESTDIR)$(prefix)/share/pixmaps/hello.png-rm -f $(DESTDIR)$(prefix)/share/man/man1/hello.1
.PHONY: all install clean distclean uninstall
让我们使用 debmake命令来打包。这里使用 -b’:sh’选项来指明生成的二进制包是一个 shell脚本。
$ cd debhello-1.0$ debmake -b':sh'
I: set parametersI: sanity check of parametersI: pkg="debhello", ver="1.0", rev="1"I: *** start packaging in "debhello-1.0". ***I: provide debhello_1.0.orig.tar.gz for non-native Debian packageI: pwd = "/path/to"I: $ ln -sf debhello-1.0.tar.gz debhello_1.0.orig.tar.gzI: pwd = "/path/to/debhello-1.0"I: parse binary package settings: :shI: binary package=debhello Type=script / Arch=all M-A=foreign...
让我们来检查一下自动产生的模板文件。debian/rules(模板文件,v=1.0):
85
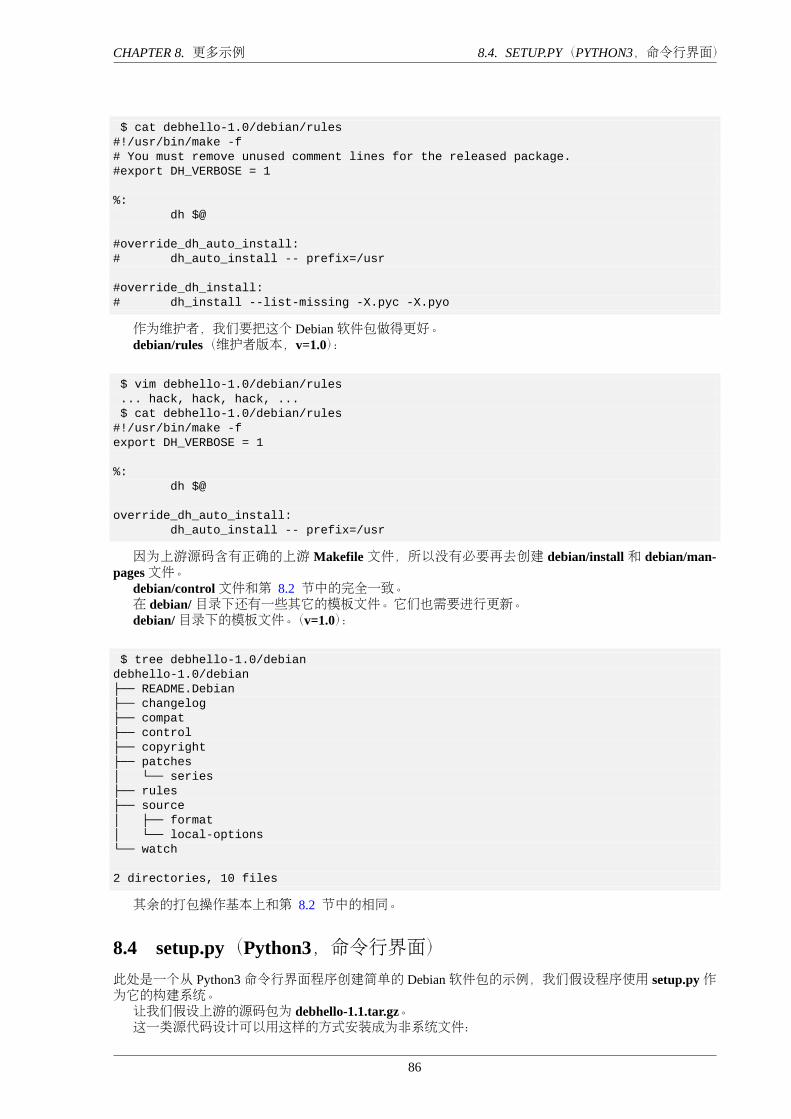
CHAPTER 8. 更多示例 8.4. SETUP.PY(PYTHON3,命令行界面)
$ cat debhello-1.0/debian/rules#!/usr/bin/make -f# You must remove unused comment lines for the released package.#export DH_VERBOSE = 1
%:dh $@
#override_dh_auto_install:# dh_auto_install -- prefix=/usr
#override_dh_install:# dh_install --list-missing -X.pyc -X.pyo
作为维护者,我们要把这个 Debian软件包做得更好。debian/rules(维护者版本,v=1.0):
$ vim debhello-1.0/debian/rules... hack, hack, hack, ...$ cat debhello-1.0/debian/rules
#!/usr/bin/make -fexport DH_VERBOSE = 1
%:dh $@
override_dh_auto_install:dh_auto_install -- prefix=/usr
因为上游源码含有正确的上游 Makefile文件,所以没有必要再去创建 debian/install和 debian/man-pages文件。
debian/control文件和第 8.2 节中的完全一致。在 debian/目录下还有一些其它的模板文件。它们也需要进行更新。debian/目录下的模板文件。(v=1.0):
$ tree debhello-1.0/debiandebhello-1.0/debian├── README.Debian├── changelog├── compat├── control├── copyright├── patches│ └── series├── rules├── source│ ├── format│ └── local-options└── watch
2 directories, 10 files
其余的打包操作基本上和第 8.2 节中的相同。
8.4 setup.py(Python3,命令行界面)此处是一个从 Python3命令行界面程序创建简单的 Debian软件包的示例,我们假设程序使用 setup.py作为它的构建系统。让我们假设上游的源码包为 debhello-1.1.tar.gz。这一类源代码设计可以用这样的方式安装成为非系统文件:
86
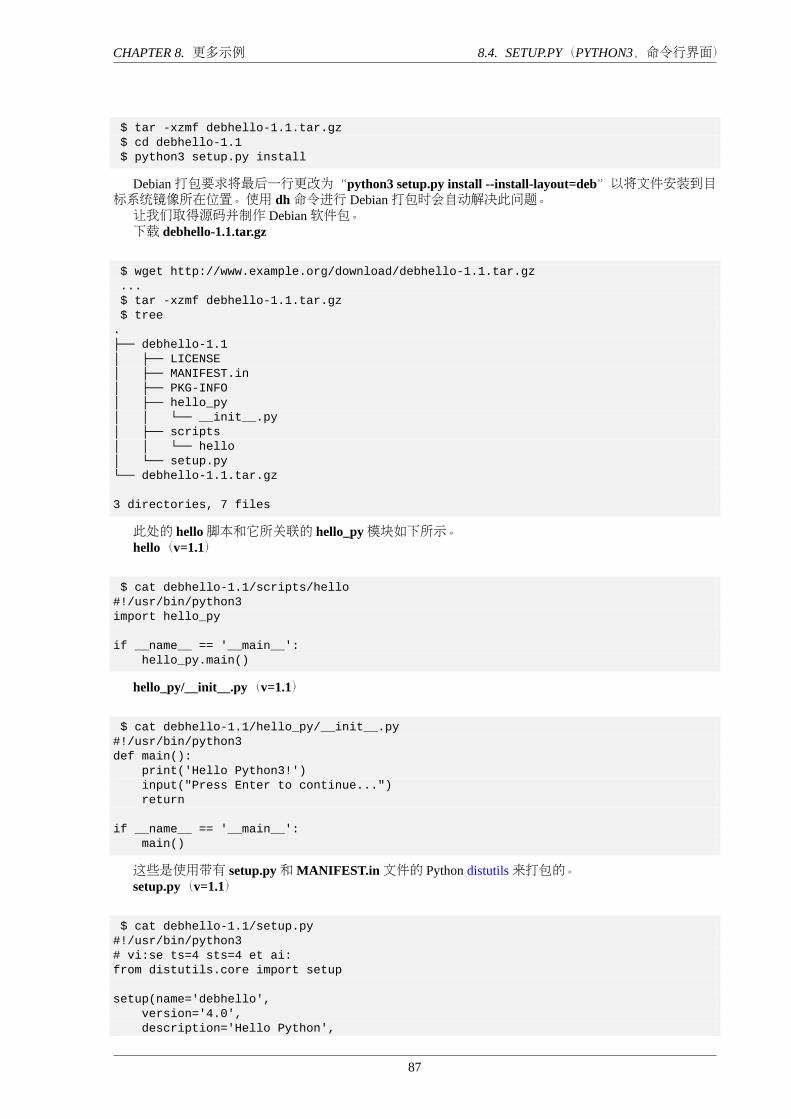
CHAPTER 8. 更多示例 8.4. SETUP.PY(PYTHON3,命令行界面)
$ tar -xzmf debhello-1.1.tar.gz$ cd debhello-1.1$ python3 setup.py install
Debian打包要求将最后一行更改为“python3 setup.py install --install-layout=deb”以将文件安装到目标系统镜像所在位置。使用 dh命令进行 Debian打包时会自动解决此问题。让我们取得源码并制作 Debian软件包。下载 debhello-1.1.tar.gz
$ wget http://www.example.org/download/debhello-1.1.tar.gz...$ tar -xzmf debhello-1.1.tar.gz$ tree
.├── debhello-1.1│ ├── LICENSE│ ├── MANIFEST.in│ ├── PKG-INFO│ ├── hello_py│ │ └── __init__.py│ ├── scripts│ │ └── hello│ └── setup.py└── debhello-1.1.tar.gz
3 directories, 7 files
此处的 hello脚本和它所关联的 hello_py模块如下所示。hello(v=1.1)
$ cat debhello-1.1/scripts/hello#!/usr/bin/python3import hello_py
if __name__ == '__main__':hello_py.main()
hello_py/__init__.py(v=1.1)
$ cat debhello-1.1/hello_py/__init__.py#!/usr/bin/python3def main():
print('Hello Python3!')input("Press Enter to continue...")return
if __name__ == '__main__':main()
这些是使用带有 setup.py和MANIFEST.in文件的 Python distutils来打包的。setup.py(v=1.1)
$ cat debhello-1.1/setup.py#!/usr/bin/python3# vi:se ts=4 sts=4 et ai:from distutils.core import setup
setup(name='debhello',version='4.0',description='Hello Python',
87
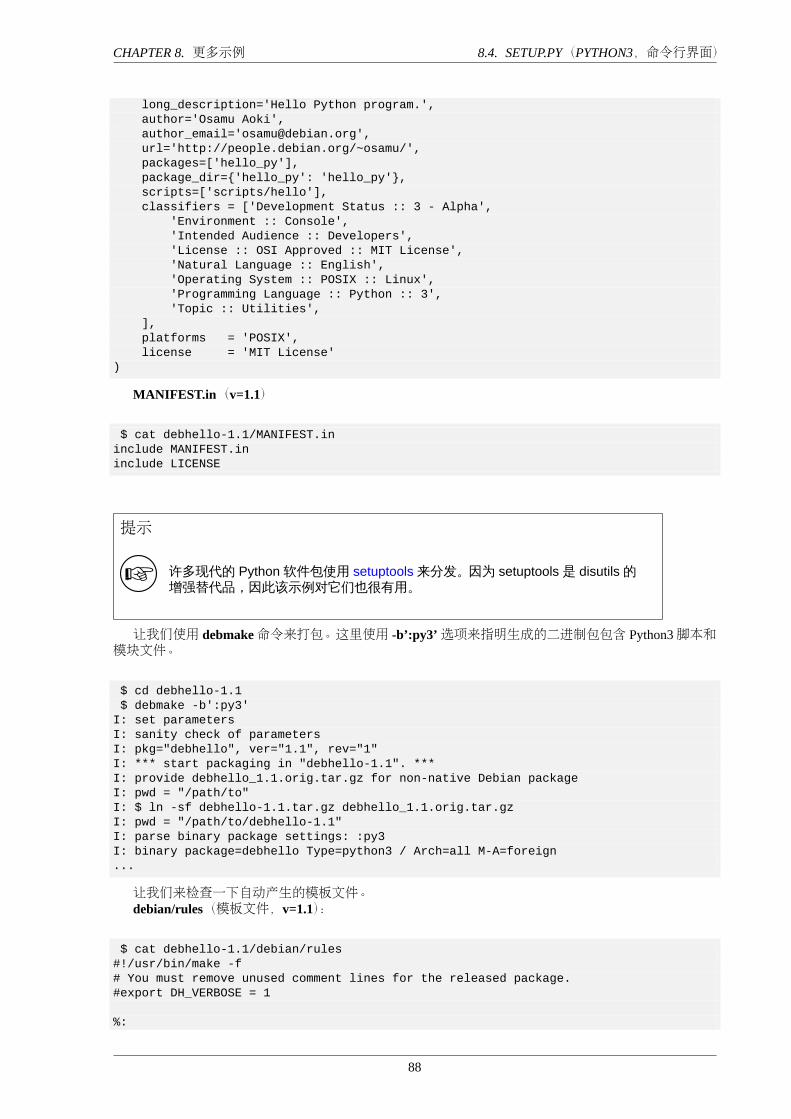
CHAPTER 8. 更多示例 8.4. SETUP.PY(PYTHON3,命令行界面)
long_description='Hello Python program.',author='Osamu Aoki',author_email='[email protected]',url='http://people.debian.org/~osamu/',packages=['hello_py'],package_dir={'hello_py': 'hello_py'},scripts=['scripts/hello'],classifiers = ['Development Status :: 3 - Alpha',
'Environment :: Console','Intended Audience :: Developers','License :: OSI Approved :: MIT License','Natural Language :: English','Operating System :: POSIX :: Linux','Programming Language :: Python :: 3','Topic :: Utilities',
],platforms = 'POSIX',license = 'MIT License'
)
MANIFEST.in(v=1.1)
$ cat debhello-1.1/MANIFEST.ininclude MANIFEST.ininclude LICENSE
提示
许多现代的 Python 软件包使用 setuptools 来分发。因为 setuptools 是 disutils 的增强替代品,因此该示例对它们也很有用。
让我们使用 debmake命令来打包。这里使用 -b’:py3’选项来指明生成的二进制包包含 Python3脚本和模块文件。
$ cd debhello-1.1$ debmake -b':py3'
I: set parametersI: sanity check of parametersI: pkg="debhello", ver="1.1", rev="1"I: *** start packaging in "debhello-1.1". ***I: provide debhello_1.1.orig.tar.gz for non-native Debian packageI: pwd = "/path/to"I: $ ln -sf debhello-1.1.tar.gz debhello_1.1.orig.tar.gzI: pwd = "/path/to/debhello-1.1"I: parse binary package settings: :py3I: binary package=debhello Type=python3 / Arch=all M-A=foreign...
让我们来检查一下自动产生的模板文件。debian/rules(模板文件,v=1.1):
$ cat debhello-1.1/debian/rules#!/usr/bin/make -f# You must remove unused comment lines for the released package.#export DH_VERBOSE = 1
%:
88
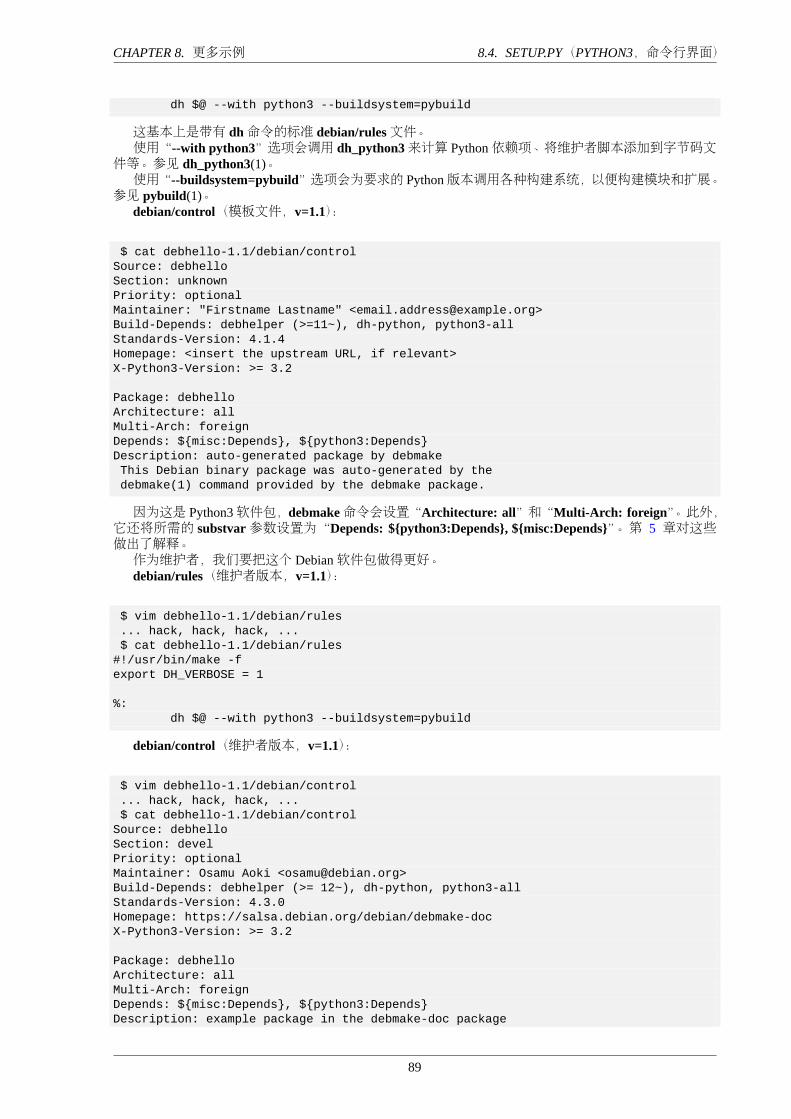
CHAPTER 8. 更多示例 8.4. SETUP.PY(PYTHON3,命令行界面)
dh $@ --with python3 --buildsystem=pybuild
这基本上是带有 dh命令的标准 debian/rules文件。使用“--with python3”选项会调用 dh_python3来计算 Python依赖项、将维护者脚本添加到字节码文
件等。参见 dh_python3(1)。使用“--buildsystem=pybuild”选项会为要求的 Python版本调用各种构建系统,以便构建模块和扩展。
参见 pybuild(1)。debian/control(模板文件,v=1.1):
$ cat debhello-1.1/debian/controlSource: debhelloSection: unknownPriority: optionalMaintainer: "Firstname Lastname" <[email protected]>Build-Depends: debhelper (>=11~), dh-python, python3-allStandards-Version: 4.1.4Homepage: <insert the upstream URL, if relevant>X-Python3-Version: >= 3.2
Package: debhelloArchitecture: allMulti-Arch: foreignDepends: ${misc:Depends}, ${python3:Depends}Description: auto-generated package by debmakeThis Debian binary package was auto-generated by thedebmake(1) command provided by the debmake package.
因为这是 Python3软件包,debmake命令会设置“Architecture: all”和“Multi-Arch: foreign”。此外,它还将所需的 substvar参数设置为“Depends: ${python3:Depends}, ${misc:Depends}”。第 5 章对这些做出了解释。作为维护者,我们要把这个 Debian软件包做得更好。debian/rules(维护者版本,v=1.1):
$ vim debhello-1.1/debian/rules... hack, hack, hack, ...$ cat debhello-1.1/debian/rules
#!/usr/bin/make -fexport DH_VERBOSE = 1
%:dh $@ --with python3 --buildsystem=pybuild
debian/control(维护者版本,v=1.1):
$ vim debhello-1.1/debian/control... hack, hack, hack, ...$ cat debhello-1.1/debian/control
Source: debhelloSection: develPriority: optionalMaintainer: Osamu Aoki <[email protected]>Build-Depends: debhelper (>= 12~), dh-python, python3-allStandards-Version: 4.3.0Homepage: https://salsa.debian.org/debian/debmake-docX-Python3-Version: >= 3.2
Package: debhelloArchitecture: allMulti-Arch: foreignDepends: ${misc:Depends}, ${python3:Depends}Description: example package in the debmake-doc package
89
CHAPTER 8. 更多示例 8.5. MAKEFILE(SHELL,图形界面)
This is an example package to demonstrate Debian packaging usingthe debmake command..The generated Debian package uses the dh command offered by thedebhelper package and the dpkg source format `3.0 (quilt)'.
hello命令没有附带上游提供的手册页。让我们这些维护者给它添上。debian/manpages等。(维护者版本,v=1.1):
$ vim debhello-1.1/debian/hello.1... hack, hack, hack, ...$ vim debhello-1.1/debian/manpages... hack, hack, hack, ...$ cat debhello-1.1/debian/manpages
debian/hello.1
在 debian/目录下还有一些其它的模板文件。它们也需要进行更新。其余的打包工作与第 8.3 节中的几乎一致。debian/目录下的模板文件。(v=1.1):
$ tree debhello-1.1/debiandebhello-1.1/debian├── README.Debian├── changelog├── compat├── control├── copyright├── hello.1├── manpages├── patches│ └── series├── rules├── source│ ├── format│ └── local-options└── watch
2 directories, 12 files
此处是生成的 debhello_1.1-1_all.deb包的依赖项列表。debhello_1.1-1_all.deb的依赖项列表:
$ dpkg -f debhello_1.1-1_all.deb pre-depends depends recommends conflicts br...Depends: python3:any (>= 3.2~)
8.5 Makefile(shell,图形界面)此处是一个从 POSIX shell图形界面程序构建简单的 Debian软件包的示例,我们假设程序使用Makefile作为构建系统。上游是基于第 8.3 节中的源代码,并带有增强的图形界面支持。让我们假设上游的源码包为 debhello-1.2.tar.gz。让我们取得源码并制作 Debian软件包。下载 debhello-1.2.tar.gz
$ wget http://www.example.org/download/debhello-1.2.tar.gz...$ tar -xzmf debhello-1.2.tar.gz$ tree
.
90
CHAPTER 8. 更多示例 8.5. MAKEFILE(SHELL,图形界面)
├── debhello-1.2│ ├── LICENSE│ ├── Makefile│ ├── data│ │ ├── hello.desktop│ │ └── hello.png│ ├── man│ │ └── hello.1│ └── scripts│ └── hello└── debhello-1.2.tar.gz
4 directories, 7 files
此处的 hello已经被重写以便使用 zenity命令来使其成为 GTK+图形界面程序。hello(v=1.2)
$ cat debhello-1.2/scripts/hello#!/bin/sh -ezenity --info --title "hello" --text "Hello from the shell!"
这里,作为图形界面程序,桌面文件被更新为 Terminal=false。hello.desktop(v=1.2)
$ cat debhello-1.2/data/hello.desktop[Desktop Entry]Name=HelloName[fr]=BonjourComment=GreetingsComment[fr]=SalutationsType=ApplicationKeywords=helloExec=helloTerminal=falseIcon=hello.pngCategories=Utility;
其余的所有文件都与第 8.3 节中的一致。让我们使用 debmake命令来打包。这里使用 -b’:sh’选项来指明生成的二进制包是一个 shell脚本。
$ cd debhello-1.2$ debmake -b':sh'
I: set parametersI: sanity check of parametersI: pkg="debhello", ver="1.2", rev="1"I: *** start packaging in "debhello-1.2". ***I: provide debhello_1.2.orig.tar.gz for non-native Debian packageI: pwd = "/path/to"I: $ ln -sf debhello-1.2.tar.gz debhello_1.2.orig.tar.gzI: pwd = "/path/to/debhello-1.2"I: parse binary package settings: :shI: binary package=debhello Type=script / Arch=all M-A=foreign...
让我们来检查一下自动产生的模板文件。debian/control(模板文件,v=1.2):
$ cat debhello-1.2/debian/controlSource: debhelloSection: unknownPriority: optional
91
CHAPTER 8. 更多示例 8.5. MAKEFILE(SHELL,图形界面)
Maintainer: "Firstname Lastname" <[email protected]>Build-Depends: debhelper (>=11~)Standards-Version: 4.1.4Homepage: <insert the upstream URL, if relevant>
Package: debhelloArchitecture: allMulti-Arch: foreignDepends: ${misc:Depends}Description: auto-generated package by debmakeThis Debian binary package was auto-generated by thedebmake(1) command provided by the debmake package.
作为维护者,我们要把这个 Debian软件包做得更好。debian/control(维护者版本,v=1.2):
$ vim debhello-1.2/debian/control... hack, hack, hack, ...$ cat debhello-1.2/debian/control
Source: debhelloSection: develPriority: optionalMaintainer: Osamu Aoki <[email protected]>Build-Depends: debhelper (>=11~)Standards-Version: 4.3.0Homepage: https://salsa.debian.org/debian/debmake-doc
Package: debhelloArchitecture: allMulti-Arch: foreignDepends: zenity, ${misc:Depends}Description: example package in the debmake-doc packageThis is an example package to demonstrate Debian packaging usingthe debmake command..The generated Debian package uses the dh command offered by thedebhelper package and the dpkg source format `3.0 (quilt)'.
请注意,这里需要手动添加 zenity依赖。debian/rules文件与第 8.3 节中的完全一致。在 debian/目录下还有一些其它的模板文件。它们也需要进行更新。debian/目录下的模板文件。(v=1.2):
$ tree debhello-1.2/debiandebhello-1.2/debian├── README.Debian├── changelog├── compat├── control├── copyright├── patches│ └── series├── rules├── source│ ├── format│ └── local-options└── watch
2 directories, 10 files
其余的打包工作与第 8.3 节中的几乎一致。此处是 debhello_1.2-1_all.deb的依赖项列表。
92
CHAPTER 8. 更多示例 8.6. SETUP.PY(PYTHON3,图形界面)
debhello_1.2-1_all.deb的依赖项列表:
$ dpkg -f debhello_1.2-1_all.deb pre-depends depends recommends conflicts br...Depends: zenity
8.6 setup.py(Python3,图形界面)此处是一个从 Python3图形界面程序构建简单的 Debian软件包的示例,我们假设程序使用 setup.py作为自身的构建系统。上游是基于第 8.4 节中的源代码,并带有增强的图形界面、桌面图标、手册页。让我们假设上游源码包为 debhello-1.3.tar.gz。让我们取得源码并制作 Debian软件包。下载 debhello-1.3.tar.gz
$ wget http://www.example.org/download/debhello-1.3.tar.gz...$ tar -xzmf debhello-1.3.tar.gz$ tree
.├── debhello-1.3│ ├── LICENSE│ ├── MANIFEST.in│ ├── PKG-INFO│ ├── data│ │ ├── hello.desktop│ │ └── hello.png│ ├── hello_py│ │ └── __init__.py│ ├── man│ │ └── hello.1│ ├── scripts│ │ └── hello│ └── setup.py└── debhello-1.3.tar.gz
5 directories, 10 files
以下是上游源码。hello(v=1.3)
$ cat debhello-1.3/scripts/hello#!/usr/bin/python3import hello_py
if __name__ == '__main__':hello_py.main()
hello_py/__init__.py(v=1.3)
$ cat debhello-1.3/hello_py/__init__.py#!/usr/bin/python3from gi.repository import Gtk
class TopWindow(Gtk.Window):
def __init__(self):Gtk.Window.__init__(self)self.title = "Hello World!"self.counter = 0
93

CHAPTER 8. 更多示例 8.6. SETUP.PY(PYTHON3,图形界面)
self.border_width = 10self.set_default_size(400, 100)self.set_position(Gtk.WindowPosition.CENTER)self.button = Gtk.Button(label="Click me!")self.button.connect("clicked", self.on_button_clicked)self.add(self.button)self.connect("delete-event", self.on_window_destroy)
def on_window_destroy(self, *args):Gtk.main_quit(*args)
def on_button_clicked(self, widget):self.counter += 1widget.set_label("Hello, World!\nClick count = %i" % self.counter)
def main():window = TopWindow()window.show_all()Gtk.main()
if __name__ == '__main__':main()
setup.py(v=1.3)
$ cat debhello-1.3/setup.py#!/usr/bin/python3# vi:se ts=4 sts=4 et ai:from distutils.core import setup
setup(name='debhello',version='4.1',description='Hello Python',long_description='Hello Python program.',author='Osamu Aoki',author_email='[email protected]',url='http://people.debian.org/~osamu/',packages=['hello_py'],package_dir={'hello_py': 'hello_py'},scripts=['scripts/hello'],data_files=[
('share/applications', ['data/hello.desktop']),('share/pixmaps', ['data/hello.png']),('share/man/man1', ['man/hello.1']),
],classifiers = ['Development Status :: 3 - Alpha',
'Environment :: Console','Intended Audience :: Developers','License :: OSI Approved :: MIT License','Natural Language :: English','Operating System :: POSIX :: Linux','Programming Language :: Python :: 3','Topic :: Utilities',
],platforms = 'POSIX',license = 'MIT License'
)
MANIFEST.in(v=1.3)
$ cat debhello-1.3/MANIFEST.ininclude MANIFEST.ininclude LICENSE
94
CHAPTER 8. 更多示例 8.6. SETUP.PY(PYTHON3,图形界面)
include data/hello.desktoinclude data/hello.pnginclude man/hello.1
让我们使用 debmake命令来打包。这里使用 -b’:py3’选项来指明生成的二进制包包含 Python3脚本和模块文件。
$ cd debhello-1.3$ debmake -b':py3'
I: set parametersI: sanity check of parametersI: pkg="debhello", ver="1.3", rev="1"I: *** start packaging in "debhello-1.3". ***I: provide debhello_1.3.orig.tar.gz for non-native Debian packageI: pwd = "/path/to"I: $ ln -sf debhello-1.3.tar.gz debhello_1.3.orig.tar.gzI: pwd = "/path/to/debhello-1.3"I: parse binary package settings: :py3I: binary package=debhello Type=python3 / Arch=all M-A=foreign...
其余的步骤与第 8.4 节中的基本一致。作为维护者,我们要把这个 Debian软件包做得更好。debian/rules(维护者版本,v=1.3):
$ vim debhello-1.3/debian/rules... hack, hack, hack, ...$ cat debhello-1.3/debian/rules
#!/usr/bin/make -fexport DH_VERBOSE = 1
%:dh $@ --with python3 --buildsystem=pybuild
debian/control(维护者版本,v=1.3):
$ vim debhello-1.3/debian/control... hack, hack, hack, ...$ cat debhello-1.3/debian/control
Source: debhelloSection: develPriority: optionalMaintainer: Osamu Aoki <[email protected]>Build-Depends: debhelper (>=11~), dh-python, python3-allStandards-Version: 4.3.0Homepage: https://salsa.debian.org/debian/debmake-docX-Python3-Version: >= 3.2
Package: debhelloArchitecture: allMulti-Arch: foreignDepends: gir1.2-gtk-3.0, python3-gi, ${misc:Depends}, ${python3:Depends}Description: example package in the debmake-doc packageThis is an example package to demonstrate Debian packaging usingthe debmake command..The generated Debian package uses the dh command offered by thedebhelper package and the dpkg source format `3.0 (quilt)'.
请注意,此处需要手动添加 python3-gi和 gir1.2-gtk-3.0依赖。因为上游源码已经自带手册页,并且其余的文件在 setup.py文件中都有对应条目,就没有必要再去创
建第 8.4 节中所要求的 debian/install和 debian/manpages文件。
95
CHAPTER 8. 更多示例 8.7. MAKEFILE(单个二进制软件包)
其余的打包工作与第 8.4 节中的几乎完全一致。此处是 debhello_1.3-1_all.deb的依赖项列表。debhello_1.3-1_all.deb的依赖项列表:
$ dpkg -f debhello_1.3-1_all.deb pre-depends depends recommends conflicts br...Depends: gir1.2-gtk-3.0, python3-gi, python3:any (>= 3.2~)
8.7 Makefile(单个二进制软件包)这里给出了从简单的 C语言源代码创建简单的 Debian软件包的例子,并假设上游使用了Makefile作为构建系统。此处的上游源代码是第 4 章中的源代码的增强版本。它带有手册页、桌面文件和桌面图标。并且为
了更加贴合实际,它还有一个外部库文件 libm。让我们假设上游源码包为 debhello-1.4.tar.gz。这一类源代码设计可以用这样的方式安装成为非系统文件:
$ tar -xzmf debhello-1.4.tar.gz$ cd debhello-1.4$ make$ make install
Debian的打包需要对“make install”流程进行改变,从而将文件安装至系统镜像所在位置,而非通常使用的 /usr/local下的位置。让我们取得源码并制作 Debian软件包。下载 debhello-1.4.tar.gz
$ wget http://www.example.org/download/debhello-1.4.tar.gz...$ tar -xzmf debhello-1.4.tar.gz$ tree
.├── debhello-1.4│ ├── LICENSE│ ├── Makefile│ ├── data│ │ ├── hello.desktop│ │ └── hello.png│ ├── man│ │ └── hello.1│ └── src│ ├── config.h│ └── hello.c└── debhello-1.4.tar.gz
4 directories, 8 files
此处的源码如下所示。src/hello.c(v=1.4):
$ cat debhello-1.4/src/hello.c#include "config.h"#include <math.h>#include <stdio.h>intmain(){
printf("Hello, I am " PACKAGE_AUTHOR "!\n");printf("4.0 * atan(1.0) = %10f8\n", 4.0*atan(1.0));return 0;
96
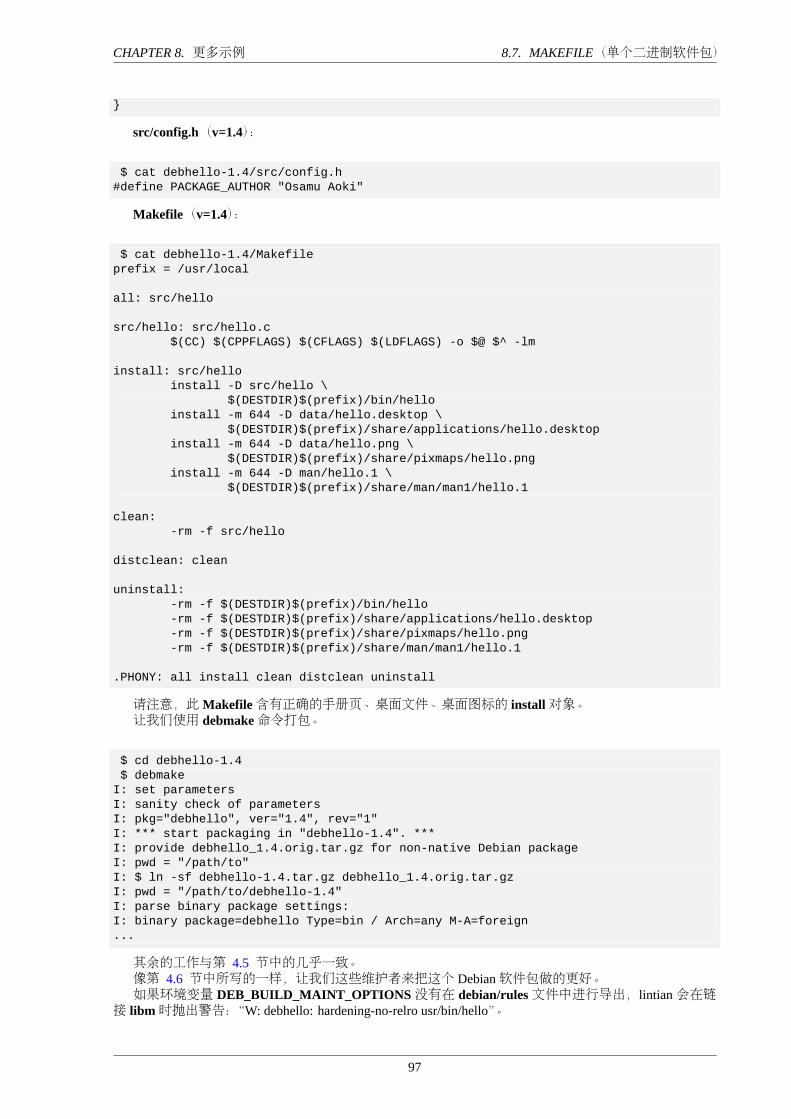
CHAPTER 8. 更多示例 8.7. MAKEFILE(单个二进制软件包)
}
src/config.h(v=1.4):
$ cat debhello-1.4/src/config.h#define PACKAGE_AUTHOR "Osamu Aoki"
Makefile(v=1.4):
$ cat debhello-1.4/Makefileprefix = /usr/local
all: src/hello
src/hello: src/hello.c$(CC) $(CPPFLAGS) $(CFLAGS) $(LDFLAGS) -o $@ $^ -lm
install: src/helloinstall -D src/hello \
$(DESTDIR)$(prefix)/bin/helloinstall -m 644 -D data/hello.desktop \
$(DESTDIR)$(prefix)/share/applications/hello.desktopinstall -m 644 -D data/hello.png \
$(DESTDIR)$(prefix)/share/pixmaps/hello.pnginstall -m 644 -D man/hello.1 \
$(DESTDIR)$(prefix)/share/man/man1/hello.1
clean:-rm -f src/hello
distclean: clean
uninstall:-rm -f $(DESTDIR)$(prefix)/bin/hello-rm -f $(DESTDIR)$(prefix)/share/applications/hello.desktop-rm -f $(DESTDIR)$(prefix)/share/pixmaps/hello.png-rm -f $(DESTDIR)$(prefix)/share/man/man1/hello.1
.PHONY: all install clean distclean uninstall
请注意,此Makefile含有正确的手册页、桌面文件、桌面图标的 install对象。让我们使用 debmake命令打包。
$ cd debhello-1.4$ debmake
I: set parametersI: sanity check of parametersI: pkg="debhello", ver="1.4", rev="1"I: *** start packaging in "debhello-1.4". ***I: provide debhello_1.4.orig.tar.gz for non-native Debian packageI: pwd = "/path/to"I: $ ln -sf debhello-1.4.tar.gz debhello_1.4.orig.tar.gzI: pwd = "/path/to/debhello-1.4"I: parse binary package settings:I: binary package=debhello Type=bin / Arch=any M-A=foreign...
其余的工作与第 4.5 节中的几乎一致。像第 4.6 节中所写的一样,让我们这些维护者来把这个 Debian软件包做的更好。如果环境变量 DEB_BUILD_MAINT_OPTIONS没有在 debian/rules文件中进行导出,lintian会在链
接 libm时抛出警告:“W: debhello: hardening-no-relro usr/bin/hello”。
97
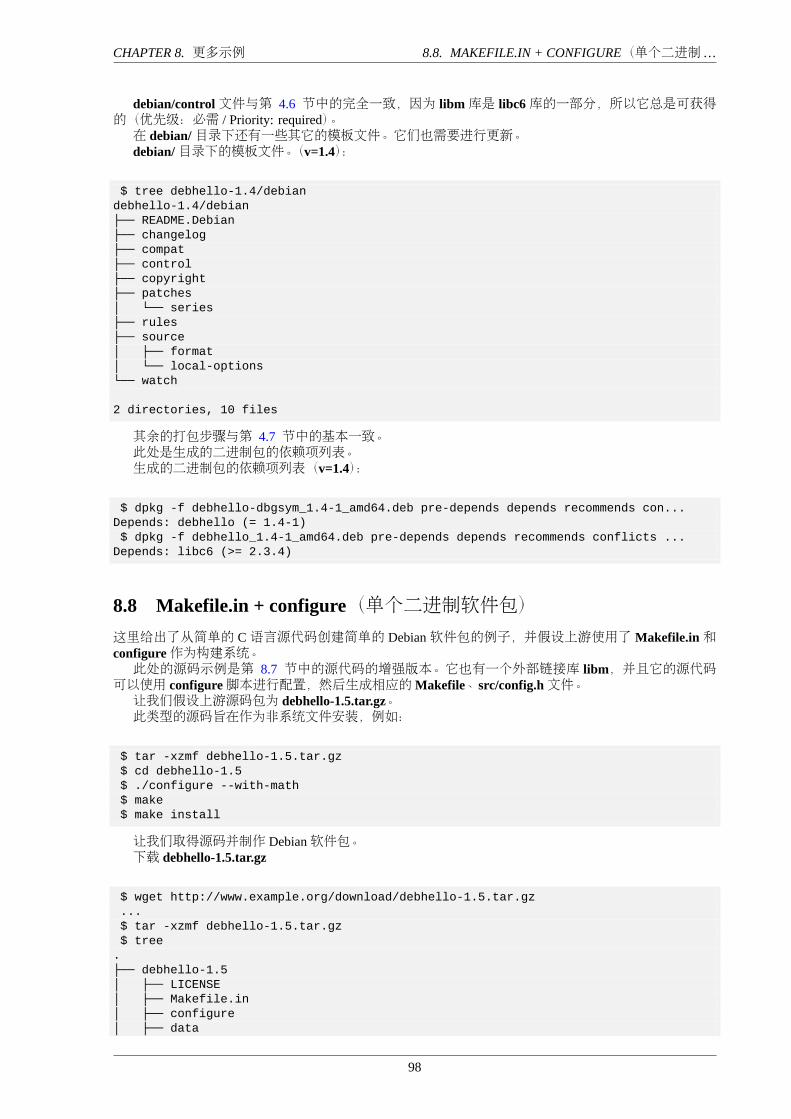
CHAPTER 8. 更多示例 8.8. MAKEFILE.IN + CONFIGURE(单个二进制…
debian/control文件与第 4.6 节中的完全一致,因为 libm库是 libc6库的一部分,所以它总是可获得的(优先级:必需 / Priority: required)。在 debian/目录下还有一些其它的模板文件。它们也需要进行更新。debian/目录下的模板文件。(v=1.4):
$ tree debhello-1.4/debiandebhello-1.4/debian├── README.Debian├── changelog├── compat├── control├── copyright├── patches│ └── series├── rules├── source│ ├── format│ └── local-options└── watch
2 directories, 10 files
其余的打包步骤与第 4.7 节中的基本一致。此处是生成的二进制包的依赖项列表。生成的二进制包的依赖项列表(v=1.4):
$ dpkg -f debhello-dbgsym_1.4-1_amd64.deb pre-depends depends recommends con...Depends: debhello (= 1.4-1)$ dpkg -f debhello_1.4-1_amd64.deb pre-depends depends recommends conflicts ...
Depends: libc6 (>= 2.3.4)
8.8 Makefile.in + configure(单个二进制软件包)这里给出了从简单的 C语言源代码创建简单的 Debian软件包的例子,并假设上游使用了Makefile.in和configure作为构建系统。此处的源码示例是第 8.7 节中的源代码的增强版本。它也有一个外部链接库 libm,并且它的源代码
可以使用 configure脚本进行配置,然后生成相应的Makefile、src/config.h文件。让我们假设上游源码包为 debhello-1.5.tar.gz。此类型的源码旨在作为非系统文件安装,例如:
$ tar -xzmf debhello-1.5.tar.gz$ cd debhello-1.5$ ./configure --with-math$ make$ make install
让我们取得源码并制作 Debian软件包。下载 debhello-1.5.tar.gz
$ wget http://www.example.org/download/debhello-1.5.tar.gz...$ tar -xzmf debhello-1.5.tar.gz$ tree
.├── debhello-1.5│ ├── LICENSE│ ├── Makefile.in│ ├── configure│ ├── data
98
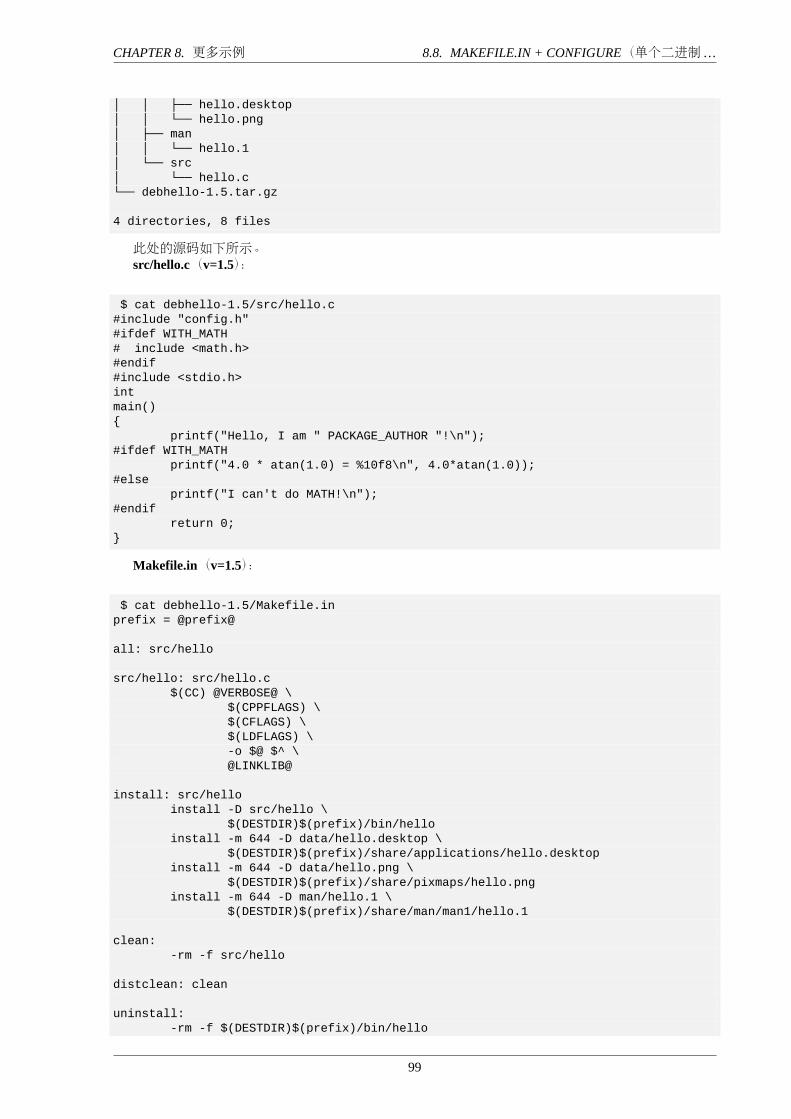
CHAPTER 8. 更多示例 8.8. MAKEFILE.IN + CONFIGURE(单个二进制…
│ │ ├── hello.desktop│ │ └── hello.png│ ├── man│ │ └── hello.1│ └── src│ └── hello.c└── debhello-1.5.tar.gz
4 directories, 8 files
此处的源码如下所示。src/hello.c(v=1.5):
$ cat debhello-1.5/src/hello.c#include "config.h"#ifdef WITH_MATH# include <math.h>#endif#include <stdio.h>intmain(){
printf("Hello, I am " PACKAGE_AUTHOR "!\n");#ifdef WITH_MATH
printf("4.0 * atan(1.0) = %10f8\n", 4.0*atan(1.0));#else
printf("I can't do MATH!\n");#endif
return 0;}
Makefile.in(v=1.5):
$ cat debhello-1.5/Makefile.inprefix = @prefix@
all: src/hello
src/hello: src/hello.c$(CC) @VERBOSE@ \
$(CPPFLAGS) \$(CFLAGS) \$(LDFLAGS) \-o $@ $^ \@LINKLIB@
install: src/helloinstall -D src/hello \
$(DESTDIR)$(prefix)/bin/helloinstall -m 644 -D data/hello.desktop \
$(DESTDIR)$(prefix)/share/applications/hello.desktopinstall -m 644 -D data/hello.png \
$(DESTDIR)$(prefix)/share/pixmaps/hello.pnginstall -m 644 -D man/hello.1 \
$(DESTDIR)$(prefix)/share/man/man1/hello.1
clean:-rm -f src/hello
distclean: clean
uninstall:-rm -f $(DESTDIR)$(prefix)/bin/hello
99
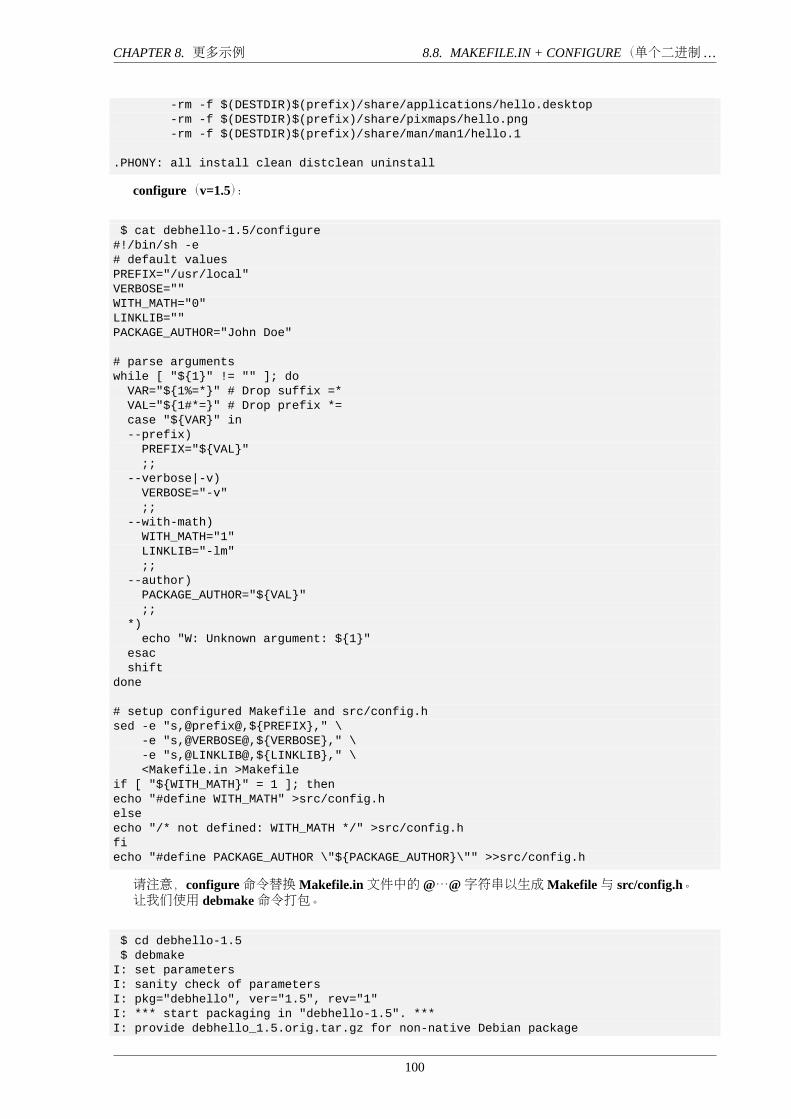
CHAPTER 8. 更多示例 8.8. MAKEFILE.IN + CONFIGURE(单个二进制…
-rm -f $(DESTDIR)$(prefix)/share/applications/hello.desktop-rm -f $(DESTDIR)$(prefix)/share/pixmaps/hello.png-rm -f $(DESTDIR)$(prefix)/share/man/man1/hello.1
.PHONY: all install clean distclean uninstall
configure(v=1.5):
$ cat debhello-1.5/configure#!/bin/sh -e# default valuesPREFIX="/usr/local"VERBOSE=""WITH_MATH="0"LINKLIB=""PACKAGE_AUTHOR="John Doe"
# parse argumentswhile [ "${1}" != "" ]; doVAR="${1%=*}" # Drop suffix =*VAL="${1#*=}" # Drop prefix *=case "${VAR}" in--prefix)PREFIX="${VAL}";;
--verbose|-v)VERBOSE="-v";;
--with-math)WITH_MATH="1"LINKLIB="-lm";;
--author)PACKAGE_AUTHOR="${VAL}";;
*)echo "W: Unknown argument: ${1}"
esacshift
done
# setup configured Makefile and src/config.hsed -e "s,@prefix@,${PREFIX}," \
-e "s,@VERBOSE@,${VERBOSE}," \-e "s,@LINKLIB@,${LINKLIB}," \<Makefile.in >Makefile
if [ "${WITH_MATH}" = 1 ]; thenecho "#define WITH_MATH" >src/config.helseecho "/* not defined: WITH_MATH */" >src/config.hfiecho "#define PACKAGE_AUTHOR \"${PACKAGE_AUTHOR}\"" >>src/config.h
请注意,configure命令替换Makefile.in文件中的@…@字符串以生成Makefile与 src/config.h。让我们使用 debmake命令打包。
$ cd debhello-1.5$ debmake
I: set parametersI: sanity check of parametersI: pkg="debhello", ver="1.5", rev="1"I: *** start packaging in "debhello-1.5". ***I: provide debhello_1.5.orig.tar.gz for non-native Debian package
100
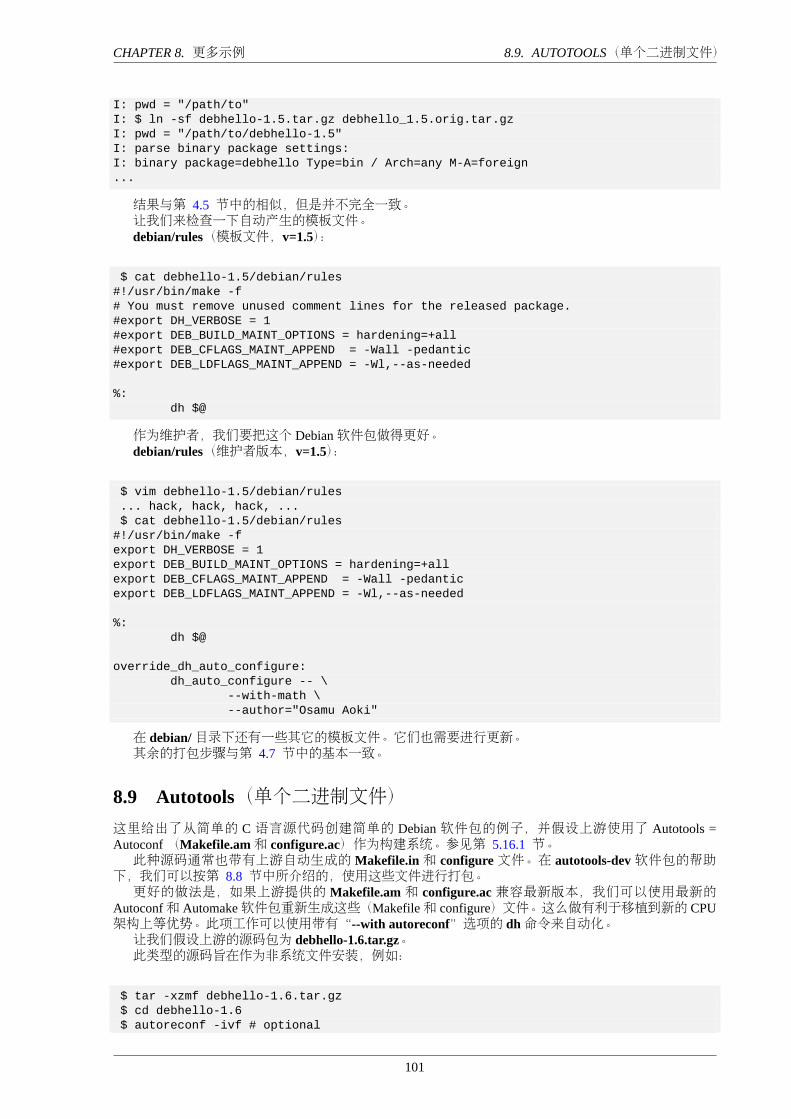
CHAPTER 8. 更多示例 8.9. AUTOTOOLS(单个二进制文件)
I: pwd = "/path/to"I: $ ln -sf debhello-1.5.tar.gz debhello_1.5.orig.tar.gzI: pwd = "/path/to/debhello-1.5"I: parse binary package settings:I: binary package=debhello Type=bin / Arch=any M-A=foreign...
结果与第 4.5 节中的相似,但是并不完全一致。让我们来检查一下自动产生的模板文件。debian/rules(模板文件,v=1.5):
$ cat debhello-1.5/debian/rules#!/usr/bin/make -f# You must remove unused comment lines for the released package.#export DH_VERBOSE = 1#export DEB_BUILD_MAINT_OPTIONS = hardening=+all#export DEB_CFLAGS_MAINT_APPEND = -Wall -pedantic#export DEB_LDFLAGS_MAINT_APPEND = -Wl,--as-needed
%:dh $@
作为维护者,我们要把这个 Debian软件包做得更好。debian/rules(维护者版本,v=1.5):
$ vim debhello-1.5/debian/rules... hack, hack, hack, ...$ cat debhello-1.5/debian/rules
#!/usr/bin/make -fexport DH_VERBOSE = 1export DEB_BUILD_MAINT_OPTIONS = hardening=+allexport DEB_CFLAGS_MAINT_APPEND = -Wall -pedanticexport DEB_LDFLAGS_MAINT_APPEND = -Wl,--as-needed
%:dh $@
override_dh_auto_configure:dh_auto_configure -- \
--with-math \--author="Osamu Aoki"
在 debian/目录下还有一些其它的模板文件。它们也需要进行更新。其余的打包步骤与第 4.7 节中的基本一致。
8.9 Autotools(单个二进制文件)这里给出了从简单的 C 语言源代码创建简单的 Debian 软件包的例子,并假设上游使用了 Autotools =Autoconf(Makefile.am和 configure.ac)作为构建系统。参见第 5.16.1 节。此种源码通常也带有上游自动生成的 Makefile.in和 configure文件。在 autotools-dev软件包的帮助
下,我们可以按第 8.8 节中所介绍的,使用这些文件进行打包。更好的做法是,如果上游提供的 Makefile.am 和 configure.ac 兼容最新版本,我们可以使用最新的
Autoconf和 Automake软件包重新生成这些(Makefile和 configure)文件。这么做有利于移植到新的 CPU架构上等优势。此项工作可以使用带有“--with autoreconf”选项的 dh命令来自动化。让我们假设上游的源码包为 debhello-1.6.tar.gz。此类型的源码旨在作为非系统文件安装,例如:
$ tar -xzmf debhello-1.6.tar.gz$ cd debhello-1.6$ autoreconf -ivf # optional
101
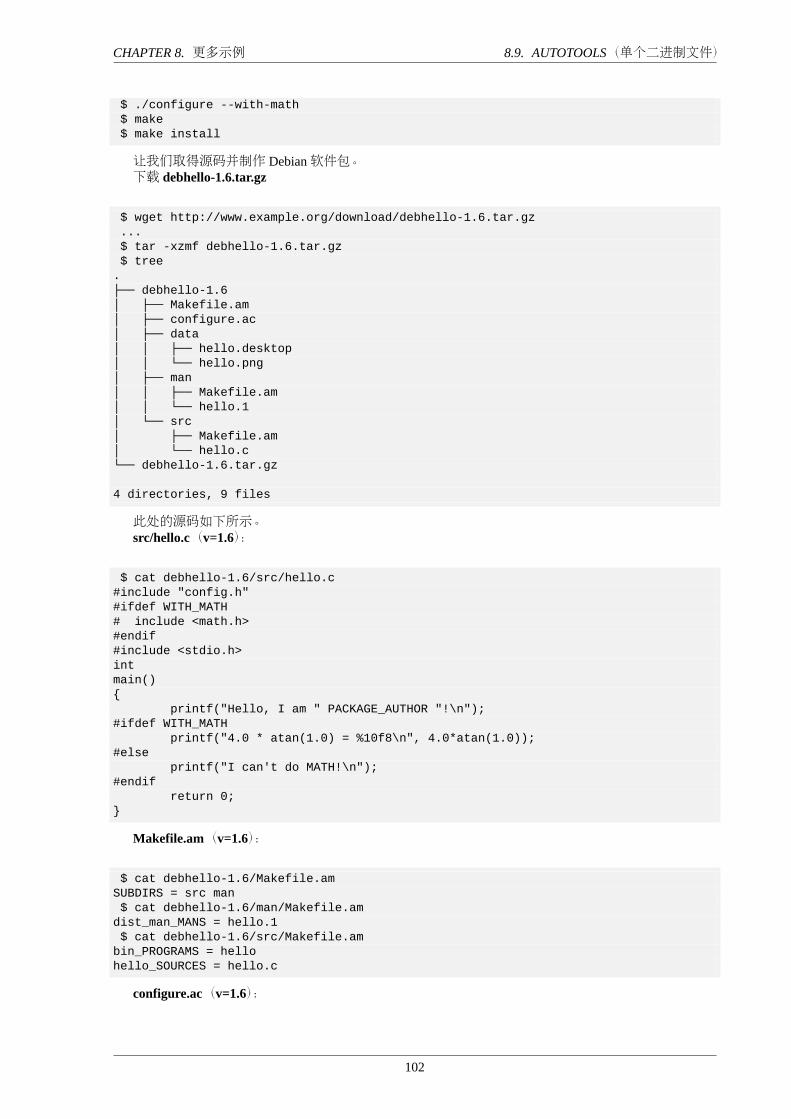
CHAPTER 8. 更多示例 8.9. AUTOTOOLS(单个二进制文件)
$ ./configure --with-math$ make$ make install
让我们取得源码并制作 Debian软件包。下载 debhello-1.6.tar.gz
$ wget http://www.example.org/download/debhello-1.6.tar.gz...$ tar -xzmf debhello-1.6.tar.gz$ tree
.├── debhello-1.6│ ├── Makefile.am│ ├── configure.ac│ ├── data│ │ ├── hello.desktop│ │ └── hello.png│ ├── man│ │ ├── Makefile.am│ │ └── hello.1│ └── src│ ├── Makefile.am│ └── hello.c└── debhello-1.6.tar.gz
4 directories, 9 files
此处的源码如下所示。src/hello.c(v=1.6):
$ cat debhello-1.6/src/hello.c#include "config.h"#ifdef WITH_MATH# include <math.h>#endif#include <stdio.h>intmain(){
printf("Hello, I am " PACKAGE_AUTHOR "!\n");#ifdef WITH_MATH
printf("4.0 * atan(1.0) = %10f8\n", 4.0*atan(1.0));#else
printf("I can't do MATH!\n");#endif
return 0;}
Makefile.am(v=1.6):
$ cat debhello-1.6/Makefile.amSUBDIRS = src man$ cat debhello-1.6/man/Makefile.am
dist_man_MANS = hello.1$ cat debhello-1.6/src/Makefile.am
bin_PROGRAMS = hellohello_SOURCES = hello.c
configure.ac(v=1.6):
102
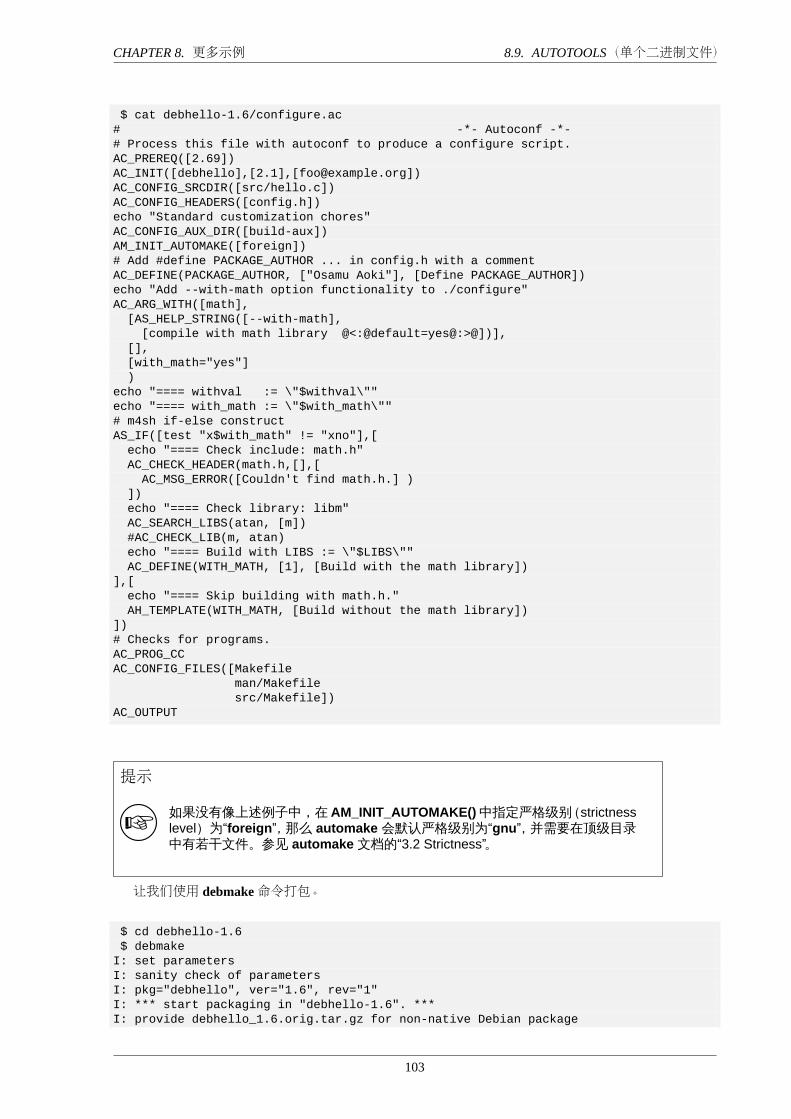
CHAPTER 8. 更多示例 8.9. AUTOTOOLS(单个二进制文件)
$ cat debhello-1.6/configure.ac# -*- Autoconf -*-# Process this file with autoconf to produce a configure script.AC_PREREQ([2.69])AC_INIT([debhello],[2.1],[[email protected]])AC_CONFIG_SRCDIR([src/hello.c])AC_CONFIG_HEADERS([config.h])echo "Standard customization chores"AC_CONFIG_AUX_DIR([build-aux])AM_INIT_AUTOMAKE([foreign])# Add #define PACKAGE_AUTHOR ... in config.h with a commentAC_DEFINE(PACKAGE_AUTHOR, ["Osamu Aoki"], [Define PACKAGE_AUTHOR])echo "Add --with-math option functionality to ./configure"AC_ARG_WITH([math],[AS_HELP_STRING([--with-math],[compile with math library @<:@default=yes@:>@])],
[],[with_math="yes"])
echo "==== withval := \"$withval\""echo "==== with_math := \"$with_math\""# m4sh if-else constructAS_IF([test "x$with_math" != "xno"],[echo "==== Check include: math.h"AC_CHECK_HEADER(math.h,[],[AC_MSG_ERROR([Couldn't find math.h.] )
])echo "==== Check library: libm"AC_SEARCH_LIBS(atan, [m])#AC_CHECK_LIB(m, atan)echo "==== Build with LIBS := \"$LIBS\""AC_DEFINE(WITH_MATH, [1], [Build with the math library])
],[echo "==== Skip building with math.h."AH_TEMPLATE(WITH_MATH, [Build without the math library])
])# Checks for programs.AC_PROG_CCAC_CONFIG_FILES([Makefile
man/Makefilesrc/Makefile])
AC_OUTPUT
提示
如果没有像上述例子中,在AM_INIT_AUTOMAKE()中指定严格级别(strictnesslevel)为“foreign”,那么 automake 会默认严格级别为“gnu”,并需要在顶级目录中有若干文件。参见 automake 文档的“3.2 Strictness”。
让我们使用 debmake命令打包。
$ cd debhello-1.6$ debmake
I: set parametersI: sanity check of parametersI: pkg="debhello", ver="1.6", rev="1"I: *** start packaging in "debhello-1.6". ***I: provide debhello_1.6.orig.tar.gz for non-native Debian package
103
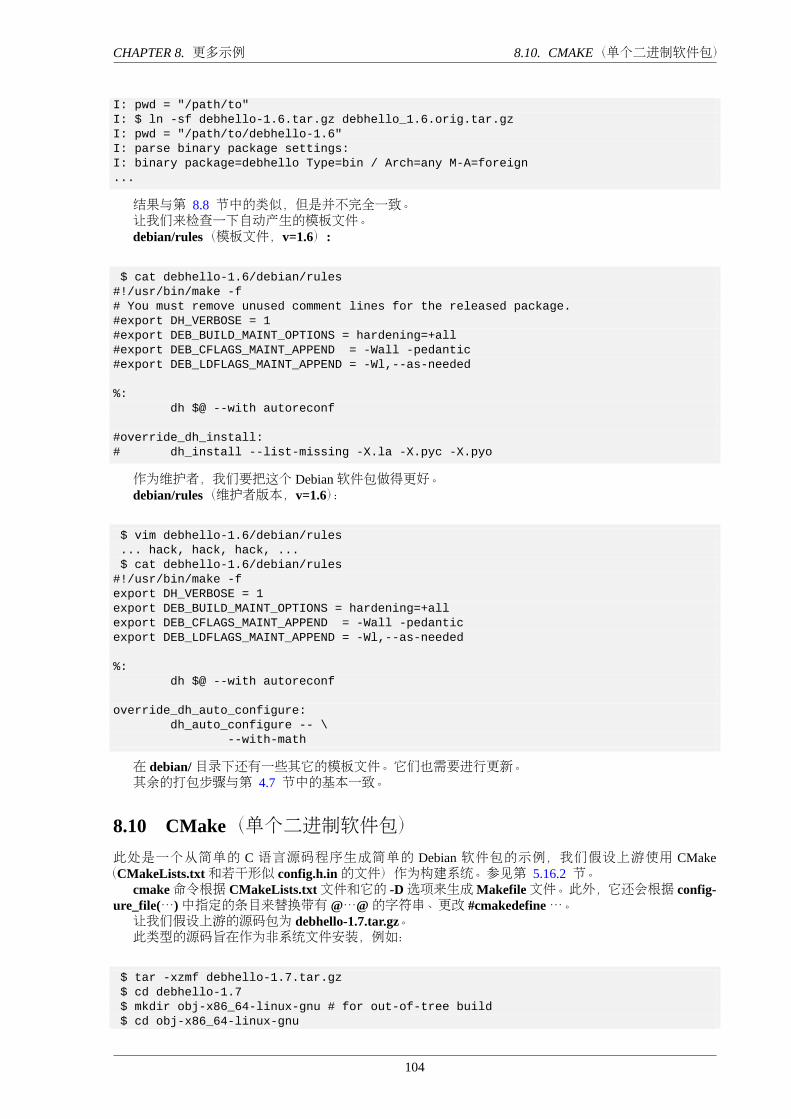
CHAPTER 8. 更多示例 8.10. CMAKE(单个二进制软件包)
I: pwd = "/path/to"I: $ ln -sf debhello-1.6.tar.gz debhello_1.6.orig.tar.gzI: pwd = "/path/to/debhello-1.6"I: parse binary package settings:I: binary package=debhello Type=bin / Arch=any M-A=foreign...
结果与第 8.8 节中的类似,但是并不完全一致。让我们来检查一下自动产生的模板文件。debian/rules(模板文件,v=1.6):
$ cat debhello-1.6/debian/rules#!/usr/bin/make -f# You must remove unused comment lines for the released package.#export DH_VERBOSE = 1#export DEB_BUILD_MAINT_OPTIONS = hardening=+all#export DEB_CFLAGS_MAINT_APPEND = -Wall -pedantic#export DEB_LDFLAGS_MAINT_APPEND = -Wl,--as-needed
%:dh $@ --with autoreconf
#override_dh_install:# dh_install --list-missing -X.la -X.pyc -X.pyo
作为维护者,我们要把这个 Debian软件包做得更好。debian/rules(维护者版本,v=1.6):
$ vim debhello-1.6/debian/rules... hack, hack, hack, ...$ cat debhello-1.6/debian/rules
#!/usr/bin/make -fexport DH_VERBOSE = 1export DEB_BUILD_MAINT_OPTIONS = hardening=+allexport DEB_CFLAGS_MAINT_APPEND = -Wall -pedanticexport DEB_LDFLAGS_MAINT_APPEND = -Wl,--as-needed
%:dh $@ --with autoreconf
override_dh_auto_configure:dh_auto_configure -- \
--with-math
在 debian/目录下还有一些其它的模板文件。它们也需要进行更新。其余的打包步骤与第 4.7 节中的基本一致。
8.10 CMake(单个二进制软件包)此处是一个从简单的 C 语言源码程序生成简单的 Debian 软件包的示例,我们假设上游使用 CMake(CMakeLists.txt和若干形似 config.h.in的文件)作为构建系统。参见第 5.16.2 节。
cmake命令根据 CMakeLists.txt文件和它的 -D选项来生成Makefile文件。此外,它还会根据 config-ure_file(…)中指定的条目来替换带有@…@的字符串、更改 #cmakedefine…。让我们假设上游的源码包为 debhello-1.7.tar.gz。此类型的源码旨在作为非系统文件安装,例如:
$ tar -xzmf debhello-1.7.tar.gz$ cd debhello-1.7$ mkdir obj-x86_64-linux-gnu # for out-of-tree build$ cd obj-x86_64-linux-gnu
104
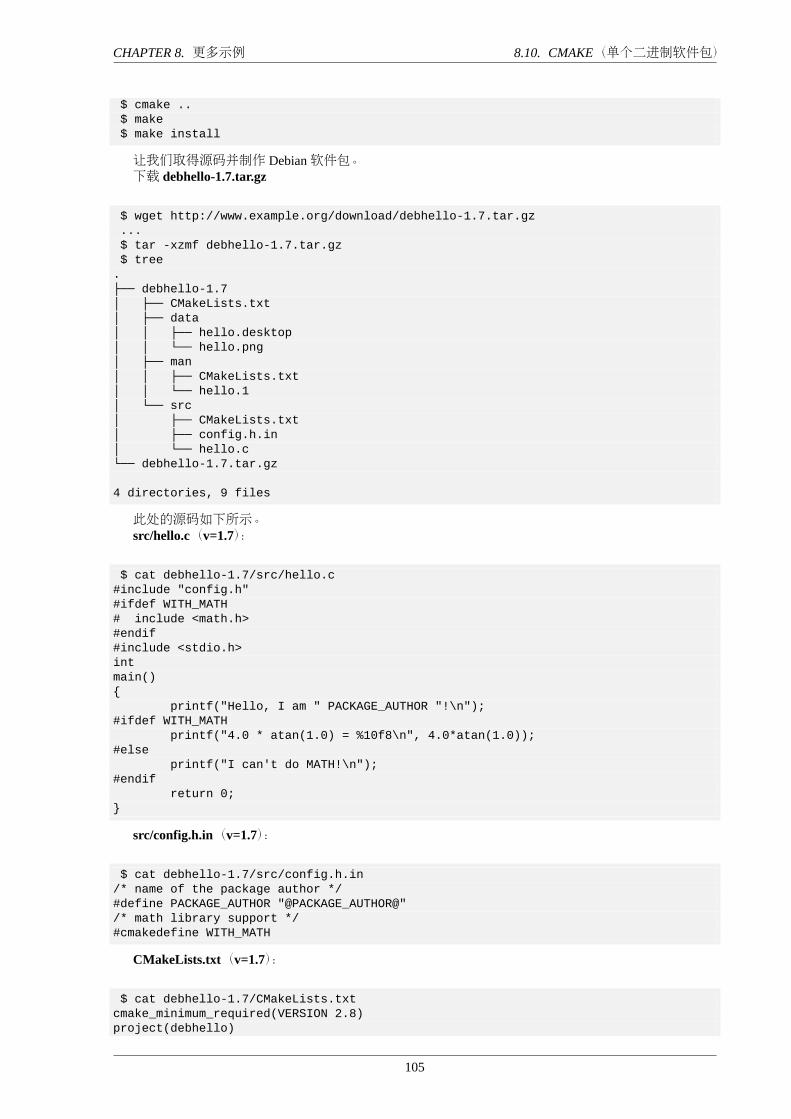
CHAPTER 8. 更多示例 8.10. CMAKE(单个二进制软件包)
$ cmake ..$ make$ make install
让我们取得源码并制作 Debian软件包。下载 debhello-1.7.tar.gz
$ wget http://www.example.org/download/debhello-1.7.tar.gz...$ tar -xzmf debhello-1.7.tar.gz$ tree
.├── debhello-1.7│ ├── CMakeLists.txt│ ├── data│ │ ├── hello.desktop│ │ └── hello.png│ ├── man│ │ ├── CMakeLists.txt│ │ └── hello.1│ └── src│ ├── CMakeLists.txt│ ├── config.h.in│ └── hello.c└── debhello-1.7.tar.gz
4 directories, 9 files
此处的源码如下所示。src/hello.c(v=1.7):
$ cat debhello-1.7/src/hello.c#include "config.h"#ifdef WITH_MATH# include <math.h>#endif#include <stdio.h>intmain(){
printf("Hello, I am " PACKAGE_AUTHOR "!\n");#ifdef WITH_MATH
printf("4.0 * atan(1.0) = %10f8\n", 4.0*atan(1.0));#else
printf("I can't do MATH!\n");#endif
return 0;}
src/config.h.in(v=1.7):
$ cat debhello-1.7/src/config.h.in/* name of the package author */#define PACKAGE_AUTHOR "@PACKAGE_AUTHOR@"/* math library support */#cmakedefine WITH_MATH
CMakeLists.txt(v=1.7):
$ cat debhello-1.7/CMakeLists.txtcmake_minimum_required(VERSION 2.8)project(debhello)
105
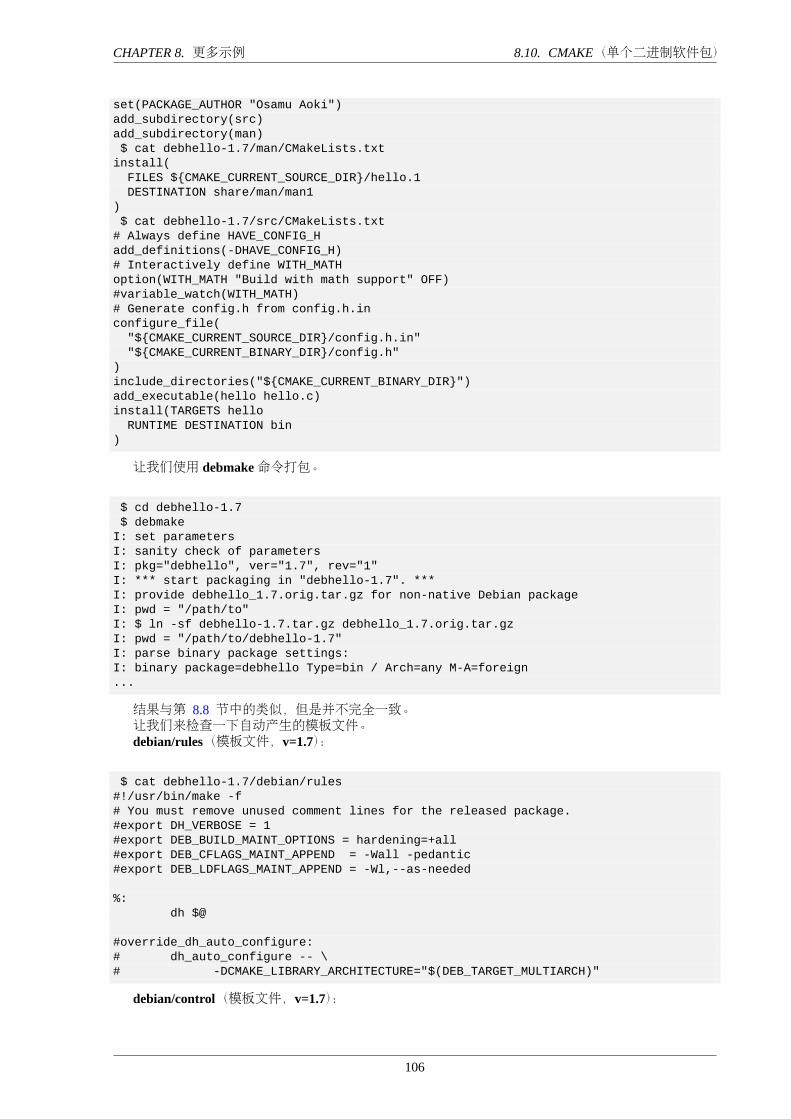
CHAPTER 8. 更多示例 8.10. CMAKE(单个二进制软件包)
set(PACKAGE_AUTHOR "Osamu Aoki")add_subdirectory(src)add_subdirectory(man)$ cat debhello-1.7/man/CMakeLists.txt
install(FILES ${CMAKE_CURRENT_SOURCE_DIR}/hello.1DESTINATION share/man/man1
)$ cat debhello-1.7/src/CMakeLists.txt
# Always define HAVE_CONFIG_Hadd_definitions(-DHAVE_CONFIG_H)# Interactively define WITH_MATHoption(WITH_MATH "Build with math support" OFF)#variable_watch(WITH_MATH)# Generate config.h from config.h.inconfigure_file("${CMAKE_CURRENT_SOURCE_DIR}/config.h.in""${CMAKE_CURRENT_BINARY_DIR}/config.h"
)include_directories("${CMAKE_CURRENT_BINARY_DIR}")add_executable(hello hello.c)install(TARGETS helloRUNTIME DESTINATION bin
)
让我们使用 debmake命令打包。
$ cd debhello-1.7$ debmake
I: set parametersI: sanity check of parametersI: pkg="debhello", ver="1.7", rev="1"I: *** start packaging in "debhello-1.7". ***I: provide debhello_1.7.orig.tar.gz for non-native Debian packageI: pwd = "/path/to"I: $ ln -sf debhello-1.7.tar.gz debhello_1.7.orig.tar.gzI: pwd = "/path/to/debhello-1.7"I: parse binary package settings:I: binary package=debhello Type=bin / Arch=any M-A=foreign...
结果与第 8.8 节中的类似,但是并不完全一致。让我们来检查一下自动产生的模板文件。debian/rules(模板文件,v=1.7):
$ cat debhello-1.7/debian/rules#!/usr/bin/make -f# You must remove unused comment lines for the released package.#export DH_VERBOSE = 1#export DEB_BUILD_MAINT_OPTIONS = hardening=+all#export DEB_CFLAGS_MAINT_APPEND = -Wall -pedantic#export DEB_LDFLAGS_MAINT_APPEND = -Wl,--as-needed
%:dh $@
#override_dh_auto_configure:# dh_auto_configure -- \# -DCMAKE_LIBRARY_ARCHITECTURE="$(DEB_TARGET_MULTIARCH)"
debian/control(模板文件,v=1.7):
106
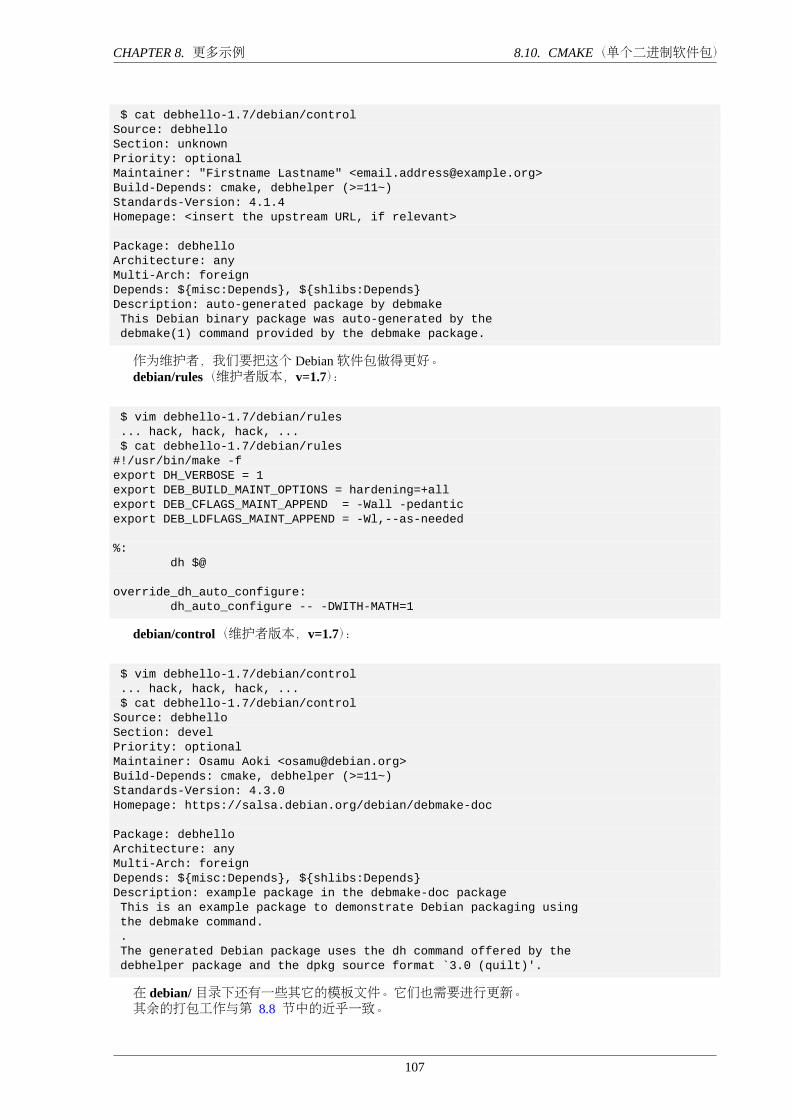
CHAPTER 8. 更多示例 8.10. CMAKE(单个二进制软件包)
$ cat debhello-1.7/debian/controlSource: debhelloSection: unknownPriority: optionalMaintainer: "Firstname Lastname" <[email protected]>Build-Depends: cmake, debhelper (>=11~)Standards-Version: 4.1.4Homepage: <insert the upstream URL, if relevant>
Package: debhelloArchitecture: anyMulti-Arch: foreignDepends: ${misc:Depends}, ${shlibs:Depends}Description: auto-generated package by debmakeThis Debian binary package was auto-generated by thedebmake(1) command provided by the debmake package.
作为维护者,我们要把这个 Debian软件包做得更好。debian/rules(维护者版本,v=1.7):
$ vim debhello-1.7/debian/rules... hack, hack, hack, ...$ cat debhello-1.7/debian/rules
#!/usr/bin/make -fexport DH_VERBOSE = 1export DEB_BUILD_MAINT_OPTIONS = hardening=+allexport DEB_CFLAGS_MAINT_APPEND = -Wall -pedanticexport DEB_LDFLAGS_MAINT_APPEND = -Wl,--as-needed
%:dh $@
override_dh_auto_configure:dh_auto_configure -- -DWITH-MATH=1
debian/control(维护者版本,v=1.7):
$ vim debhello-1.7/debian/control... hack, hack, hack, ...$ cat debhello-1.7/debian/control
Source: debhelloSection: develPriority: optionalMaintainer: Osamu Aoki <[email protected]>Build-Depends: cmake, debhelper (>=11~)Standards-Version: 4.3.0Homepage: https://salsa.debian.org/debian/debmake-doc
Package: debhelloArchitecture: anyMulti-Arch: foreignDepends: ${misc:Depends}, ${shlibs:Depends}Description: example package in the debmake-doc packageThis is an example package to demonstrate Debian packaging usingthe debmake command..The generated Debian package uses the dh command offered by thedebhelper package and the dpkg source format `3.0 (quilt)'.
在 debian/目录下还有一些其它的模板文件。它们也需要进行更新。其余的打包工作与第 8.8 节中的近乎一致。
107
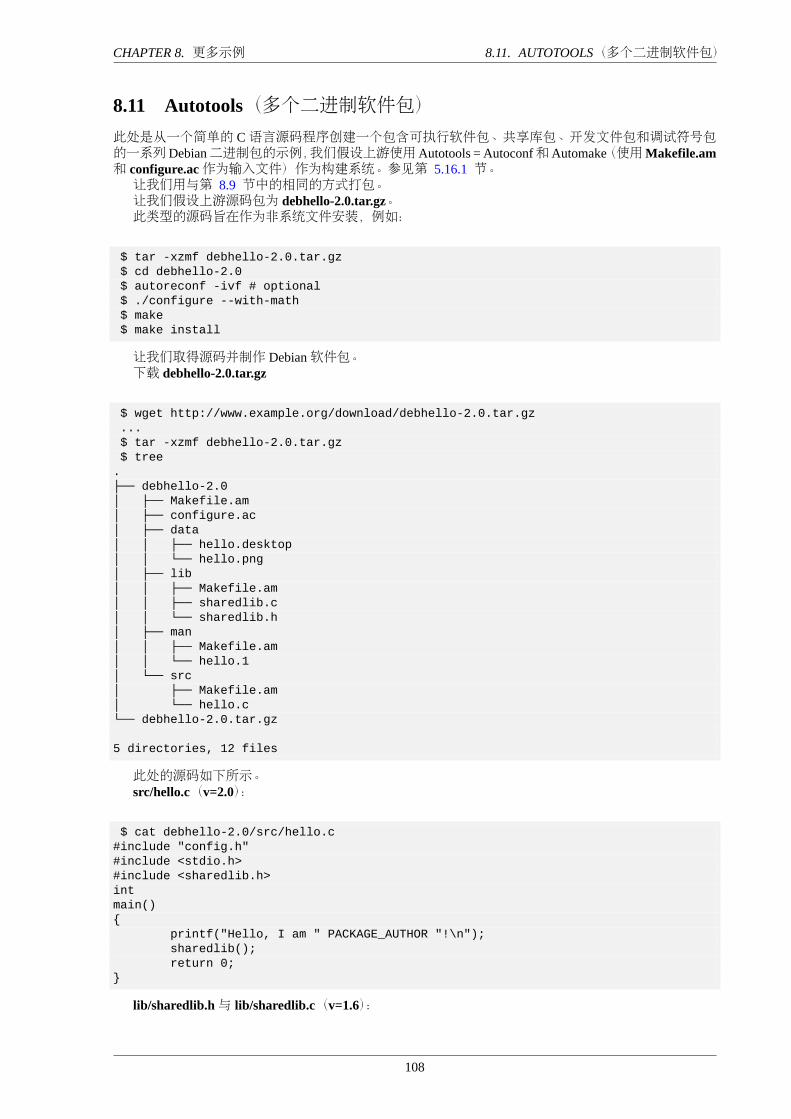
CHAPTER 8. 更多示例 8.11. AUTOTOOLS(多个二进制软件包)
8.11 Autotools(多个二进制软件包)此处是从一个简单的 C语言源码程序创建一个包含可执行软件包、共享库包、开发文件包和调试符号包的一系列Debian二进制包的示例,我们假设上游使用Autotools = Autoconf和Automake(使用Makefile.am和 configure.ac作为输入文件)作为构建系统。参见第 5.16.1 节。让我们用与第 8.9 节中的相同的方式打包。让我们假设上游源码包为 debhello-2.0.tar.gz。此类型的源码旨在作为非系统文件安装,例如:
$ tar -xzmf debhello-2.0.tar.gz$ cd debhello-2.0$ autoreconf -ivf # optional$ ./configure --with-math$ make$ make install
让我们取得源码并制作 Debian软件包。下载 debhello-2.0.tar.gz
$ wget http://www.example.org/download/debhello-2.0.tar.gz...$ tar -xzmf debhello-2.0.tar.gz$ tree
.├── debhello-2.0│ ├── Makefile.am│ ├── configure.ac│ ├── data│ │ ├── hello.desktop│ │ └── hello.png│ ├── lib│ │ ├── Makefile.am│ │ ├── sharedlib.c│ │ └── sharedlib.h│ ├── man│ │ ├── Makefile.am│ │ └── hello.1│ └── src│ ├── Makefile.am│ └── hello.c└── debhello-2.0.tar.gz
5 directories, 12 files
此处的源码如下所示。src/hello.c(v=2.0):
$ cat debhello-2.0/src/hello.c#include "config.h"#include <stdio.h>#include <sharedlib.h>intmain(){
printf("Hello, I am " PACKAGE_AUTHOR "!\n");sharedlib();return 0;
}
lib/sharedlib.h与 lib/sharedlib.c(v=1.6):
108
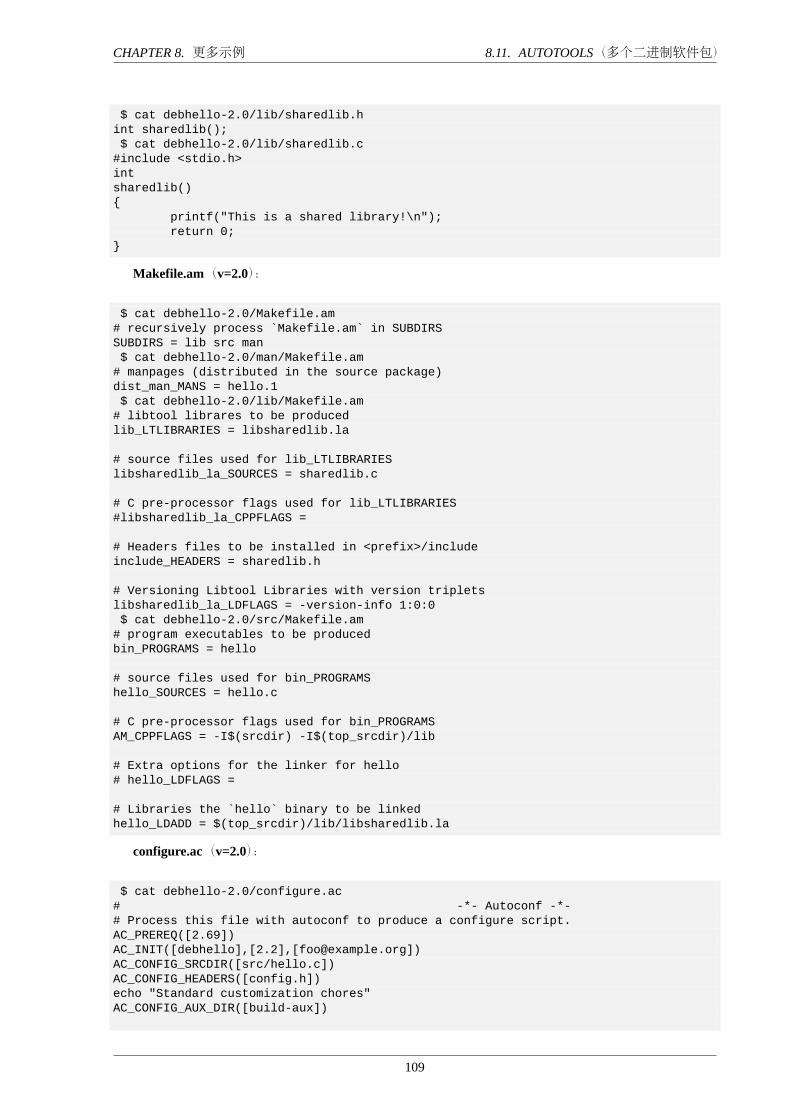
CHAPTER 8. 更多示例 8.11. AUTOTOOLS(多个二进制软件包)
$ cat debhello-2.0/lib/sharedlib.hint sharedlib();$ cat debhello-2.0/lib/sharedlib.c
#include <stdio.h>intsharedlib(){
printf("This is a shared library!\n");return 0;
}
Makefile.am(v=2.0):
$ cat debhello-2.0/Makefile.am# recursively process `Makefile.am` in SUBDIRSSUBDIRS = lib src man$ cat debhello-2.0/man/Makefile.am
# manpages (distributed in the source package)dist_man_MANS = hello.1$ cat debhello-2.0/lib/Makefile.am
# libtool librares to be producedlib_LTLIBRARIES = libsharedlib.la
# source files used for lib_LTLIBRARIESlibsharedlib_la_SOURCES = sharedlib.c
# C pre-processor flags used for lib_LTLIBRARIES#libsharedlib_la_CPPFLAGS =
# Headers files to be installed in <prefix>/includeinclude_HEADERS = sharedlib.h
# Versioning Libtool Libraries with version tripletslibsharedlib_la_LDFLAGS = -version-info 1:0:0$ cat debhello-2.0/src/Makefile.am
# program executables to be producedbin_PROGRAMS = hello
# source files used for bin_PROGRAMShello_SOURCES = hello.c
# C pre-processor flags used for bin_PROGRAMSAM_CPPFLAGS = -I$(srcdir) -I$(top_srcdir)/lib
# Extra options for the linker for hello# hello_LDFLAGS =
# Libraries the `hello` binary to be linkedhello_LDADD = $(top_srcdir)/lib/libsharedlib.la
configure.ac(v=2.0):
$ cat debhello-2.0/configure.ac# -*- Autoconf -*-# Process this file with autoconf to produce a configure script.AC_PREREQ([2.69])AC_INIT([debhello],[2.2],[[email protected]])AC_CONFIG_SRCDIR([src/hello.c])AC_CONFIG_HEADERS([config.h])echo "Standard customization chores"AC_CONFIG_AUX_DIR([build-aux])
109
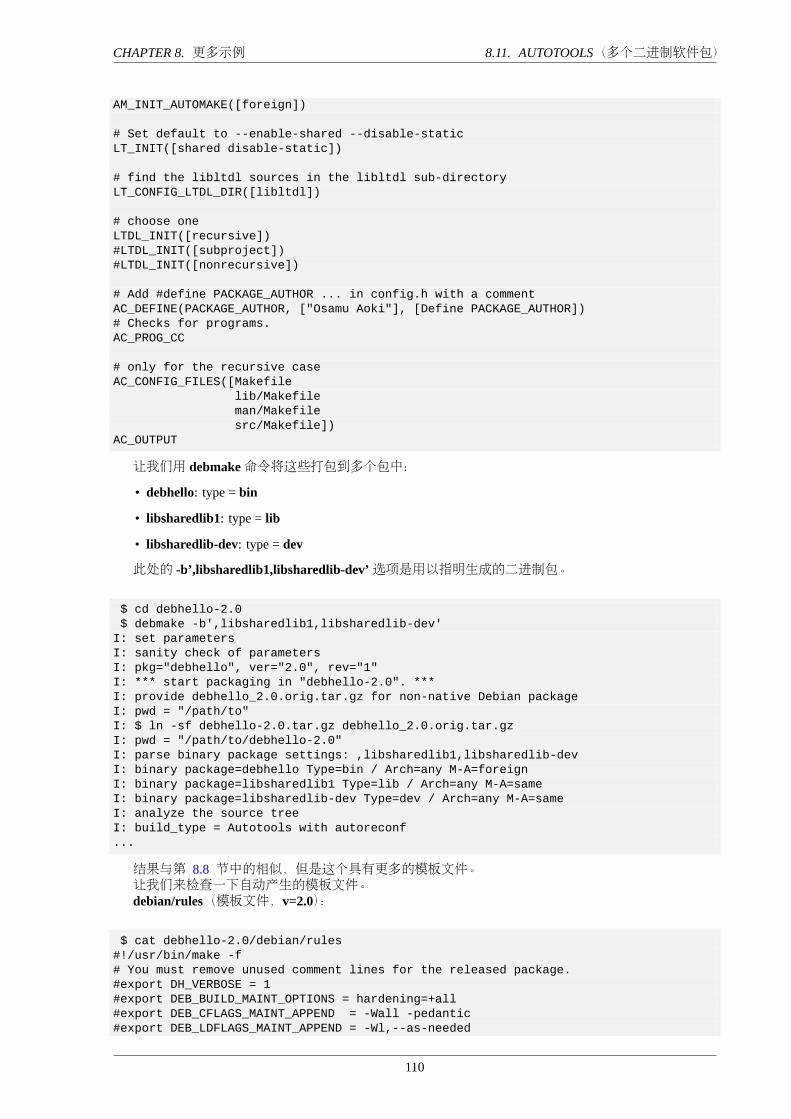
CHAPTER 8. 更多示例 8.11. AUTOTOOLS(多个二进制软件包)
AM_INIT_AUTOMAKE([foreign])
# Set default to --enable-shared --disable-staticLT_INIT([shared disable-static])
# find the libltdl sources in the libltdl sub-directoryLT_CONFIG_LTDL_DIR([libltdl])
# choose oneLTDL_INIT([recursive])#LTDL_INIT([subproject])#LTDL_INIT([nonrecursive])
# Add #define PACKAGE_AUTHOR ... in config.h with a commentAC_DEFINE(PACKAGE_AUTHOR, ["Osamu Aoki"], [Define PACKAGE_AUTHOR])# Checks for programs.AC_PROG_CC
# only for the recursive caseAC_CONFIG_FILES([Makefile
lib/Makefileman/Makefilesrc/Makefile])
AC_OUTPUT
让我们用 debmake命令将这些打包到多个包中:
• debhello: type = bin
• libsharedlib1: type = lib
• libsharedlib-dev: type = dev
此处的 -b’,libsharedlib1,libsharedlib-dev’选项是用以指明生成的二进制包。
$ cd debhello-2.0$ debmake -b',libsharedlib1,libsharedlib-dev'
I: set parametersI: sanity check of parametersI: pkg="debhello", ver="2.0", rev="1"I: *** start packaging in "debhello-2.0". ***I: provide debhello_2.0.orig.tar.gz for non-native Debian packageI: pwd = "/path/to"I: $ ln -sf debhello-2.0.tar.gz debhello_2.0.orig.tar.gzI: pwd = "/path/to/debhello-2.0"I: parse binary package settings: ,libsharedlib1,libsharedlib-devI: binary package=debhello Type=bin / Arch=any M-A=foreignI: binary package=libsharedlib1 Type=lib / Arch=any M-A=sameI: binary package=libsharedlib-dev Type=dev / Arch=any M-A=sameI: analyze the source treeI: build_type = Autotools with autoreconf...
结果与第 8.8 节中的相似,但是这个具有更多的模板文件。让我们来检查一下自动产生的模板文件。debian/rules(模板文件,v=2.0):
$ cat debhello-2.0/debian/rules#!/usr/bin/make -f# You must remove unused comment lines for the released package.#export DH_VERBOSE = 1#export DEB_BUILD_MAINT_OPTIONS = hardening=+all#export DEB_CFLAGS_MAINT_APPEND = -Wall -pedantic#export DEB_LDFLAGS_MAINT_APPEND = -Wl,--as-needed
110
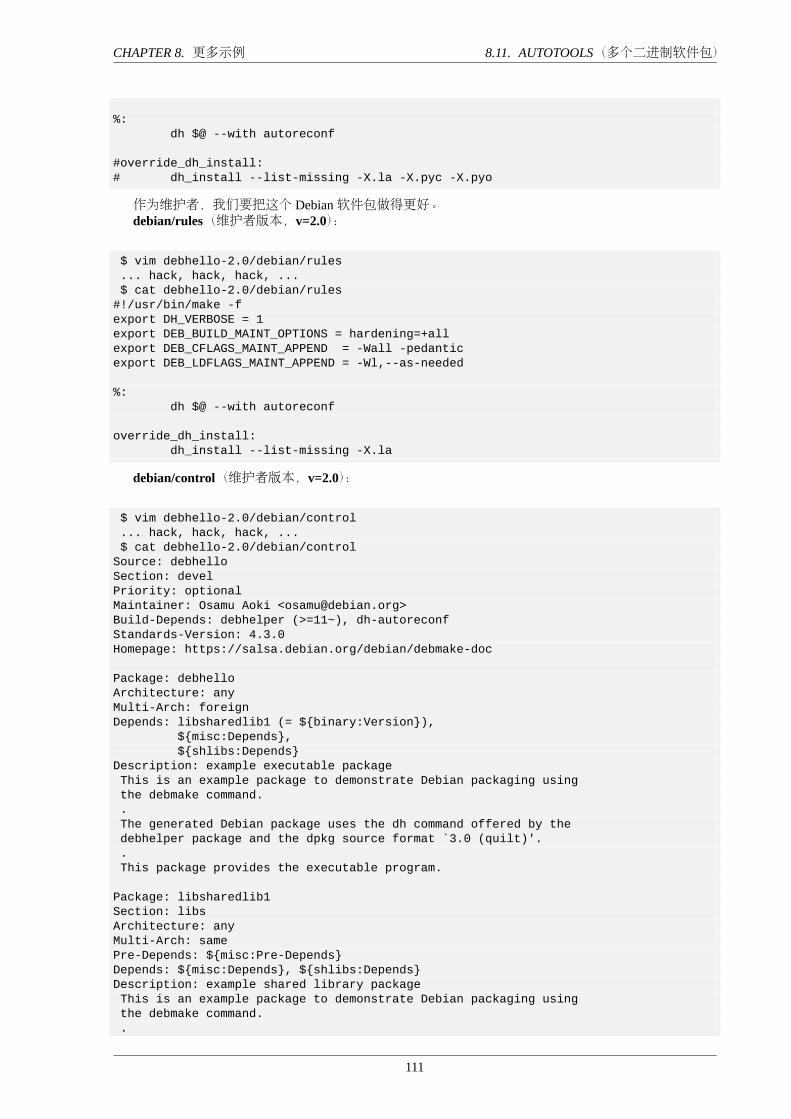
CHAPTER 8. 更多示例 8.11. AUTOTOOLS(多个二进制软件包)
%:dh $@ --with autoreconf
#override_dh_install:# dh_install --list-missing -X.la -X.pyc -X.pyo
作为维护者,我们要把这个 Debian软件包做得更好。debian/rules(维护者版本,v=2.0):
$ vim debhello-2.0/debian/rules... hack, hack, hack, ...$ cat debhello-2.0/debian/rules
#!/usr/bin/make -fexport DH_VERBOSE = 1export DEB_BUILD_MAINT_OPTIONS = hardening=+allexport DEB_CFLAGS_MAINT_APPEND = -Wall -pedanticexport DEB_LDFLAGS_MAINT_APPEND = -Wl,--as-needed
%:dh $@ --with autoreconf
override_dh_install:dh_install --list-missing -X.la
debian/control(维护者版本,v=2.0):
$ vim debhello-2.0/debian/control... hack, hack, hack, ...$ cat debhello-2.0/debian/control
Source: debhelloSection: develPriority: optionalMaintainer: Osamu Aoki <[email protected]>Build-Depends: debhelper (>=11~), dh-autoreconfStandards-Version: 4.3.0Homepage: https://salsa.debian.org/debian/debmake-doc
Package: debhelloArchitecture: anyMulti-Arch: foreignDepends: libsharedlib1 (= ${binary:Version}),
${misc:Depends},${shlibs:Depends}
Description: example executable packageThis is an example package to demonstrate Debian packaging usingthe debmake command..The generated Debian package uses the dh command offered by thedebhelper package and the dpkg source format `3.0 (quilt)'..This package provides the executable program.
Package: libsharedlib1Section: libsArchitecture: anyMulti-Arch: samePre-Depends: ${misc:Pre-Depends}Depends: ${misc:Depends}, ${shlibs:Depends}Description: example shared library packageThis is an example package to demonstrate Debian packaging usingthe debmake command..
111
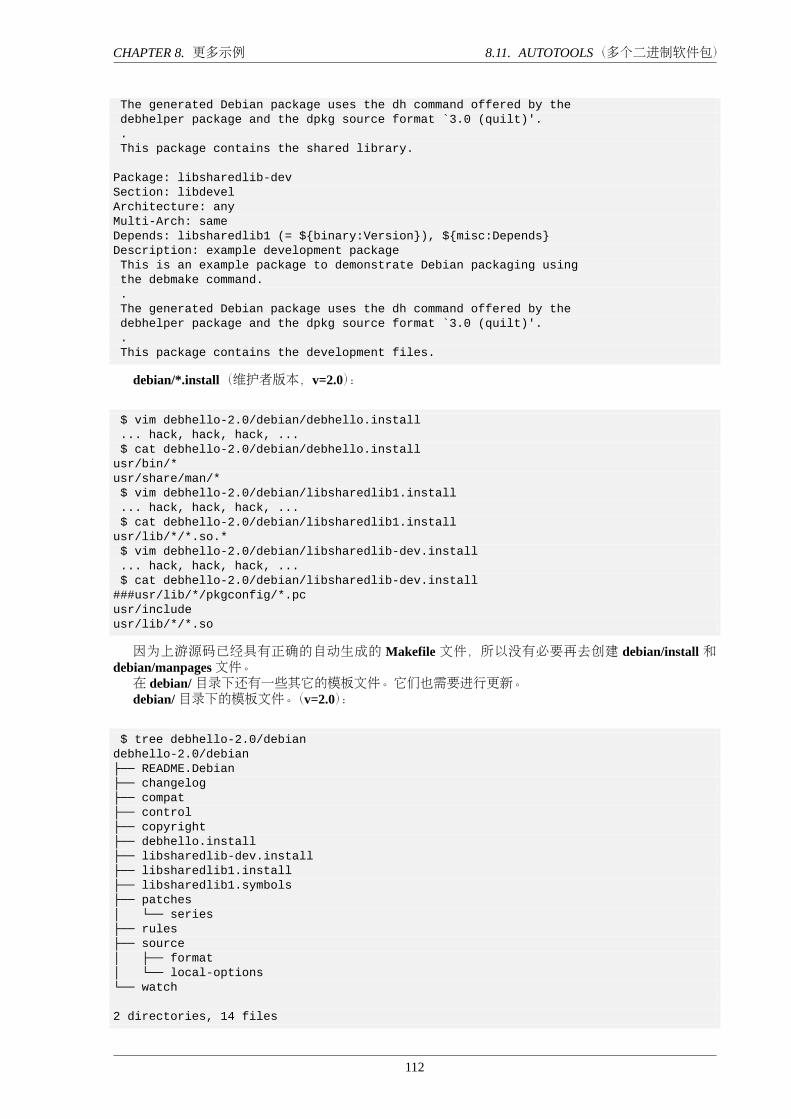
CHAPTER 8. 更多示例 8.11. AUTOTOOLS(多个二进制软件包)
The generated Debian package uses the dh command offered by thedebhelper package and the dpkg source format `3.0 (quilt)'..This package contains the shared library.
Package: libsharedlib-devSection: libdevelArchitecture: anyMulti-Arch: sameDepends: libsharedlib1 (= ${binary:Version}), ${misc:Depends}Description: example development packageThis is an example package to demonstrate Debian packaging usingthe debmake command..The generated Debian package uses the dh command offered by thedebhelper package and the dpkg source format `3.0 (quilt)'..This package contains the development files.
debian/*.install(维护者版本,v=2.0):
$ vim debhello-2.0/debian/debhello.install... hack, hack, hack, ...$ cat debhello-2.0/debian/debhello.install
usr/bin/*usr/share/man/*$ vim debhello-2.0/debian/libsharedlib1.install... hack, hack, hack, ...$ cat debhello-2.0/debian/libsharedlib1.install
usr/lib/*/*.so.*$ vim debhello-2.0/debian/libsharedlib-dev.install... hack, hack, hack, ...$ cat debhello-2.0/debian/libsharedlib-dev.install
###usr/lib/*/pkgconfig/*.pcusr/includeusr/lib/*/*.so
因为上游源码已经具有正确的自动生成的 Makefile 文件,所以没有必要再去创建 debian/install 和debian/manpages文件。在 debian/目录下还有一些其它的模板文件。它们也需要进行更新。debian/目录下的模板文件。(v=2.0):
$ tree debhello-2.0/debiandebhello-2.0/debian├── README.Debian├── changelog├── compat├── control├── copyright├── debhello.install├── libsharedlib-dev.install├── libsharedlib1.install├── libsharedlib1.symbols├── patches│ └── series├── rules├── source│ ├── format│ └── local-options└── watch
2 directories, 14 files
112
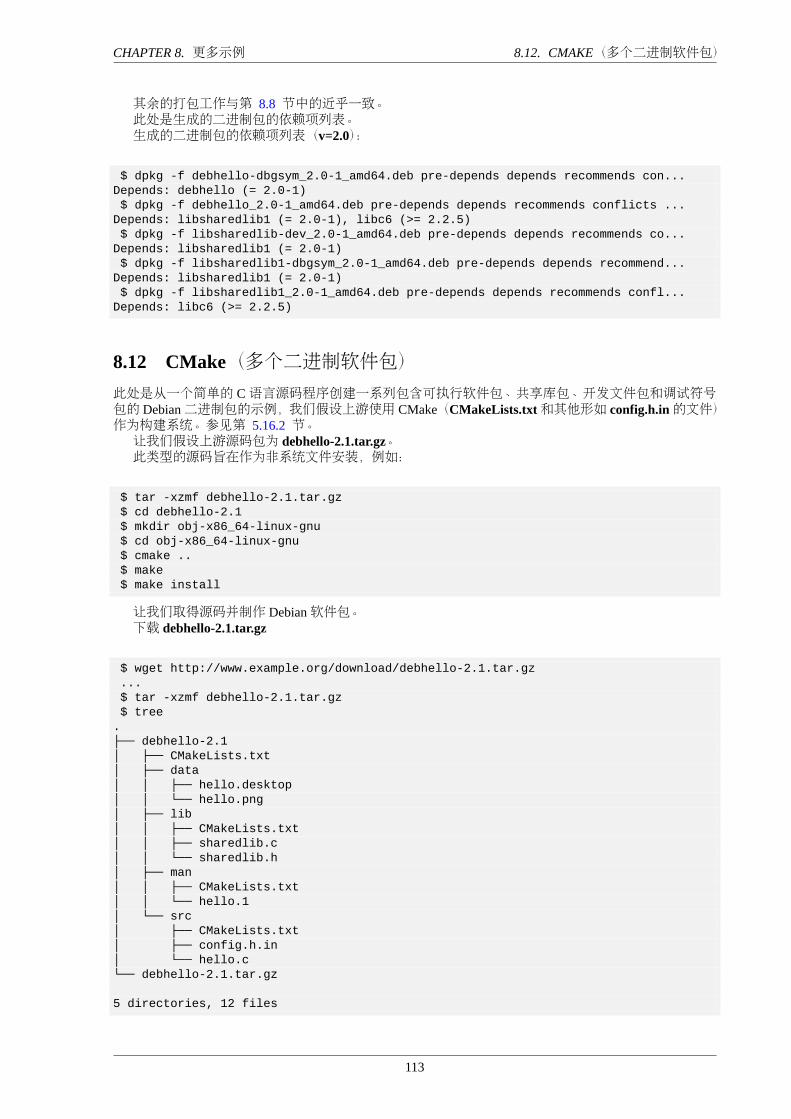
CHAPTER 8. 更多示例 8.12. CMAKE(多个二进制软件包)
其余的打包工作与第 8.8 节中的近乎一致。此处是生成的二进制包的依赖项列表。生成的二进制包的依赖项列表(v=2.0):
$ dpkg -f debhello-dbgsym_2.0-1_amd64.deb pre-depends depends recommends con...Depends: debhello (= 2.0-1)$ dpkg -f debhello_2.0-1_amd64.deb pre-depends depends recommends conflicts ...
Depends: libsharedlib1 (= 2.0-1), libc6 (>= 2.2.5)$ dpkg -f libsharedlib-dev_2.0-1_amd64.deb pre-depends depends recommends co...
Depends: libsharedlib1 (= 2.0-1)$ dpkg -f libsharedlib1-dbgsym_2.0-1_amd64.deb pre-depends depends recommend...
Depends: libsharedlib1 (= 2.0-1)$ dpkg -f libsharedlib1_2.0-1_amd64.deb pre-depends depends recommends confl...
Depends: libc6 (>= 2.2.5)
8.12 CMake(多个二进制软件包)此处是从一个简单的 C语言源码程序创建一系列包含可执行软件包、共享库包、开发文件包和调试符号包的 Debian二进制包的示例,我们假设上游使用 CMake(CMakeLists.txt和其他形如 config.h.in的文件)作为构建系统。参见第 5.16.2 节。让我们假设上游源码包为 debhello-2.1.tar.gz。此类型的源码旨在作为非系统文件安装,例如:
$ tar -xzmf debhello-2.1.tar.gz$ cd debhello-2.1$ mkdir obj-x86_64-linux-gnu$ cd obj-x86_64-linux-gnu$ cmake ..$ make$ make install
让我们取得源码并制作 Debian软件包。下载 debhello-2.1.tar.gz
$ wget http://www.example.org/download/debhello-2.1.tar.gz...$ tar -xzmf debhello-2.1.tar.gz$ tree
.├── debhello-2.1│ ├── CMakeLists.txt│ ├── data│ │ ├── hello.desktop│ │ └── hello.png│ ├── lib│ │ ├── CMakeLists.txt│ │ ├── sharedlib.c│ │ └── sharedlib.h│ ├── man│ │ ├── CMakeLists.txt│ │ └── hello.1│ └── src│ ├── CMakeLists.txt│ ├── config.h.in│ └── hello.c└── debhello-2.1.tar.gz
5 directories, 12 files
113
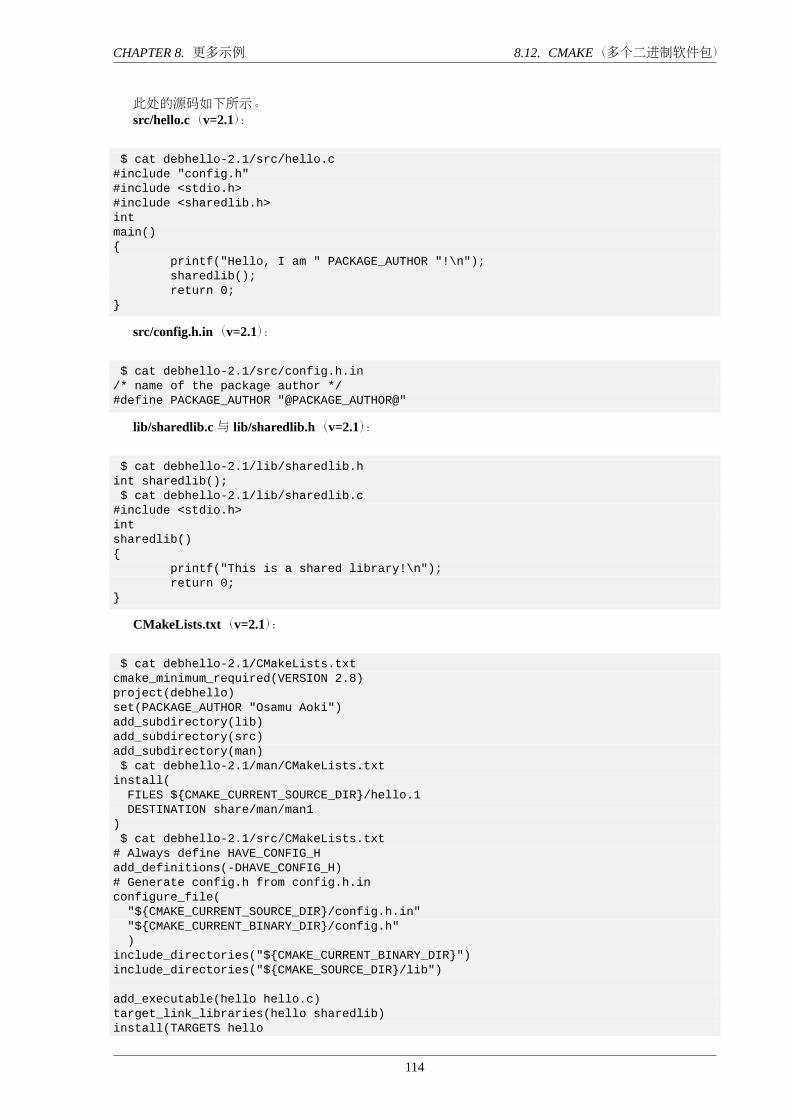
CHAPTER 8. 更多示例 8.12. CMAKE(多个二进制软件包)
此处的源码如下所示。src/hello.c(v=2.1):
$ cat debhello-2.1/src/hello.c#include "config.h"#include <stdio.h>#include <sharedlib.h>intmain(){
printf("Hello, I am " PACKAGE_AUTHOR "!\n");sharedlib();return 0;
}
src/config.h.in(v=2.1):
$ cat debhello-2.1/src/config.h.in/* name of the package author */#define PACKAGE_AUTHOR "@PACKAGE_AUTHOR@"
lib/sharedlib.c与 lib/sharedlib.h(v=2.1):
$ cat debhello-2.1/lib/sharedlib.hint sharedlib();$ cat debhello-2.1/lib/sharedlib.c
#include <stdio.h>intsharedlib(){
printf("This is a shared library!\n");return 0;
}
CMakeLists.txt(v=2.1):
$ cat debhello-2.1/CMakeLists.txtcmake_minimum_required(VERSION 2.8)project(debhello)set(PACKAGE_AUTHOR "Osamu Aoki")add_subdirectory(lib)add_subdirectory(src)add_subdirectory(man)$ cat debhello-2.1/man/CMakeLists.txt
install(FILES ${CMAKE_CURRENT_SOURCE_DIR}/hello.1DESTINATION share/man/man1
)$ cat debhello-2.1/src/CMakeLists.txt
# Always define HAVE_CONFIG_Hadd_definitions(-DHAVE_CONFIG_H)# Generate config.h from config.h.inconfigure_file("${CMAKE_CURRENT_SOURCE_DIR}/config.h.in""${CMAKE_CURRENT_BINARY_DIR}/config.h")
include_directories("${CMAKE_CURRENT_BINARY_DIR}")include_directories("${CMAKE_SOURCE_DIR}/lib")
add_executable(hello hello.c)target_link_libraries(hello sharedlib)install(TARGETS hello
114
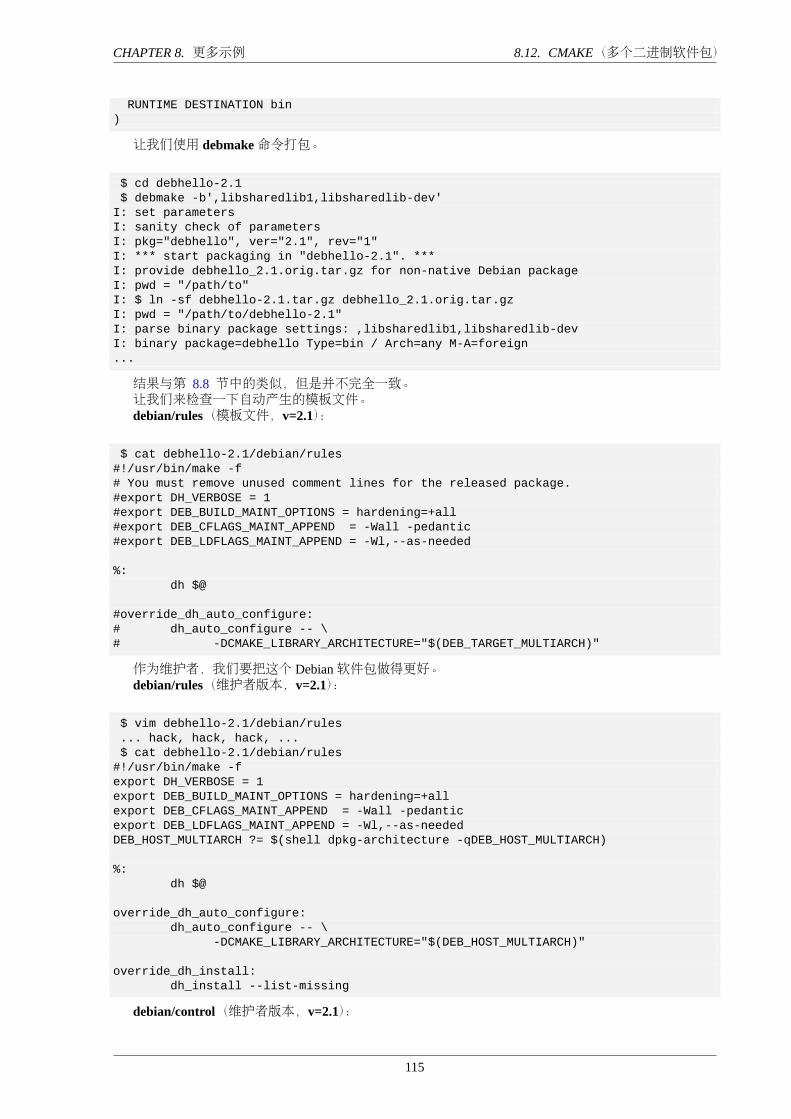
CHAPTER 8. 更多示例 8.12. CMAKE(多个二进制软件包)
RUNTIME DESTINATION bin)
让我们使用 debmake命令打包。
$ cd debhello-2.1$ debmake -b',libsharedlib1,libsharedlib-dev'
I: set parametersI: sanity check of parametersI: pkg="debhello", ver="2.1", rev="1"I: *** start packaging in "debhello-2.1". ***I: provide debhello_2.1.orig.tar.gz for non-native Debian packageI: pwd = "/path/to"I: $ ln -sf debhello-2.1.tar.gz debhello_2.1.orig.tar.gzI: pwd = "/path/to/debhello-2.1"I: parse binary package settings: ,libsharedlib1,libsharedlib-devI: binary package=debhello Type=bin / Arch=any M-A=foreign...
结果与第 8.8 节中的类似,但是并不完全一致。让我们来检查一下自动产生的模板文件。debian/rules(模板文件,v=2.1):
$ cat debhello-2.1/debian/rules#!/usr/bin/make -f# You must remove unused comment lines for the released package.#export DH_VERBOSE = 1#export DEB_BUILD_MAINT_OPTIONS = hardening=+all#export DEB_CFLAGS_MAINT_APPEND = -Wall -pedantic#export DEB_LDFLAGS_MAINT_APPEND = -Wl,--as-needed
%:dh $@
#override_dh_auto_configure:# dh_auto_configure -- \# -DCMAKE_LIBRARY_ARCHITECTURE="$(DEB_TARGET_MULTIARCH)"
作为维护者,我们要把这个 Debian软件包做得更好。debian/rules(维护者版本,v=2.1):
$ vim debhello-2.1/debian/rules... hack, hack, hack, ...$ cat debhello-2.1/debian/rules
#!/usr/bin/make -fexport DH_VERBOSE = 1export DEB_BUILD_MAINT_OPTIONS = hardening=+allexport DEB_CFLAGS_MAINT_APPEND = -Wall -pedanticexport DEB_LDFLAGS_MAINT_APPEND = -Wl,--as-neededDEB_HOST_MULTIARCH ?= $(shell dpkg-architecture -qDEB_HOST_MULTIARCH)
%:dh $@
override_dh_auto_configure:dh_auto_configure -- \
-DCMAKE_LIBRARY_ARCHITECTURE="$(DEB_HOST_MULTIARCH)"
override_dh_install:dh_install --list-missing
debian/control(维护者版本,v=2.1):
115
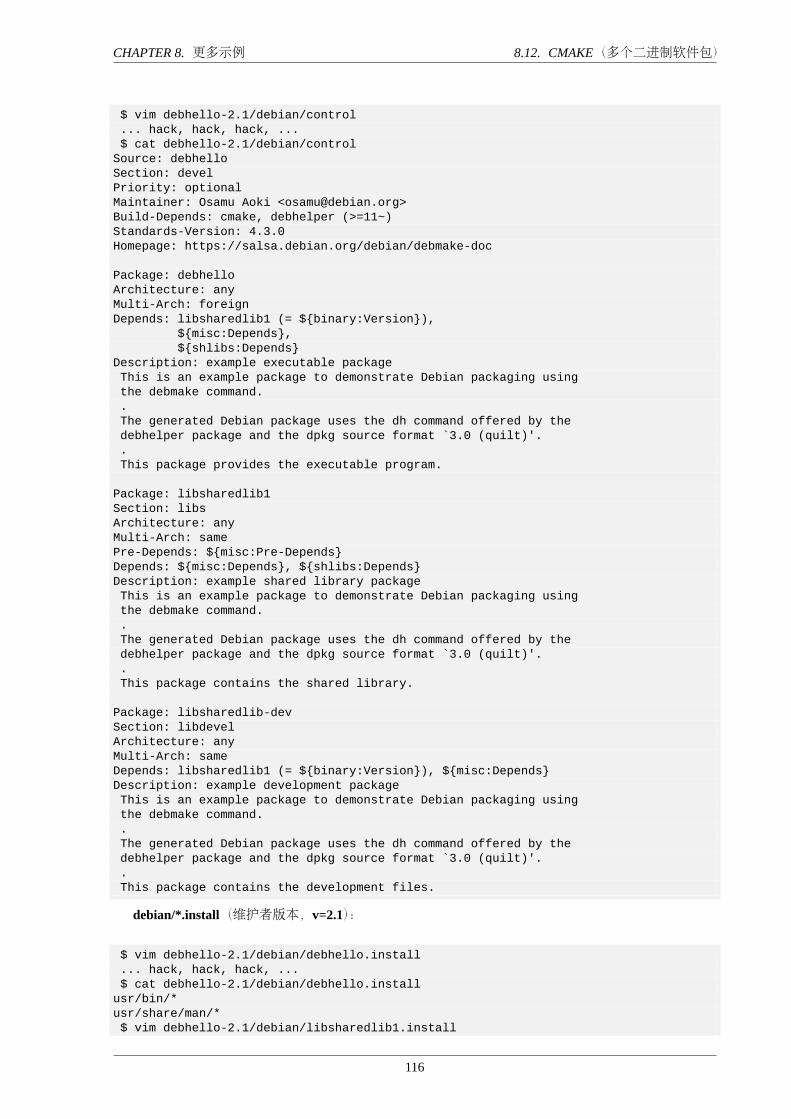
CHAPTER 8. 更多示例 8.12. CMAKE(多个二进制软件包)
$ vim debhello-2.1/debian/control... hack, hack, hack, ...$ cat debhello-2.1/debian/control
Source: debhelloSection: develPriority: optionalMaintainer: Osamu Aoki <[email protected]>Build-Depends: cmake, debhelper (>=11~)Standards-Version: 4.3.0Homepage: https://salsa.debian.org/debian/debmake-doc
Package: debhelloArchitecture: anyMulti-Arch: foreignDepends: libsharedlib1 (= ${binary:Version}),
${misc:Depends},${shlibs:Depends}
Description: example executable packageThis is an example package to demonstrate Debian packaging usingthe debmake command..The generated Debian package uses the dh command offered by thedebhelper package and the dpkg source format `3.0 (quilt)'..This package provides the executable program.
Package: libsharedlib1Section: libsArchitecture: anyMulti-Arch: samePre-Depends: ${misc:Pre-Depends}Depends: ${misc:Depends}, ${shlibs:Depends}Description: example shared library packageThis is an example package to demonstrate Debian packaging usingthe debmake command..The generated Debian package uses the dh command offered by thedebhelper package and the dpkg source format `3.0 (quilt)'..This package contains the shared library.
Package: libsharedlib-devSection: libdevelArchitecture: anyMulti-Arch: sameDepends: libsharedlib1 (= ${binary:Version}), ${misc:Depends}Description: example development packageThis is an example package to demonstrate Debian packaging usingthe debmake command..The generated Debian package uses the dh command offered by thedebhelper package and the dpkg source format `3.0 (quilt)'..This package contains the development files.
debian/*.install(维护者版本,v=2.1):
$ vim debhello-2.1/debian/debhello.install... hack, hack, hack, ...$ cat debhello-2.1/debian/debhello.install
usr/bin/*usr/share/man/*$ vim debhello-2.1/debian/libsharedlib1.install
116
CHAPTER 8. 更多示例 8.12. CMAKE(多个二进制软件包)
... hack, hack, hack, ...$ cat debhello-2.1/debian/libsharedlib1.install
usr/lib/*/*.so.*$ vim debhello-2.1/debian/libsharedlib-dev.install... hack, hack, hack, ...$ cat debhello-2.1/debian/libsharedlib-dev.install
###usr/lib/*/pkgconfig/*.pcusr/includeusr/lib/*/*.so
需要对上游的 CMakeList.txt进行修补,以便应对多架构的路径。debian/patches/*(维护者版本,v=2.1):
... hack, hack, hack, ...$ cat debhello-2.1/debian/libsharedlib1.symbols
libsharedlib.so.1 libsharedlib1 #MINVER#sharedlib@Base 2.1
因为上游源码已经具有正确的自动生成的 Makefile 文件,所以没有必要再去创建 debian/install 和debian/manpages文件。在 debian/目录下还有一些其它的模板文件。它们也需要进行更新。debian/目录下的模板文件。(v=2.1):
$ tree debhello-2.1/debiandebhello-2.1/debian├── README.Debian├── changelog├── compat├── control├── copyright├── debhello.install├── libsharedlib-dev.install├── libsharedlib1.install├── libsharedlib1.symbols├── patches│ ├── 000-cmake-multiarch.patch│ └── series├── rules├── source│ ├── format│ └── local-options└── watch
2 directories, 15 files
其余的打包工作与第 8.8 节中的近乎一致。此处是生成的二进制包的依赖项列表。生成的二进制包的依赖项列表(v=2.1):
$ dpkg -f debhello-dbgsym_2.1-1_amd64.deb pre-depends depends recommends con...Depends: debhello (= 2.1-1)$ dpkg -f debhello_2.1-1_amd64.deb pre-depends depends recommends conflicts ...
Depends: libsharedlib1 (= 2.1-1), libc6 (>= 2.2.5)$ dpkg -f libsharedlib-dev_2.1-1_amd64.deb pre-depends depends recommends co...
Depends: libsharedlib1 (= 2.1-1)$ dpkg -f libsharedlib1-dbgsym_2.1-1_amd64.deb pre-depends depends recommend...
Depends: libsharedlib1 (= 2.1-1)$ dpkg -f libsharedlib1_2.1-1_amd64.deb pre-depends depends recommends confl...
Depends: libc6 (>= 2.2.5)
117
CHAPTER 8. 更多示例 8.13. 国际化
8.13 国际化
此处是更新第 8.11 节中提供的简单上游 C语言源代码 debhello-2.0.tar.gz以便进行国际化(i18n)并创建更新后的上游 C语言源代码 debhello-2.0.tar.gz的示例。在实际情况中,此软件包应该已被国际化过。所以此示例用作帮助您了解国际化的具体实现方法。
提示
负责维护国际化的维护者的日常活动就是将通过缺陷追踪系统(BTS)反馈给您的 po 翻译文件添加至 po/ 目录,然后更新 po/LINGUAS 文件的语言列表。
让我们取得源码并制作 Debian软件包。下载 debhello-2.0.tar.gz(国际化版)
$ wget http://www.example.org/download/debhello-2.0.tar.gz...$ tar -xzmf debhello-2.0.tar.gz$ tree
.├── debhello-2.0│ ├── Makefile.am│ ├── configure.ac│ ├── data│ │ ├── hello.desktop│ │ └── hello.png│ ├── lib│ │ ├── Makefile.am│ │ ├── sharedlib.c│ │ └── sharedlib.h│ ├── man│ │ ├── Makefile.am│ │ └── hello.1│ └── src│ ├── Makefile.am│ └── hello.c└── debhello-2.0.tar.gz
5 directories, 12 files
使用 gettextize命令将此源代码树国际化,并删除由 Autotools自动生成的文件。运行 gettextize(国际化版):
$ cd debhello-2.0$ gettextize
Creating po/ subdirectoryCreating build-aux/ subdirectoryCopying file ABOUT-NLSCopying file build-aux/config.rpathNot copying intl/ directory.Copying file po/Makefile.in.inCopying file po/Makevars.templateCopying file po/Rules-quotCopying file po/boldquot.sedCopying file po/[email protected] file po/[email protected] file po/insert-header.sinCopying file po/quot.sedCopying file po/remove-potcdate.sinCreating initial po/POTFILES.in
118

CHAPTER 8. 更多示例 8.13. 国际化
Creating po/ChangeLogCreating directory m4Copying file m4/gettext.m4Copying file m4/iconv.m4Copying file m4/lib-ld.m4Copying file m4/lib-link.m4Copying file m4/lib-prefix.m4Copying file m4/nls.m4Copying file m4/po.m4Copying file m4/progtest.m4Creating m4/ChangeLogUpdating Makefile.am (backup is in Makefile.am~)Updating configure.ac (backup is in configure.ac~)Creating ChangeLog
Please use AM_GNU_GETTEXT([external]) in order to cause autoconfigurationto look for an external libintl.
Please create po/Makevars from the template in po/Makevars.template.You can then remove po/Makevars.template.
Please fill po/POTFILES.in as described in the documentation.
Please run 'aclocal' to regenerate the aclocal.m4 file.You need aclocal from GNU automake 1.9 (or newer) to do this.Then run 'autoconf' to regenerate the configure file.
You will also need config.guess and config.sub, which you can get from the CV...of the 'config' project at http://savannah.gnu.org/. The commands to fetch th...are$ wget 'http://savannah.gnu.org/cgi-bin/viewcvs/*checkout*/config/config/conf...$ wget 'http://savannah.gnu.org/cgi-bin/viewcvs/*checkout*/config/config/conf...
You might also want to copy the convenience header file gettext.hfrom the /usr/share/gettext directory into your package.It is a wrapper around <libintl.h> that implements the configure --disable-nl...option.
Press Return to acknowledge the previous 6 paragraphs.$ rm -rf m4 build-aux *~
让我们确认一下 po/目录下生成的文件。po目录下的文件(国际化版):
$ ls -l po/build/debmake-doc-1.14/debhello-2.0-pkg2/step151.cmd: line 2: SOURCE_DATE_EP...total 60-rw-r--r-- 1 pbuilder pbuilder 494 May 25 20:41 ChangeLog-rw-r--r-- 1 pbuilder pbuilder 17577 May 25 20:41 Makefile.in.in-rw-r--r-- 1 pbuilder pbuilder 3376 May 25 20:41 Makevars.template-rw-r--r-- 1 pbuilder pbuilder 59 May 25 20:41 POTFILES.in-rw-r--r-- 1 pbuilder pbuilder 2203 May 25 20:41 Rules-quot-rw-r--r-- 1 pbuilder pbuilder 217 May 25 20:41 boldquot.sed-rw-r--r-- 1 pbuilder pbuilder 1337 May 25 20:41 [email protected] 1 pbuilder pbuilder 1203 May 25 20:41 [email protected] 1 pbuilder pbuilder 672 May 25 20:41 insert-header.sin-rw-r--r-- 1 pbuilder pbuilder 153 May 25 20:41 quot.sed-rw-r--r-- 1 pbuilder pbuilder 432 May 25 20:41 remove-potcdate.sin
让我们在 configure.ac文件中添加“AM_GNU_GETTEXT([external])”等条目。configure.ac(国际化版):
$ vim configure.ac
119
CHAPTER 8. 更多示例 8.13. 国际化
... hack, hack, hack, ...$ cat configure.ac
# -*- Autoconf -*-# Process this file with autoconf to produce a configure script.AC_PREREQ([2.69])AC_INIT([debhello],[2.2],[[email protected]])AC_CONFIG_SRCDIR([src/hello.c])AC_CONFIG_HEADERS([config.h])echo "Standard customization chores"AC_CONFIG_AUX_DIR([build-aux])
AM_INIT_AUTOMAKE([foreign])
# Set default to --enable-shared --disable-staticLT_INIT([shared disable-static])
# find the libltdl sources in the libltdl sub-directoryLT_CONFIG_LTDL_DIR([libltdl])
# choose oneLTDL_INIT([recursive])#LTDL_INIT([subproject])#LTDL_INIT([nonrecursive])
# Add #define PACKAGE_AUTHOR ... in config.h with a commentAC_DEFINE(PACKAGE_AUTHOR, ["Osamu Aoki"], [Define PACKAGE_AUTHOR])# Checks for programs.AC_PROG_CC
# desktop file support requiredAM_GNU_GETTEXT_VERSION([0.19.3])AM_GNU_GETTEXT([external])
# only for the recursive caseAC_CONFIG_FILES([Makefile
po/Makefile.inlib/Makefileman/Makefilesrc/Makefile])
AC_OUTPUT
让我们从 po/Makevars.template文件中创建 po/Makevars文件。po/Makevars(国际化版):
... hack, hack, hack, ...$ diff -u po/Makevars.template po/Makevars
--- po/Makevars.template 2019-03-26 17:03:20.165623558 +0000+++ po/Makevars 2019-03-26 17:03:20.245621814 +0000@@ -18,14 +18,14 @@# or entity, or to disclaim their copyright. The empty string stands for# the public domain; in this case the translators are expected to disclaim# their copyright.
-COPYRIGHT_HOLDER = Free Software Foundation, Inc.+COPYRIGHT_HOLDER = Osamu Aoki <[email protected]>
# This tells whether or not to prepend "GNU " prefix to the package# name that gets inserted into the header of the $(DOMAIN).pot file.# Possible values are "yes", "no", or empty. If it is empty, try to# detect it automatically by scanning the files in $(top_srcdir) for# "GNU packagename" string.
-PACKAGE_GNU =+PACKAGE_GNU = no
120
CHAPTER 8. 更多示例 8.13. 国际化
# This is the email address or URL to which the translators shall report# bugs in the untranslated strings:$ rm po/Makevars.template
让我们通过用 _(…)包裹字符串的方式来更新国际化版本的 C语言源代码。src/hello.c(国际化版):
... hack, hack, hack, ...$ cat src/hello.c
#include "config.h"#include <stdio.h>#include <sharedlib.h>#define _(string) gettext (string)intmain(){
printf(_("Hello, I am " PACKAGE_AUTHOR "!\n"));sharedlib();return 0;
}
lib/sharedlib.c(国际化版):
... hack, hack, hack, ...$ cat lib/sharedlib.c
#include <stdio.h>#define _(string) gettext (string)intsharedlib(){
printf(_("This is a shared library!\n"));return 0;
}
新版本的 gettext(v = 0.19)可以直接处理桌面文件的国际化版本。data/hello.desktop.in(国际化版):
$ fgrep -v '[ja]=' data/hello.desktop > data/hello.desktop.in$ rm data/hello.desktop$ cat data/hello.desktop.in
[Desktop Entry]Name=HelloComment=GreetingsType=ApplicationKeywords=helloExec=helloTerminal=trueIcon=hello.pngCategories=Utility;
让我们列出输入文件,以便在 po/POTFILES.in中提取可翻译的字符串。po/POTFILES.in(国际化版):
... hack, hack, hack, ...$ cat po/POTFILES.in
src/hello.clib/sharedlib.cdata/hello.desktop.in
此处是在 SUBDIRS环境变量中添加 po目录后更新过的根Makefile.am文件。Makefile.am(国际化版):
121
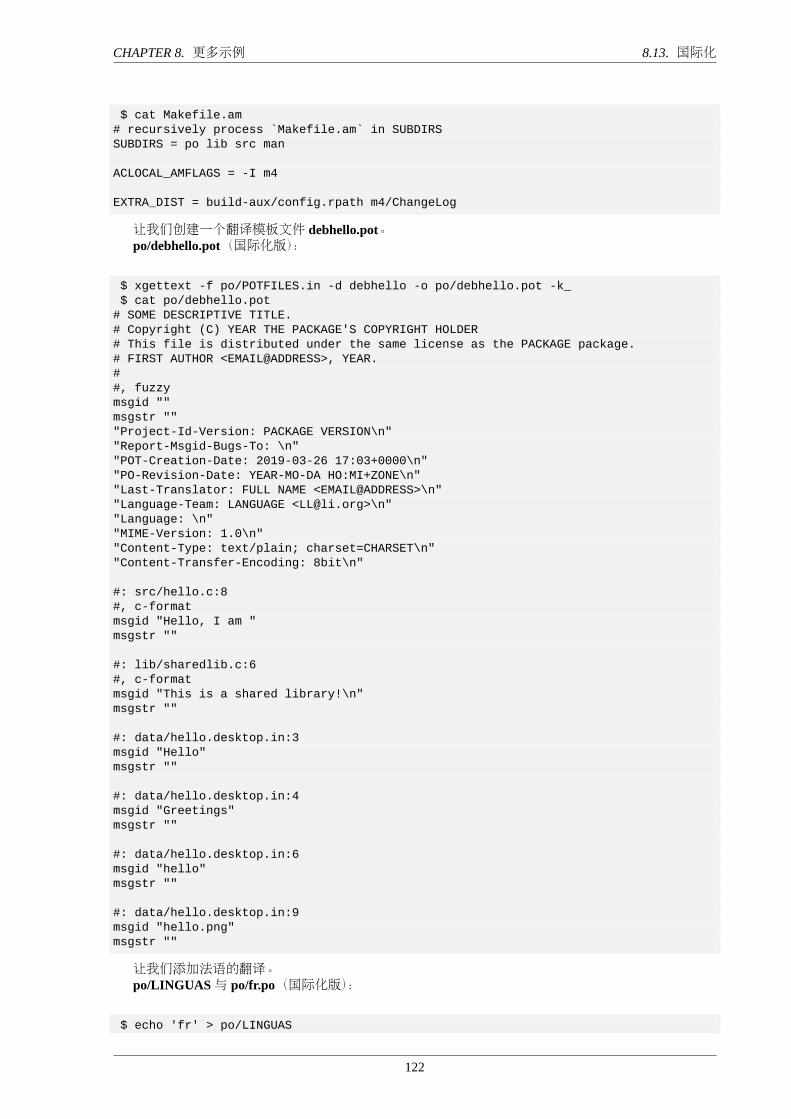
CHAPTER 8. 更多示例 8.13. 国际化
$ cat Makefile.am# recursively process `Makefile.am` in SUBDIRSSUBDIRS = po lib src man
ACLOCAL_AMFLAGS = -I m4
EXTRA_DIST = build-aux/config.rpath m4/ChangeLog
让我们创建一个翻译模板文件 debhello.pot。po/debhello.pot(国际化版):
$ xgettext -f po/POTFILES.in -d debhello -o po/debhello.pot -k_$ cat po/debhello.pot
# SOME DESCRIPTIVE TITLE.# Copyright (C) YEAR THE PACKAGE'S COPYRIGHT HOLDER# This file is distributed under the same license as the PACKAGE package.# FIRST AUTHOR <EMAIL@ADDRESS>, YEAR.##, fuzzymsgid ""msgstr """Project-Id-Version: PACKAGE VERSION\n""Report-Msgid-Bugs-To: \n""POT-Creation-Date: 2019-03-26 17:03+0000\n""PO-Revision-Date: YEAR-MO-DA HO:MI+ZONE\n""Last-Translator: FULL NAME <EMAIL@ADDRESS>\n""Language-Team: LANGUAGE <[email protected]>\n""Language: \n""MIME-Version: 1.0\n""Content-Type: text/plain; charset=CHARSET\n""Content-Transfer-Encoding: 8bit\n"
#: src/hello.c:8#, c-formatmsgid "Hello, I am "msgstr ""
#: lib/sharedlib.c:6#, c-formatmsgid "This is a shared library!\n"msgstr ""
#: data/hello.desktop.in:3msgid "Hello"msgstr ""
#: data/hello.desktop.in:4msgid "Greetings"msgstr ""
#: data/hello.desktop.in:6msgid "hello"msgstr ""
#: data/hello.desktop.in:9msgid "hello.png"msgstr ""
让我们添加法语的翻译。po/LINGUAS与 po/fr.po(国际化版):
$ echo 'fr' > po/LINGUAS
122
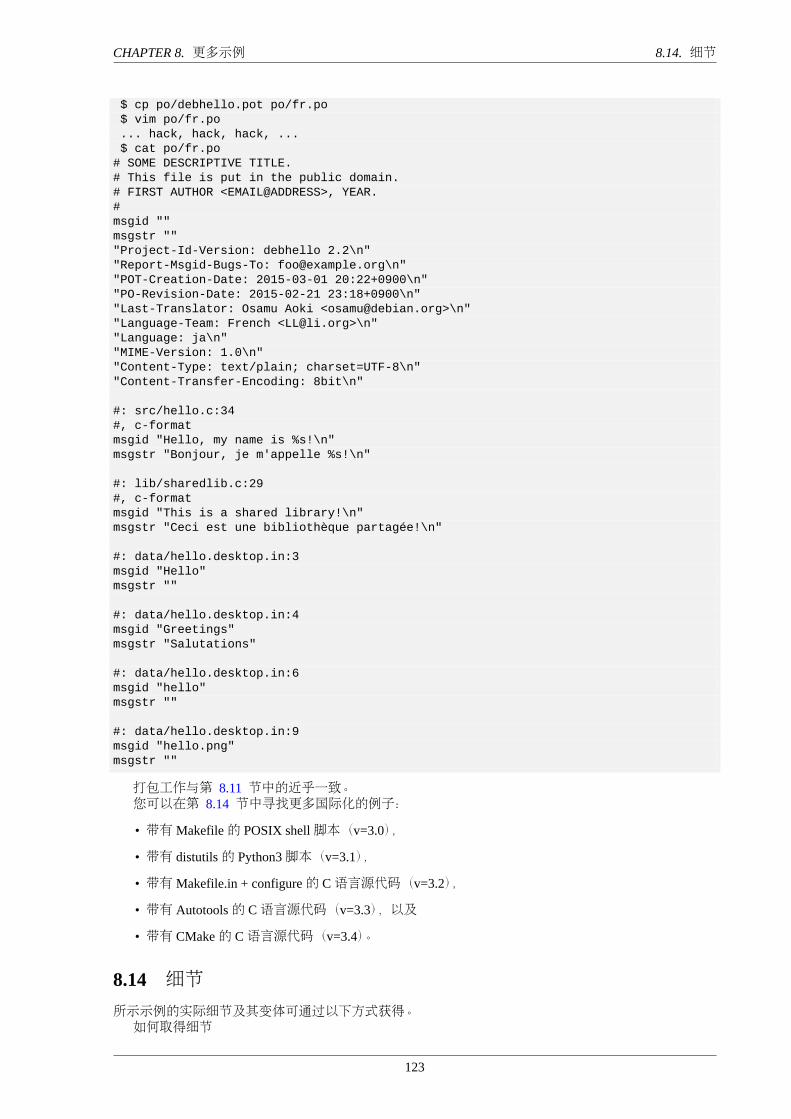
CHAPTER 8. 更多示例 8.14. 细节
$ cp po/debhello.pot po/fr.po$ vim po/fr.po... hack, hack, hack, ...$ cat po/fr.po
# SOME DESCRIPTIVE TITLE.# This file is put in the public domain.# FIRST AUTHOR <EMAIL@ADDRESS>, YEAR.#msgid ""msgstr """Project-Id-Version: debhello 2.2\n""Report-Msgid-Bugs-To: [email protected]\n""POT-Creation-Date: 2015-03-01 20:22+0900\n""PO-Revision-Date: 2015-02-21 23:18+0900\n""Last-Translator: Osamu Aoki <[email protected]>\n""Language-Team: French <[email protected]>\n""Language: ja\n""MIME-Version: 1.0\n""Content-Type: text/plain; charset=UTF-8\n""Content-Transfer-Encoding: 8bit\n"
#: src/hello.c:34#, c-formatmsgid "Hello, my name is %s!\n"msgstr "Bonjour, je m'appelle %s!\n"
#: lib/sharedlib.c:29#, c-formatmsgid "This is a shared library!\n"msgstr "Ceci est une bibliothèque partagée!\n"
#: data/hello.desktop.in:3msgid "Hello"msgstr ""
#: data/hello.desktop.in:4msgid "Greetings"msgstr "Salutations"
#: data/hello.desktop.in:6msgid "hello"msgstr ""
#: data/hello.desktop.in:9msgid "hello.png"msgstr ""
打包工作与第 8.11 节中的近乎一致。您可以在第 8.14 节中寻找更多国际化的例子:
• 带有Makefile的 POSIX shell脚本(v=3.0),
• 带有 distutils的 Python3脚本(v=3.1),
• 带有Makefile.in + configure的 C语言源代码(v=3.2),
• 带有 Autotools的 C语言源代码(v=3.3),以及
• 带有 CMake的 C语言源代码(v=3.4)。
8.14 细节
所示示例的实际细节及其变体可通过以下方式获得。如何取得细节
123
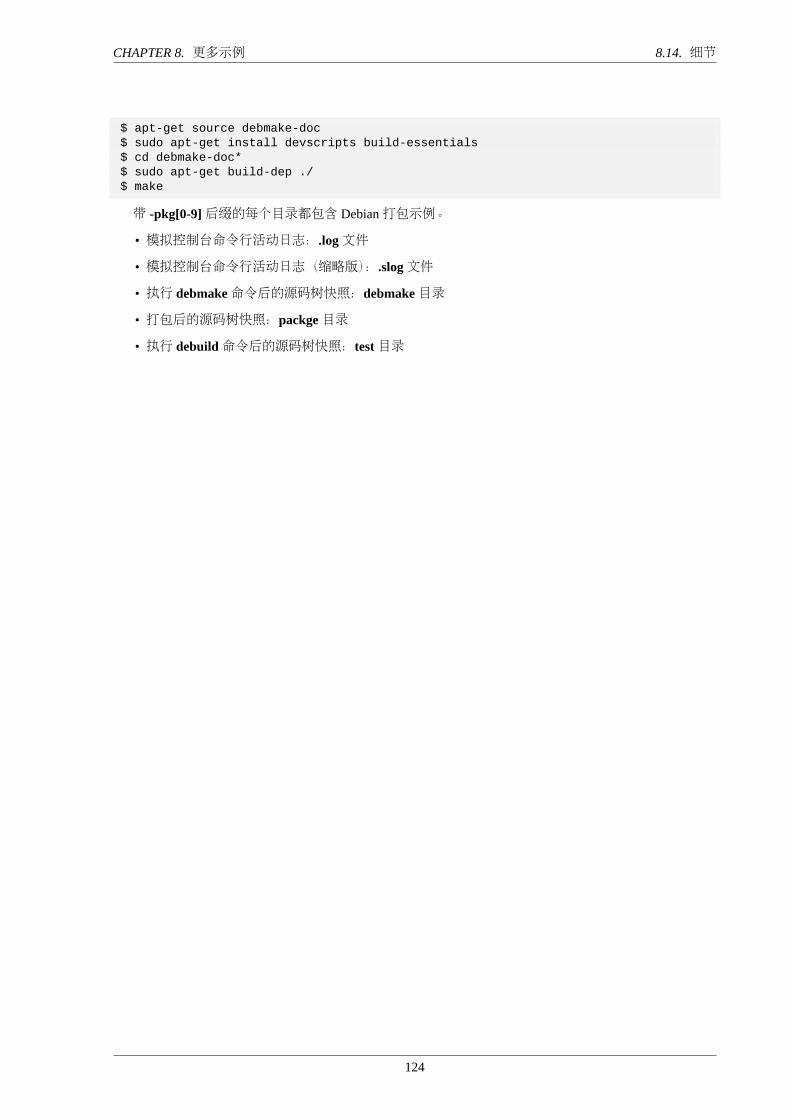
CHAPTER 8. 更多示例 8.14. 细节
$ apt-get source debmake-doc$ sudo apt-get install devscripts build-essentials$ cd debmake-doc*$ sudo apt-get build-dep ./$ make
带 -pkg[0-9]后缀的每个目录都包含 Debian打包示例。
• 模拟控制台命令行活动日志:.log文件
• 模拟控制台命令行活动日志(缩略版):.slog文件
• 执行 debmake命令后的源码树快照:debmake目录
• 打包后的源码树快照:packge目录
• 执行 debuild命令后的源码树快照:test目录
124
Appendix A
debmake(1)手册页
A.1 名称
debmake,用来制作 Debian源码包的程序
A.2 概述
debmake [-h] [-c | -k] [-n | -a软件包名-版本号.orig.tar.gz | -d | -t ] [-p package] [-u version] [-r修订号] [-z扩展] [-b ”binarypackage,…]” [-e [email protected]] [-f ”名称姓氏”] [-i ”构建工具” | -j] [-l license_file] [-m] [-ofile] [-q] [-s] [-v] [-w ”addon,…”] [-x [01234]] [-y] [-L] [-P] [-T]
A.3 描述
debmake协助从上游源代码构建一个 Debian软件包,通常做法如下:
• 下载上游源码压缩包(tarball)并命名为 package-version.tar.gz文件。
• 对其进行解压缩并将所有文件放置于 package-version/目录之下。
• 在 package-version/目录中调用 debmake,并按需带上参数。
• 手工调整 package-version/debian/目录下的文件。
• 在 package-version/目录下调用 dpkg-buildpackage(通常使用其高层封装工具,例如 debuild或者pdebuild)以构建 Debian软件包。
请确保将 -b、-f、-l和 -w选项的参数使用引号合适地保护起来,以避免 shell环境的干扰。
A.3.1 可选参数:
-h, --help 显示本帮助信息并退出。
-c, --copyright 为授权 +许可证文本而扫描源码,然后退出。
• -c:简单输出风格• -cc:正常输出风格(类似 debian/copyright文件)• -ccc:调试输出风格
-k, --kludge 对 debian/copyright文件和源代码进行比较并退出。debian/copyright必须将通用的文件匹配模式放在前部并将个别文件的例外放在后部。
• -k:基本输出风格• -kk:冗长输出风格
125
APPENDIX A. DEBMAKE(1)手册页 A.3. 描述
-n, --native 制作一个本土 Debian源码包,即不涉及 .orig.tar.gz。这样将制作一个“3.0 (native)”格式的包。
如果您正打算打包一个含 debian/*目录的 Debian特有的源码树成为一个 Debian本土软件包的话,还请三思。您可以使用“debmake -d -i debuild”或者“debmake -t -i debuild”命令来创建一个“3.0(quilt)”格式的非本土 Debian软件包。唯一的区别是 debian/changelog文件必须使用非本土软件包对应的命名规范:版本号-修订号。非本土的软件包对下游发行版更友好。
-a package-version.tar.gz, --archive package-version.tar.gz 直接使用上游源码压缩包。(-p, -u, -z:被覆盖)上游源码压缩包可以命名为 package_version.orig.tar.gz或者 tar.gz。在某些情况下,也可使用 tar.bz2或 tar.xz。如果所指定的源码压缩包文件名中包含大写字母,Debian打包时生成的名称会将其转化为小写字母。
如果所指定的参数是一个指向上游源码压缩包的 URL(http://、https://或 ftp://),程序将会使用 wget或 curl下载这个压缩包。
-d, --dist 先运行“make dist”命令或其等效命令以生成上游源码压缩包并在打包过程中使用。“debmake -d”命令设计用于在软件包名/目录下使用了上游版本控制系统的场景,且其构建系统支持“make dist”或其等效命令。(如 automake/autoconf、Python distutils等等)
-t, --tar 运行“tar”命令以生成上游源码压缩包并在打包过程中使用。“debmake -t”命令设计用于在软件包名/目录下使用了上游版本控制系统的场景。除非您使用了 -u选项或者使用 debian/changelog文件提供了上游版本号,默认情况下程序将运用协调世界时日期和时间按照 0~%y%m%d%H%M的格式作为快照的上游版本号,例如 0~1403012359。所生成的压缩包将排除上游版本控制系统中的 debian/目录。(它也会排除常见的版本控制系统目录:.git/ .hg/.svn/ .CVS/。)
-p软件包名, --package软件包名 设置 Debian软件包名称。
-u上游版本号, --upstreamversion版本号 设置上游软件包版本。
-r修订号, --revision修订号 设置 Debian软件包修订号。
-z扩展名, --targz扩展名 设置源码压缩包类型,扩展名 =(tar.gz|tar.bz2|tar.xz)。(别名:z, b, x)
-b ”二进制软件包名 [:type],…”, --binaryspec ”二进制软件包名 [:type],…” 设置二进制软件包的指定类型内容,使用一个用逗号分隔的二进制软件包名:类型成对列表;例如,使用完整形式“foo:bin,foo-doc:doc,libfoo1:lib,libfoo-dev:dev”或者使用短形式,“-doc,libfoo1,libfoo-dev”。这里,二进制软件包是二进制软件包名称,可选的类型应当从下面的类型值中进行选取:
• bin:C/C++预编译 ELF二进制代码软件包(any,foreign)(默认,别名:””,即,空字符串)• data:数据(字体、图像、……)软件包(all,foreign)(别名:da)• dev:库开发软件包(any,same)(别名:de)• doc:文档软件包(all,foreign)(别名:do)• lib:库软件包(any,same)(别名:l)• perl:Perl脚本软件包(all,foreign)(别名:pl)• python:Python脚本软件包(all,foreign)(别名:py)• python3:Python3脚本软件包(all,foreign)(别名:py3)• ruby:Ruby脚本软件包(all,foreign)(别名:rb)• script:Shell脚本软件包(all,foreign)(别名:sh)
括号内成对的值,例如(any,foreign),是软件包的架构和多架构(Multi-Arch)特性的值,它们将设置在 debian/control文件中。大多数情况下,debmake命令可以有效地从二进制软件包的名称猜测出正确的类型。如果类型的值并不明显,程序将回退到将类型设置为 bin。例如,libfoo设置类型为 lib,而 font-bar会令程序设置类型为 data,……如果源码树的内容和类型的设置不一致,debmake命令会发出警告。
126
APPENDIX A. DEBMAKE(1)手册页 A.3. 描述
-e [email protected], --email [email protected] 设置电子邮件地址。默认值为环境变量 $DEBEMAIL的值。
-f ”名称姓氏”, --fullname ”名称姓氏” 设置全名。默认值为环境变量 $DEBFULLNAME的值。
-i ”构建工具”, --invoke ”构建工具” 在执行结束时调用“构建工具”。构建工具可以是“dpkg-buildpackage”、“de-build”、“pdebuild”、pdebuild --pbuilder cowbuilder”等等。默认情况是不执行任何程序。
设置该选项也会自动设置 --local选项。
-j, --judge 运行 dpkg-depcheck以检查构建依赖和文件路径。检查日志将存储在父目录下。
• 软件包名.build-dep.log:dpkg-depcheck的日志文件。• 软件包名.install.log:记录 debian/tmp目录下所安装文件的日志。
-l ”许可证文件,…”, --license ”许可证文件,…” 在存放许可证扫描结果的 debian/copyright文件末尾添加格式化后的许可证文本。
默认值是添加 COPYING和 LICENSE文件,您只需要在许可证文件部分添加额外的文件名即可,并使用“,”分隔各个文件名。
-m, --monoarch 强制软件包不使用多架构特性。
-o文件, --option文件 从指定 file读取可选参数。(这个选项不适合日常使用。)所指定文件 file的内容将作为 Python3代码在 para.py的末尾进行解析。例如,您可以使用下述文件指定软件包描述信息。
para['desc'] = 'program short description'para['desc_long'] = '''\program long description which you wish to include..Empty line is space + .You keep going on ...
'''
-q, --quitearly 在创建 debian/目录下的文件之前即提前退出程序。
-s, --spec 使用上游配置文件(例如 Python里的 setup.py等)信息来初始化软件包描述内容。
-v, --version 显示版本信息。
-w ”addon,…”, --with ”addon,…” 在 debian/rules文件中向 dh(1)命令的参数中添加额外的 dh(1)参数以指定所使用的附加组件(addon)。The addon values are listed all separated by“,”, e.g.,“-w ”python2,autoreconf””.For Autotools based packages, setting autoreconf as addon forces running“autoreconf -i -v -f”for everypackage building. Otherwise, autotools-dev as addon is used as the default.对基于 Autotools的软件包,如果它们最终要安装 Python程序,您需要显式指定 python2作为 addon并指定“compat < 9”以明确指出您正在处理 Python软件包。但对基于 setup.py的软件包来说,并不需要显式指定 python2作为 addon,因为这种依赖关系显而易见,debmake会在需要且合适的时候自动为 dh(1)命令设置这样的参数。
-x n, --extra n 以模板文件的形式创建配置文件(请注意 debian/changelog、debian/control、debian/copy-right和 debian/rules文件是构建 Debian二进制软件包所需的最小文件集合。)n的数字大小决定了生成哪些配置模板文件。
• -x0:最少的配置文件(这是存在任何已有配置文件时的默认选项)• -x1:所有 -x0提供的文件以及用于生成单个二进制软件包可能需要的配置文件。(这是只生成单个二进制软件包,且不存在其它已有配置文件时的默认选项)
127
APPENDIX A. DEBMAKE(1)手册页 A.4. 示例
• -x2:所有 -x2提供的文件以及用于生成多个二进制软件包可能需要的配置文件。(这是生成多个二进制软件包,且不存在其它已有配置文件时的默认选项)
• -x3:所有 -x2提供的文件以及不常使用的配置模板文件。不常使用的配置模板文件在生成时会带上 .ex后缀名以方便对其删除。如需使用这些配置文件,请重命名这些文件并去除 .ex的后缀。
• -x4选项:全部配置 -x3文件加版权声明文件示例。
-y, --yes 对所有提示“强制选择是”(不提示选项“询问 [是/否]”;重复选项两次则为“强制选择否”)
-L, --local 为本地软件包生成配置文件以绕过 lintian(1)的检查。
-P, --pedantic 对自动生成的文件进行严格(甚至古板到迂腐程度)的检查。
-T, --tutorial 在模板文件中输出教程注释行。
A.4 示例
对比较正常的源码来说,您可以使用一行命令简单地构建一个自用的 Debian二进制软件包。测试安装这样生成的软件包通常比传统的“make install”命令安装至 /usr/local目录更好,因为 Debian软件包可以使用“dpkg -P…””命令更干净地卸载掉。这里提供构建这类测试软件包的一些例子(这些例子应该在大多数情况下足够使用。如果 -d选项无法工作,请尝试使用 -t选项。)对典型的使用 autoconf/automake的 C程序源码树:
• debmake -d -i debuild
对于典型的 Python模块源码树:
• debmake -s -d -b”:python” -i debuild
对于 package-version.tar.gz存档里的一个典型 Python模块:
• debmake -s -a package-version.tar.gz -b”:python” -i debuild
对于典型的以 package-version.tar.gz归档提供的 Perl模块:
• debmake -a package-version.tar.gz -b”:perl” -i debuild
A.5 帮助软件包
打包工作也许需要额外安装一些专用的帮助软件包。
• Python3程序可能需要 dh-python软件包。
• Autotools (Autoconf + Automake)构建系统可能需要 autotools-dev或 dh-autoreconf软件包。
• Ruby程序可能需要 gem2deb软件包。
• Java程序可能需要 javahelper软件包。
• Gnome程序可能需要 gobject-introspection软件包。
• 等等。
A.6 注意事项
debmake的目的是为软件包维护者提供开始工作的模板文件。注释行以 #开始,其中包含一些教程性文字。您在将软件包上传至 Debian仓库之前必须删除或者修改这样的注释行。许可证信息的提取和赋值过程应用了大量启发式操作,因此在某些情况下可能不会正常工作。强烈建
议您搭配使用其它工具,例如来自 devscripts软件包的 licensecheck工具,以配合 debmake的使用。组成 Debian软件包名称的字符选取存在一定的限制。最明显的限制应当是软件包名称中禁止出现大
写字母。这里给出正则表达式形式的规则总结:
• 上游软件包名称(-p):[-+.a-z0-9]{2,}
128
APPENDIX A. DEBMAKE(1)手册页 A.7. 除错
• 二进制软件包名称(-b):[-+.a-z0-9]{2,}
• 上游版本号(-u):[0-9][-+.:~a-z0-9A-Z]*
• Debian修订版本(-r):[0-9][+.~a-z0-9A-Z]*
请在《Debian政策手册》的第 5章 - Control文件及其字段一节中查看其精确定义。debmake所假设的打包情景是相对简单的。因此,所有与解释器相关的程序都会默认为“Architecture:
all”的情况。当然,这个假设并非总是成立。
A.7 除错
请使用 reportbug命令报告 debmake软件包的问题与错误。环境变量 $DEBUG中设置的字符用来确定日志输出等级。
• i:打印信息
• p:列出全部全局参数
• d:列出所有二进制软件包解析得到的参数
• f:用于扫描授权信息的输入文件名
• y:授权信息栏的年份/名称切分信息
• s:format_state的行扫描器
• b:content_state扫描循环:循环开始
• m: content_state扫描循环:正则匹配之后
• e: content_state扫描循环:循环结束
• c:打印授权区段文本
• l:打印许可证区段文本
• a:打印作者/翻译者区段文本
• k:debian/copyright各节的排序关键字
• n:debian/copyright的扫描结果(“debmake -k”)
用法如下:
$ DEBUG=pdfbmeclak debmake ...
查看源码中的 README.developer文件以了解更多信息。
A.8 作者
版权所有 © 2014-2017 Osamu Aoki <[email protected]>
A.9 许可证
Expat许可证
A.10 参见
debmake-doc 软件包提供了“Debian 维护者指南”手册,以纯文本、HTML 和 PDF 三种格式存放在/usr/share/doc/debmake-doc/目录下。另见 dpkg-source(1), deb-control(5), debhelper(7), dh(1), dpkg-buildpackage(1), debuild(1), quilt(1),
dpkg-depcheck(1), pdebuild(1), pbuilder(8), cowbuilder(8), gbp-buildpackage(1), gbp-pq(1)和 git-pbuilder(1)的手册页。
129