Embed Size (px)
Citation preview
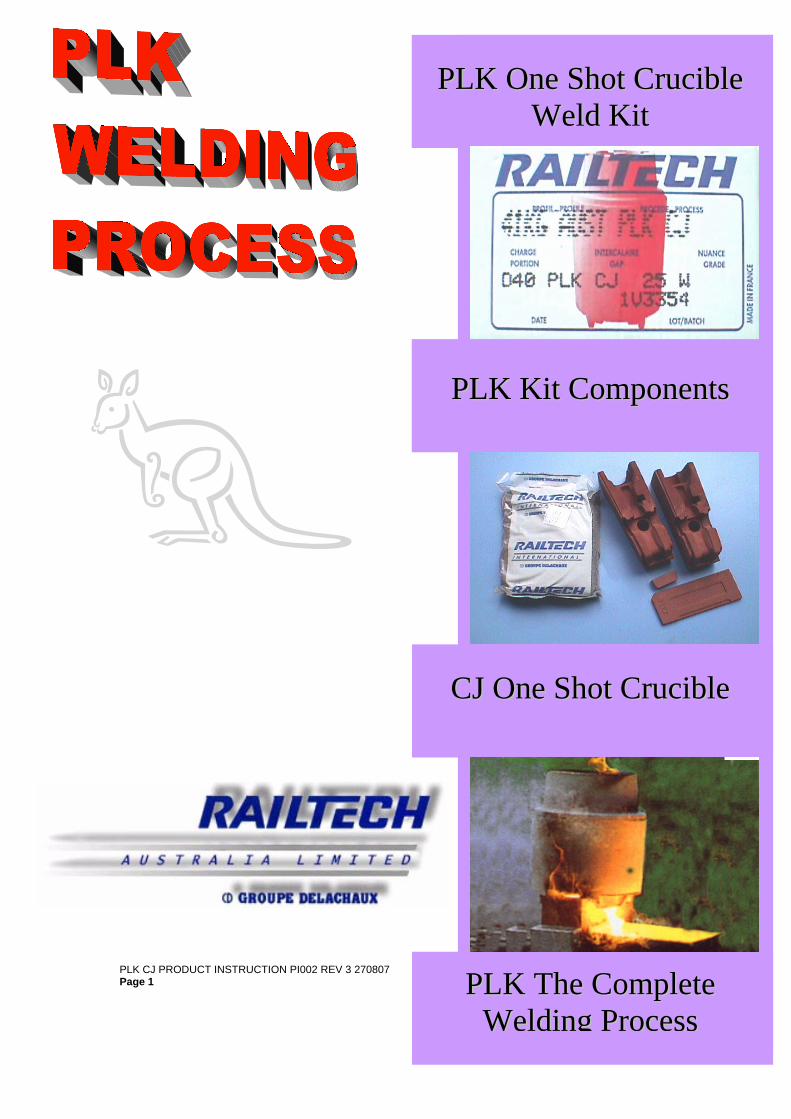
PLK CJ PRODUCT INSTRUCTION PI002 REV 3 270807 Page 1
PPLLKK KKiitt CCoommppoonneennttss
PPLLKK OOnnee SShhoott CCrruucciibbllee WWeelldd KKiitt
CCJJ OOnnee SShhoott CCrruucciibbllee
PPLLKK TThhee CCoommpplleettee WWeellddiinngg PPrroocceessss
Railtech Australia Limited Type PLK
CJ - One Shot Crucible Welding Instructions
PLK CJ PRODUCT INSTRUCTION PI002 REV3 270807 2
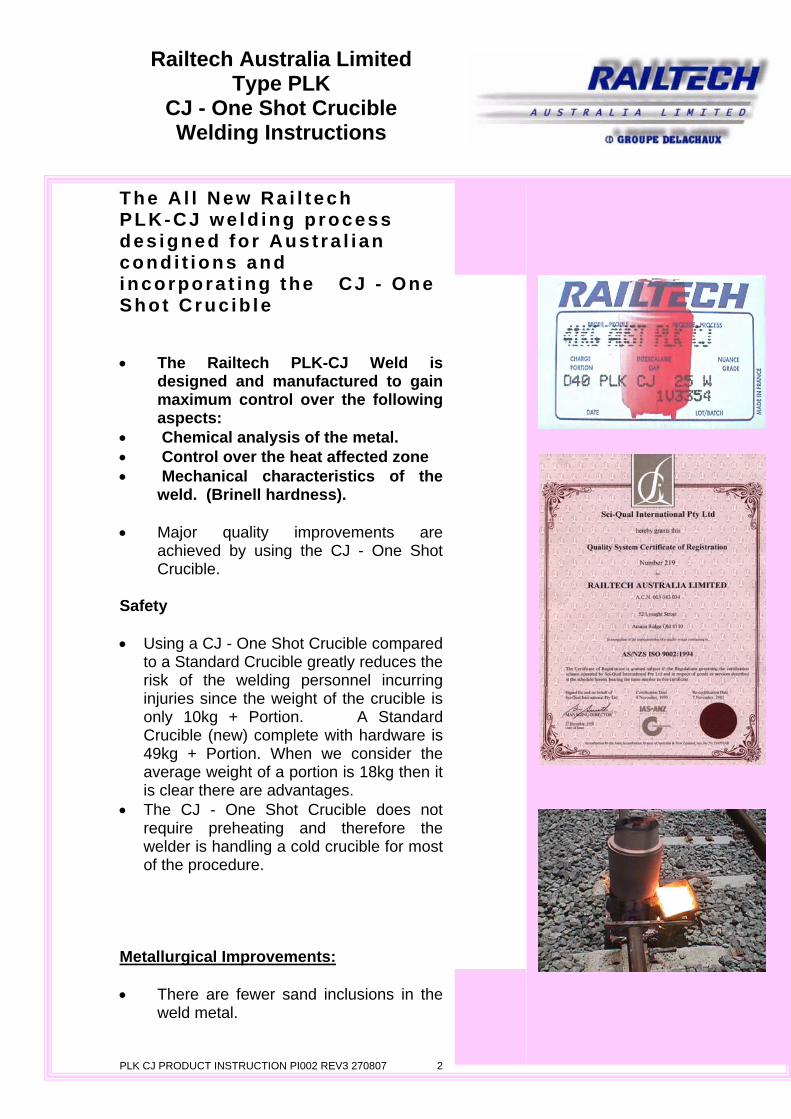
The A l l New Ra i l t ech PLK-CJ we ld ing p rocess des igned fo r Aus t ra l i an cond i t ions and incorpora t ing the CJ - One Shot Cruc ib le • The Railtech PLK-CJ Weld is
designed and manufactured to gain maximum control over the following aspects:
• Chemical analysis of the metal. • Control over the heat affected zone • Mechanical characteristics of the
weld. (Brinell hardness). • Major quality improvements are
achieved by using the CJ - One Shot Crucible.
Safety • Using a CJ - One Shot Crucible compared
to a Standard Crucible greatly reduces the risk of the welding personnel incurring injuries since the weight of the crucible is only 10kg + Portion. A Standard Crucible (new) complete with hardware is 49kg + Portion. When we consider the average weight of a portion is 18kg then it is clear there are advantages.
• The CJ - One Shot Crucible does not require preheating and therefore the welder is handling a cold crucible for most of the procedure.
Metallurgical Improvements: • There are fewer sand inclusions in the
weld metal.
Railtech Australia Limited Type PLK
CJ - One Shot Crucible Welding Instructions
• Less risk of slag inclusions from a dirty crucible.
• Less risk of porosity in the weld since each crucible is new and there is virtually no risk of moisture.
Weld Installation Improvements: • There is considerably less hardware for
the welder to carry. • No crucible hardware is required. • Preheating the crucible prior to
commencing work is no longer required and therefore there is less risk of bad welds.
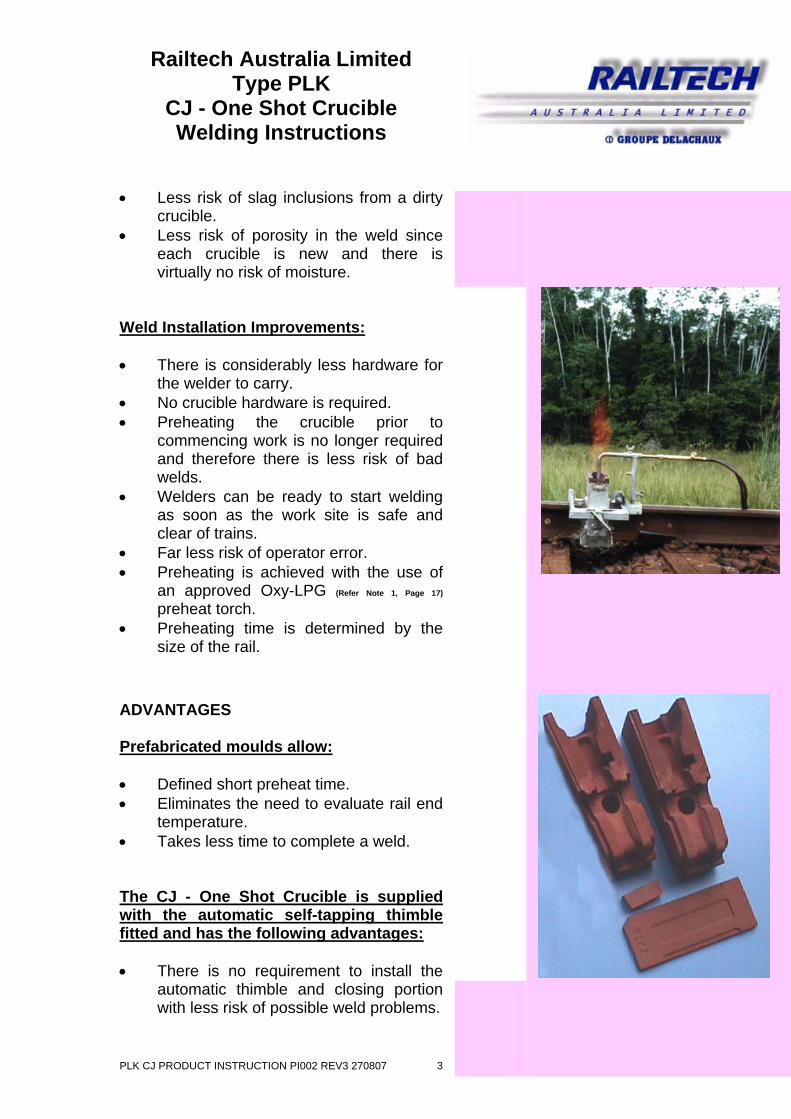
• Welders can be ready to start welding as soon as the work site is safe and clear of trains.
• Far less risk of operator error. • Preheating is achieved with the use of
an approved Oxy-LPG (Refer Note 1, Page 17)
preheat torch. • Preheating time is determined by the
size of the rail.
ADVANTAGES Prefabricated moulds allow: • Defined short preheat time. • Eliminates the need to evaluate rail end
temperature. • Takes less time to complete a weld. The CJ - One Shot Crucible is supplied with the automatic self-tapping thimble fitted and has the following advantages: • There is no requirement to install the
automatic thimble and closing portion with less risk of possible weld problems.
PLK CJ PRODUCT INSTRUCTION PI002 REV3 270807 3

Railtech Australia Limited Type PLK
CJ - One Shot Crucible Welding Instructions
• There is no risk of the operator burning himself when placing the thimble into a CJ. (As with Standard Crucible).
Weld Kit Advantages: • Complete weld in a box, eliminates risk
of not having all components on the weld site.
• Less risk of using the wrong portion for the rail to be welded.
• Good protection for the mould and portion during transit.
• The PLK-CJ kit box is easily identified with the packaging displaying a CJ - One Shot Crucible on the box. This identifies that the weld kit requires a CJ - One Shot Crucible. (This is very important, as a weld kit designed for use with a standard crucible MUST not be used in a CJ - One Shot Crucible and a portion designed for a One Shot must not be used in a standard crucible.
Advantages of the CJ Crucible: The material used as in the refractory is waterproof, which allows the crucible to be used without any drying preparation. The CJ Crucible is positioned on top of the mould for pouring, and the close proximity to the pouring reduces the washing of sand from the mould deflection plug into the mould which produces a “Metallurgically Cleaner Weld.”
“WARNING” The PLK-CJ Weld is designed for use with a “One Shot”
CJ Crucible. Type CJ2-F1, Part Number: 83450113.
PLK CJ PRODUCT INSTRUCTION PI002 REV3 270807 4

Railtech Australia Limited Type PLK
CJ - One Shot Crucible Welding Instructions
NEVER attempt to use a standard crucible with a weld kit carrying the
marking “CJ”. The above may result in serious injury or
damage to property and can result in defective welds.
A. ADJUSTMENT OF THE RAILS
(Please note that any Rail Authority specifications for alignment should be adhered to as directed)
The gap between the rail ends must be 25.0mm +/−2.0mm. If it is necessary to recut the rail ends, the cut should be performed with a mechanical rail saw or an alternative gas cutting method. In the case of long welded rails, this process must be performed at the releasing temperature. B. RAIL ALIGNMENT 1. Visual alignment at a distance of 4 to 5
metres from the rail joint. 2. Lifting the rail ends to set the joint is
required to eliminate dipped welds during the cooling process of a weld. The process depends on the type of rail and track condition. The adjustment is checked with a steel straight-edge of 1.0 metre placed half on each rail so as to have the same clearance on each side between the straight-edge and the rail head. The clearance must be 1.5 to 2.0mm. To carry out this adjustment, the sleeper fastenings are removed 2 or 3 sleepers on each side of the joint, it may also be necessary to remove the sleeper pads and to slew the sleepers to allow enough space to insert the mould. In curves, due to the flexibility of the rails, the alignment is also achieved over a length of one metre by means of tie rods adjusted on the foot of the opposite rail.
PLK CJ PRODUCT INSTRUCTION PI002 REV3 270807 5
Railtech Australia Limited Type PLK
CJ - One Shot Crucible Welding Instructions
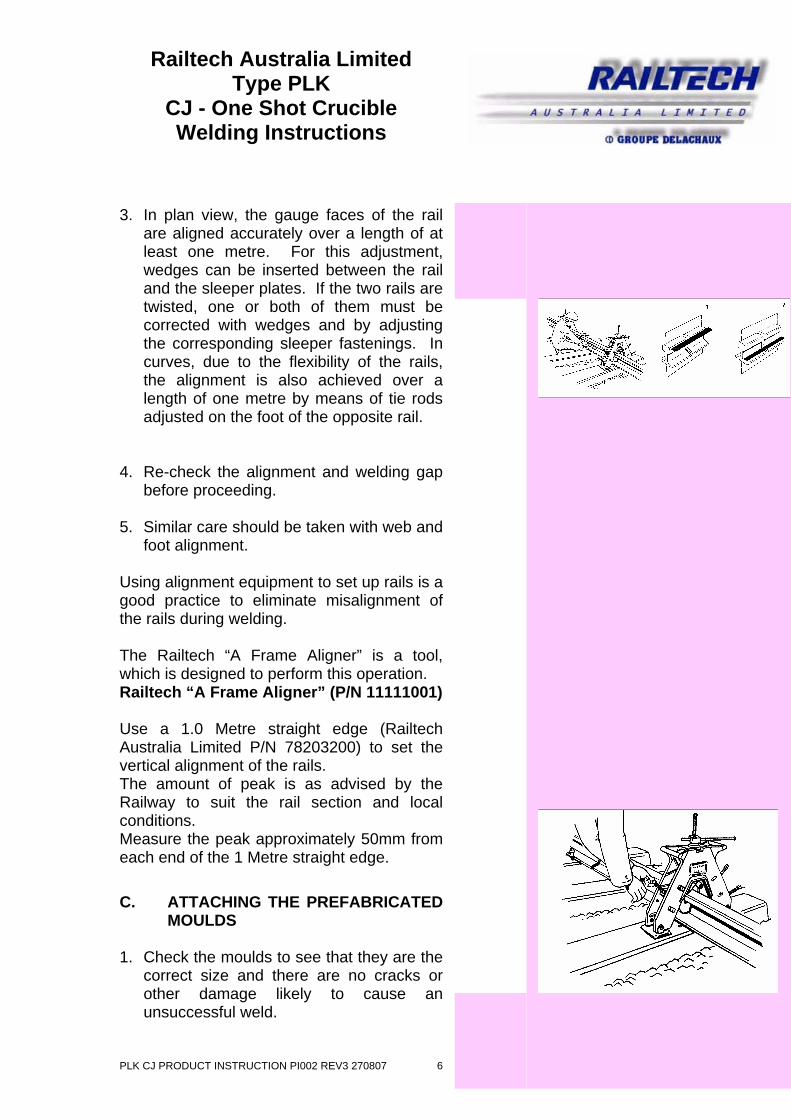
3. In plan view, the gauge faces of the rail
are aligned accurately over a length of at least one metre. For this adjustment, wedges can be inserted between the rail and the sleeper plates. If the two rails are twisted, one or both of them must be corrected with wedges and by adjusting the corresponding sleeper fastenings. In curves, due to the flexibility of the rails, the alignment is also achieved over a length of one metre by means of tie rods adjusted on the foot of the opposite rail.
4. Re-check the alignment and welding gap
before proceeding. 5. Similar care should be taken with web and
foot alignment. Using alignment equipment to set up rails is a good practice to eliminate misalignment of the rails during welding. The Railtech “A Frame Aligner” is a tool, which is designed to perform this operation. Railtech “A Frame Aligner” (P/N 11111001) Use a 1.0 Metre straight edge (Railtech Australia Limited P/N 78203200) to set the vertical alignment of the rails. The amount of peak is as advised by the Railway to suit the rail section and local conditions. Measure the peak approximately 50mm from each end of the 1 Metre straight edge. C. ATTACHING THE PREFABRICATED
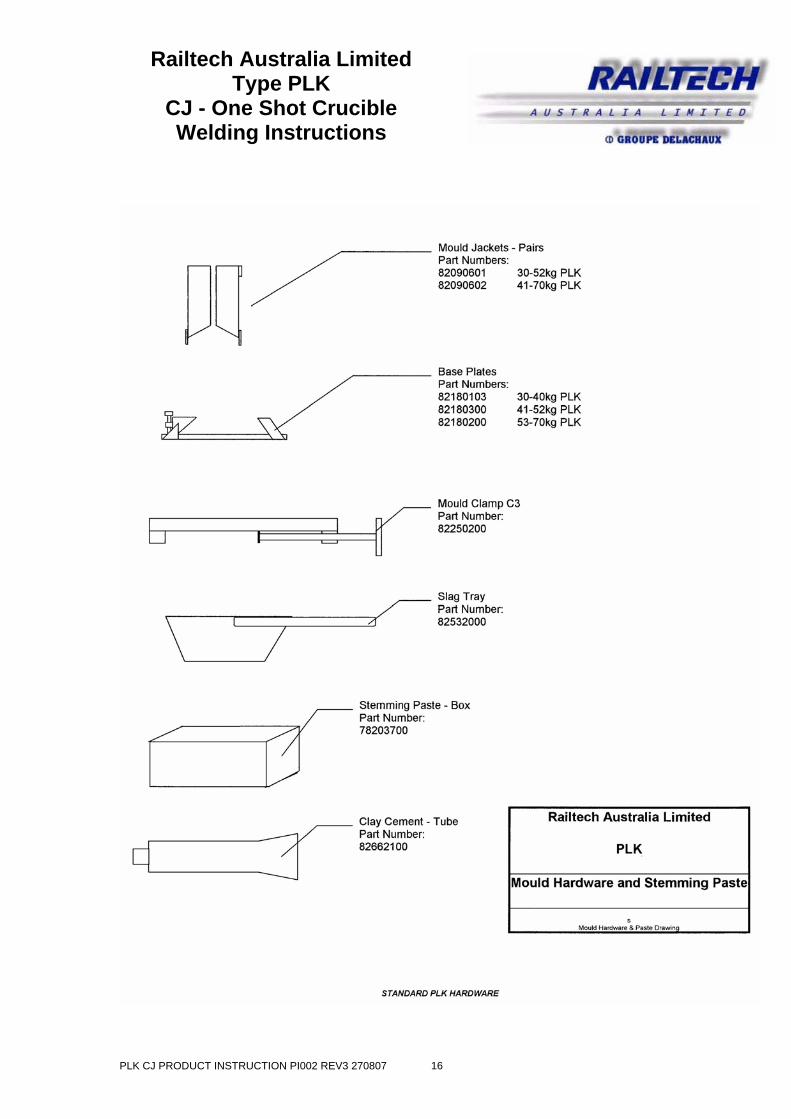
MOULDS 1. Check the moulds to see that they are the
correct size and there are no cracks or other damage likely to cause an unsuccessful weld.
PLK CJ PRODUCT INSTRUCTION PI002 REV3 270807 6
Railtech Australia Limited Type PLK
CJ - One Shot Crucible Welding Instructions
2. Before assembling, the moulds are to be
fitted to the rail shape by rubbing along the rail.
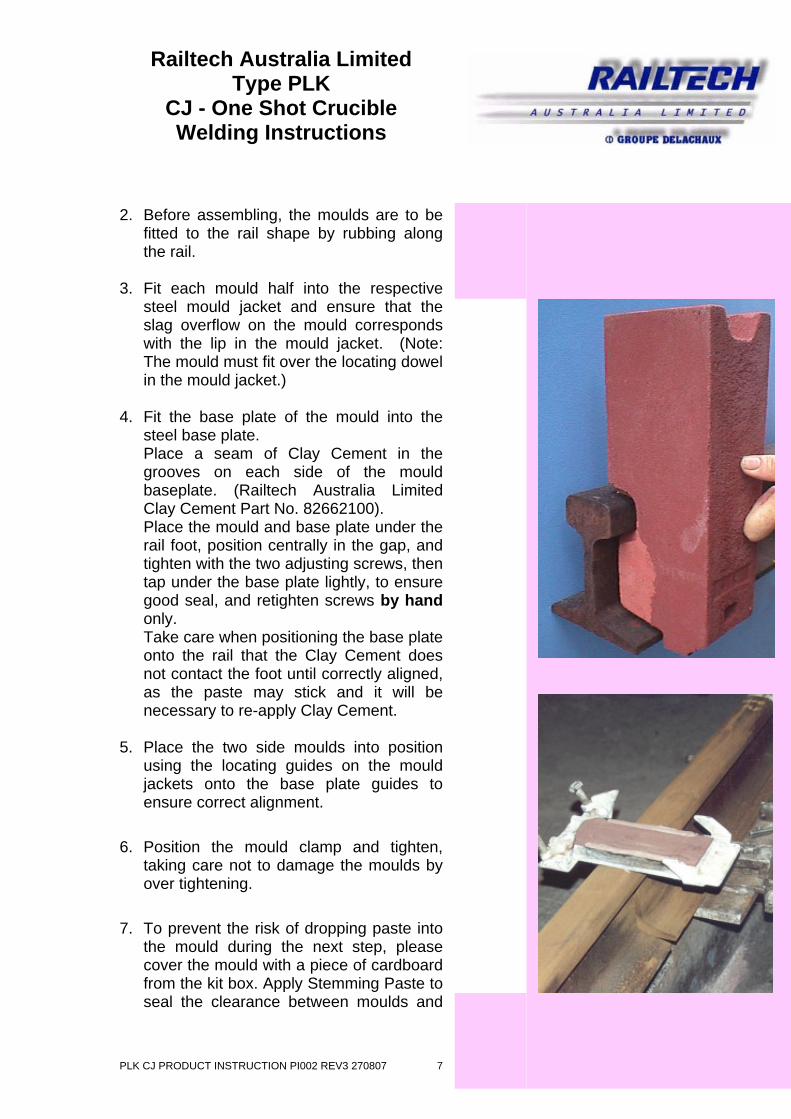
3. Fit each mould half into the respective
steel mould jacket and ensure that the slag overflow on the mould corresponds with the lip in the mould jacket. (Note: The mould must fit over the locating dowel in the mould jacket.)
4. Fit the base plate of the mould into the
steel base plate. Place a seam of Clay Cement in the grooves on each side of the mould baseplate. (Railtech Australia Limited Clay Cement Part No. 82662100). Place the mould and base plate under the rail foot, position centrally in the gap, and tighten with the two adjusting screws, then tap under the base plate lightly, to ensure good seal, and retighten screws by hand only. Take care when positioning the base plate onto the rail that the Clay Cement does not contact the foot until correctly aligned, as the paste may stick and it will be necessary to re-apply Clay Cement.
5. Place the two side moulds into position using the locating guides on the mould jackets onto the base plate guides to ensure correct alignment.
6. Position the mould clamp and tighten,
taking care not to damage the moulds by over tightening.
7. To prevent the risk of dropping paste into
the mould during the next step, please cover the mould with a piece of cardboard from the kit box. Apply Stemming Paste to seal the clearance between moulds and
PLK CJ PRODUCT INSTRUCTION PI002 REV3 270807 7
Railtech Australia Limited Type PLK
CJ - One Shot Crucible Welding Instructions
rail. Pack it firmly into the space between the flat part of the steel jackets and the rail, pressing it with the fingertips to force it into the clearance. Make a 'smoothing' movement to ensure a perfect adherence of the paste. Apply Stemming Paste to the pouring lip on the mould cover. (Railtech Australia Limited Stemming Paste Part No. 78203700).
8. It is a good idea to apply Stemming Paste
to the thread on the mould clamp, to ensure that any spillage of slag or metal will not damage the thread.
9. Place the slag basin with a quantity of dry
sand covering the bottom of it in position on the mould clamp; be careful that it is placed under the slag pouring lip.
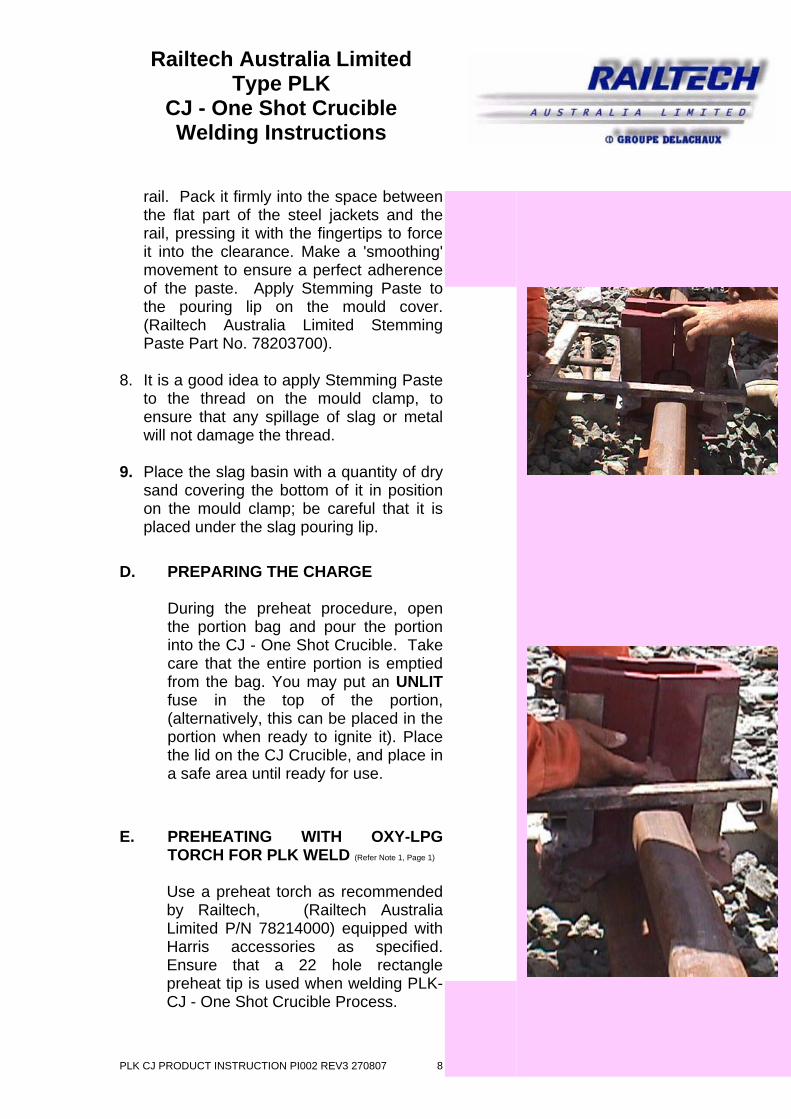
D. PREPARING THE CHARGE
During the preheat procedure, open the portion bag and pour the portion into the CJ - One Shot Crucible. Take care that the entire portion is emptied from the bag. You may put an UNLIT fuse in the top of the portion, (alternatively, this can be placed in the portion when ready to ignite it). Place the lid on the CJ Crucible, and place in a safe area until ready for use.
E. PREHEATING WITH OXY-LPG
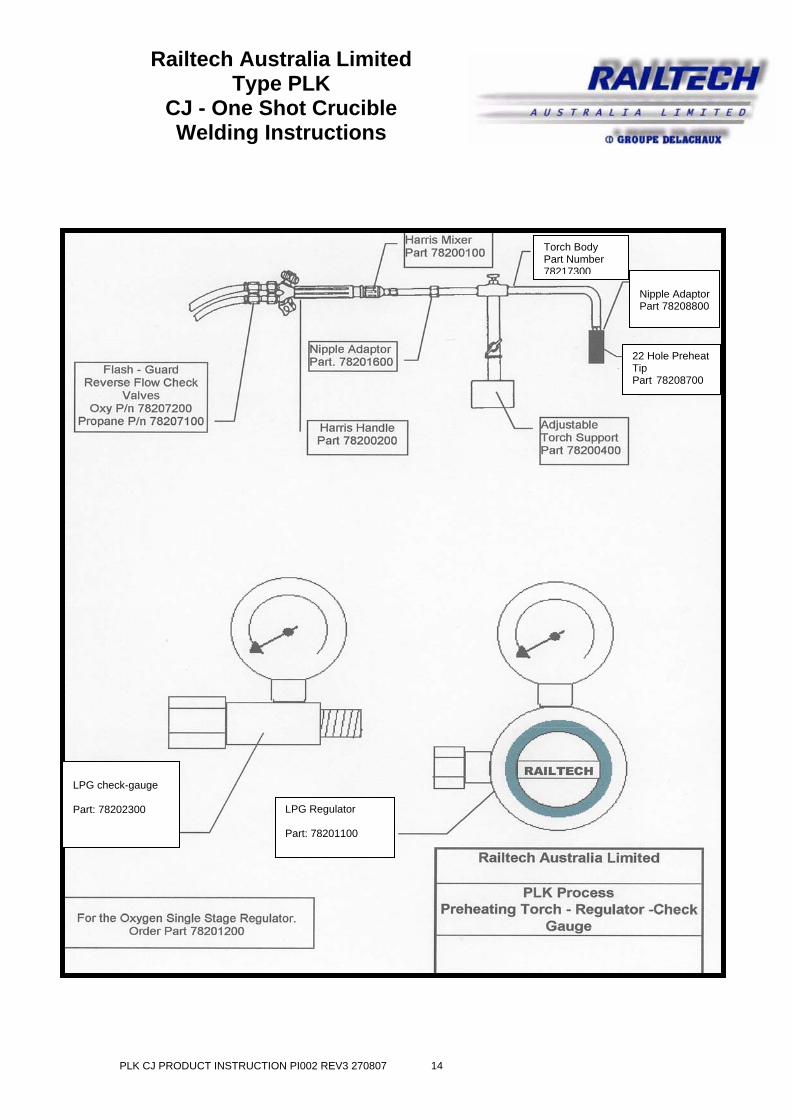
TORCH FOR PLK WELD (Refer Note 1, Page 1) Use a preheat torch as recommended
by Railtech, (Railtech Australia Limited P/N 78214000) equipped with Harris accessories as specified. Ensure that a 22 hole rectangle preheat tip is used when welding PLK-CJ - One Shot Crucible Process.
PLK CJ PRODUCT INSTRUCTION PI002 REV3 270807 8
Railtech Australia Limited Type PLK
CJ - One Shot Crucible Welding Instructions
IT IS NECESSARY TO USE A RAILTECH/HARRIS LPG REGULATOR FITTED WITH AN ACCURATE GAUGE FOR MEASURING GAS PRESSURE. (RAILTECH AUSTRALIA LIMITED P/N: 78201100 IS THE ONLY APPROVED REGULATOR FOR WELDING PLK PROCESS.(Refer Note 1, Page 17)
USE HARRIS OXYGEN REGULATOR (RAILTECH AUSTRALIA LIMITED P/N 78201200) OR ANY SUITABLE OXYGEN REGULATOR. WORKING PRESSURE AT TORCH • Oxygen:
3.0 Bar - 300 KPa.
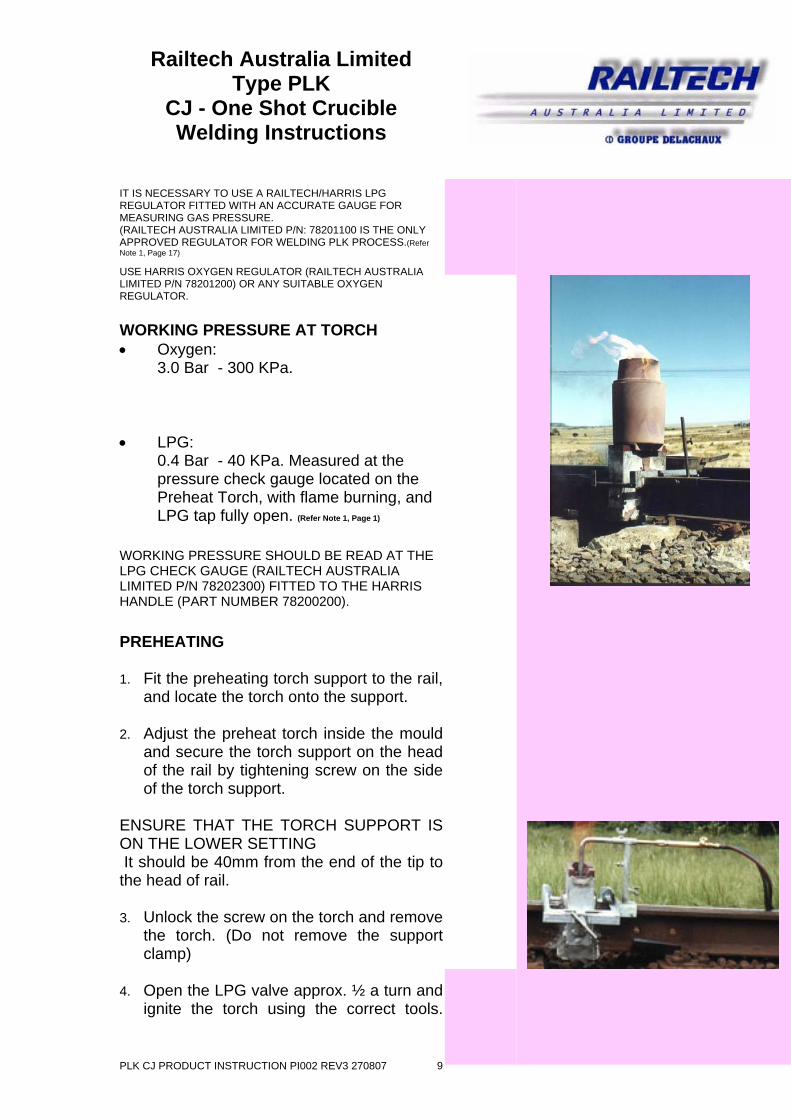
• LPG: 0.4 Bar - 40 KPa. Measured at the pressure check gauge located on the Preheat Torch, with flame burning, and LPG tap fully open. (Refer Note 1, Page 1)
WORKING PRESSURE SHOULD BE READ AT THE LPG CHECK GAUGE (RAILTECH AUSTRALIA LIMITED P/N 78202300) FITTED TO THE HARRIS HANDLE (PART NUMBER 78200200).
PREHEATING 1. Fit the preheating torch support to the rail,
and locate the torch onto the support. 2. Adjust the preheat torch inside the mould
and secure the torch support on the head of the rail by tightening screw on the side of the torch support.
ENSURE THAT THE TORCH SUPPORT IS ON THE LOWER SETTING It should be 40mm from the end of the tip to the head of rail. 3. Unlock the screw on the torch and remove
the torch. (Do not remove the support clamp)
4. Open the LPG valve approx. ½ a turn and
ignite the torch using the correct tools.
PLK CJ PRODUCT INSTRUCTION PI002 REV3 270807 9
Railtech Australia Limited Type PLK
CJ - One Shot Crucible Welding Instructions
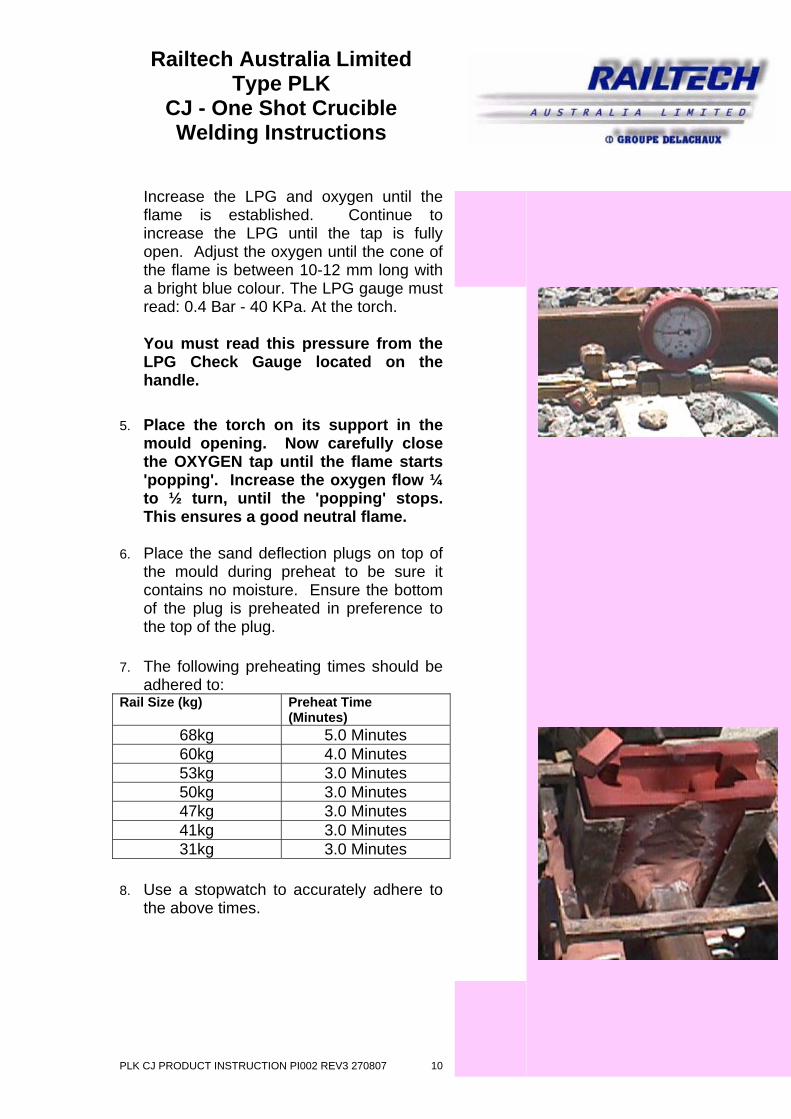
Increase the LPG and oxygen until the flame is established. Continue to increase the LPG until the tap is fully open. Adjust the oxygen until the cone of the flame is between 10-12 mm long with a bright blue colour. The LPG gauge must read: 0.4 Bar - 40 KPa. At the torch.
You must read this pressure from the LPG Check Gauge located on the handle.
5. Place the torch on its support in the
mould opening. Now carefully close the OXYGEN tap until the flame starts 'popping'. Increase the oxygen flow ¼ to ½ turn, until the 'popping' stops. This ensures a good neutral flame.
6. Place the sand deflection plugs on top of
the mould during preheat to be sure it contains no moisture. Ensure the bottom of the plug is preheated in preference to the top of the plug.
7. The following preheating times should be
adhered to: Rail Size (kg) Preheat Time
(Minutes) 68kg 5.0 Minutes 60kg 4.0 Minutes 53kg 3.0 Minutes 50kg 3.0 Minutes 47kg 3.0 Minutes 41kg 3.0 Minutes 31kg 3.0 Minutes
8. Use a stopwatch to accurately adhere to
the above times.
PLK CJ PRODUCT INSTRUCTION PI002 REV3 270807 10

Railtech Australia Limited Type PLK
CJ - One Shot Crucible Welding Instructions
SAFETY PRECAUTIONS GAS Before fitting gauges to gas bottles, open the tap on the bottle slightly to clean. Bottles should be located well clear of the work area. HOSES Use only 10 mm I.D. Hoses. Inspect hoses regularly for damage and note the following: • LPG hose is ORANGE • Oxygen hose is BLACK. HEATING TORCH To light the torch, Open the LPG1) valve slightly and light torch using the correct tool. (Do NOT use a cigarette lighter as injury can occur)
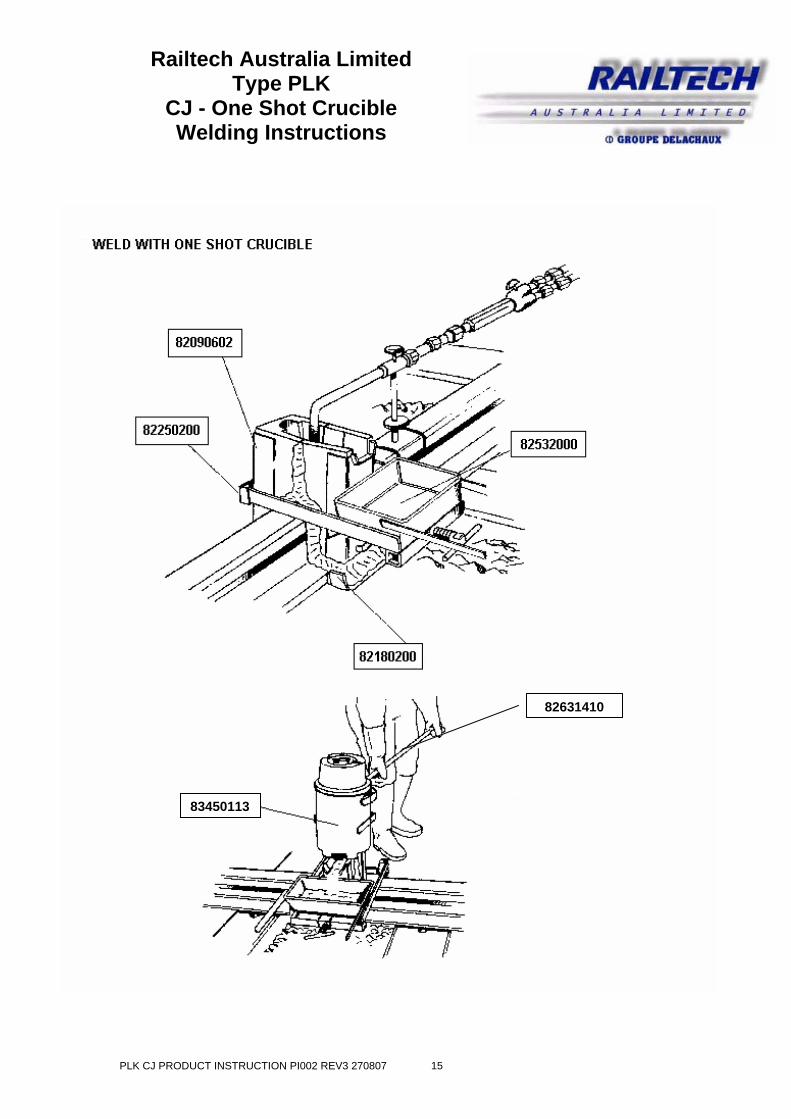
F. REACTIONS AND POURING 1. When preheating is complete, remove the
heating torch and place the mould deflector plug in the mould using tongs and gently push firmly into position.
2. Place the CJ Crucible on top of the mould
and align it. 3. Place the ignition match into the portion (if
not done at time of putting portion in crucible) and light it using the preheat torch.
4. Place the lid on the crucible. 5. The reaction will now take place. 6. There is a delay of between 15 and 25
seconds before the automatic thimble releases the molten metal.
PLK CJ PRODUCT INSTRUCTION PI002 REV3 270807 11
Railtech Australia Limited Type PLK
CJ - One Shot Crucible Welding Instructions
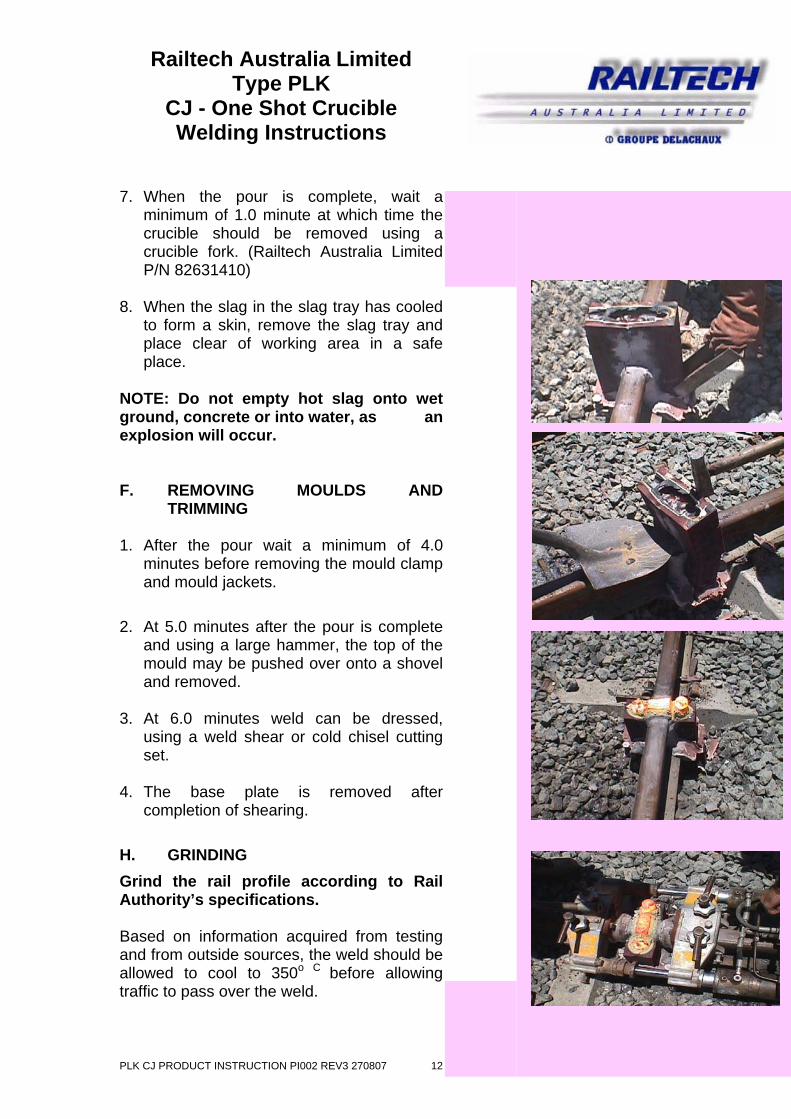
7. When the pour is complete, wait a minimum of 1.0 minute at which time the crucible should be removed using a crucible fork. (Railtech Australia Limited P/N 82631410)
8. When the slag in the slag tray has cooled
to form a skin, remove the slag tray and place clear of working area in a safe place.
NOTE: Do not empty hot slag onto wet ground, concrete or into water, as an explosion will occur. F. REMOVING MOULDS AND
TRIMMING 1. After the pour wait a minimum of 4.0
minutes before removing the mould clamp and mould jackets.
2. At 5.0 minutes after the pour is complete
and using a large hammer, the top of the mould may be pushed over onto a shovel and removed.
3. At 6.0 minutes weld can be dressed,
using a weld shear or cold chisel cutting set.
4. The base plate is removed after
completion of shearing. H. GRINDING Grind the rail profile according to Rail Authority’s specifications. Based on information acquired from testing and from outside sources, the weld should be allowed to cool to 350o C before allowing traffic to pass over the weld.
PLK CJ PRODUCT INSTRUCTION PI002 REV3 270807 12
Railtech Australia Limited Type PLK
CJ - One Shot Crucible Welding Instructions
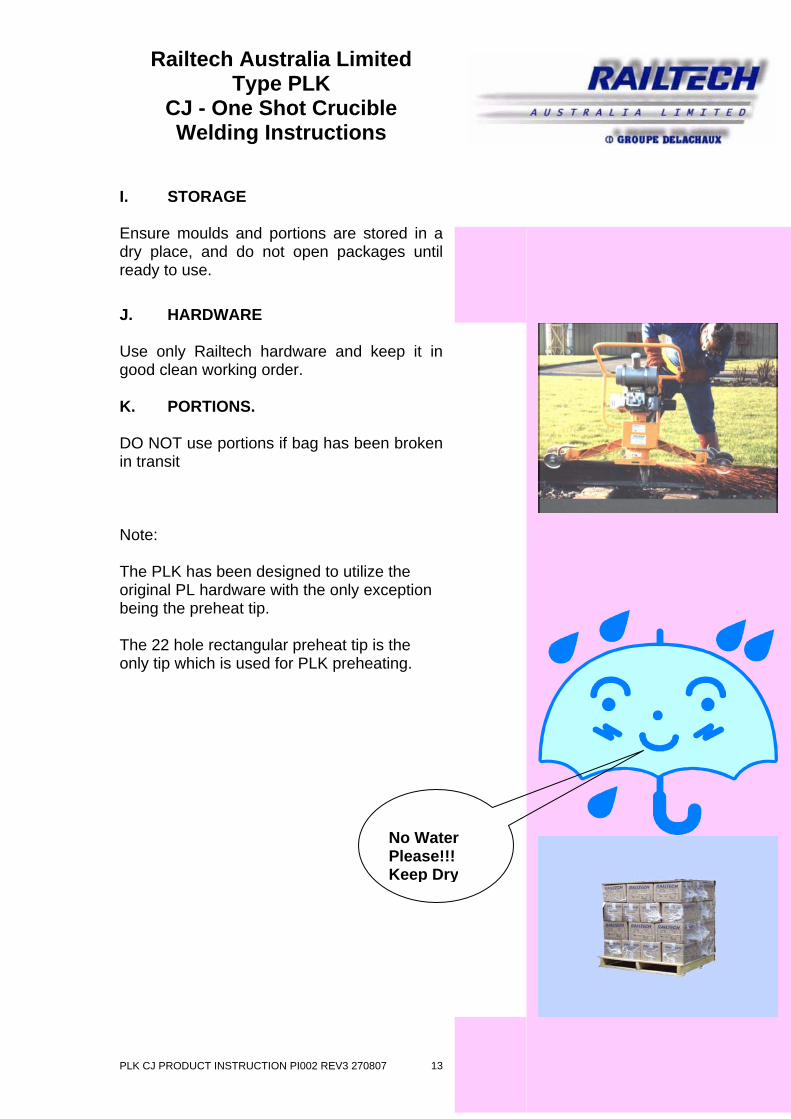
I. STORAGE Ensure moulds and portions are stored in a dry place, and do not open packages until ready to use. J. HARDWARE Use only Railtech hardware and keep it in good clean working order. K. PORTIONS. DO NOT use portions if bag has been broken in transit Note: The PLK has been designed to utilize the original PL hardware with the only exception being the preheat tip. The 22 hole rectangular preheat tip is the only tip which is used for PLK preheating.
PLK CJ PRODUCT INSTRUCTION PI002 REV3 270807 13
No Water Please!!! Keep Dry
Railtech Australia Limited Type PLK
CJ - One Shot Crucible Welding Instructions
LPG Regulator Part: 78201100
LPG check-gauge Part: 78202300
22 Hole Preheat Tip Part 78208700
Torch Body Part Number 78217300
Nipple Adaptor Part 78208800
PLK CJ PRODUCT INSTRUCTION PI002 REV3 270807 14
Railtech Australia Limited Type PLK
CJ - One Shot Crucible Welding Instructions
82631410
83450113
PLK CJ PRODUCT INSTRUCTION PI002 REV3 270807 15
Railtech Australia Limited Type PLK
CJ - One Shot Crucible Welding Instructions
PLK CJ PRODUCT INSTRUCTION PI002 REV3 270807 16
Railtech Australia Limited Type PLK
CJ - One Shot Crucible Welding Instructions
PLK CJ PRODUCT INSTRUCTION PI002 REV3 270807 17
NOTE 1: LPG

![qui n’ont pas été sélectionnés pour la 6 édition mais que ... · Date de sortie du tome : novembre 2016 One shot [18/09/2017] Résumé: Oiginaie du Kansas en Améiue, Doothée](https://img.pdfslide.fr/doc/110x75/5f01f2cf7e708231d401d394/qui-naont-pas-t-slectionns-pour-la-6-dition-mais-que-date-de-sortie.jpg)
![Learning to Select Base Classes for Few-shot Classification · 1. Introduction Few-shot Learning [6,13] is a branch of Transfer Learn-ing, its basic setting is to train a base model](https://img.pdfslide.fr/doc/110x75/5fcdb6102be62d779c570a33/learning-to-select-base-classes-for-few-shot-classiication-1-introduction-few-shot.jpg)